Quantcast
Channel: Terence Luk
Viewing all 836 articles
Browse latest View live

Digitally signing Adobe Acrobat PDF documents with Microsoft Certificate Authority Certificates

$
0
0

I’ve recently been asked by a client whether there was a way to digitally sign documents with digital signatures that cannot be modified and therefore proves that a signed document is signed by an individual.  In addition to this, they would also like to allow more signatures to be added to it because the document is essentially an invoice that requires 2 signatures of approval and a signature from a person in accounting to verify that it has been entered into the account system.

The client already uses Adobe Acrobat Professional for creating PDF documents and they noticed signature features from within the GUI but wasn’t sure how to use it so they asked me to look into it.  I’m in no way an Adobe Acrobat expert (definitely not my forte) as I don’t use it so I did a bit of research on the internet but while it looks like it can be done, there isn’t a clear document from Adobe that demonstrates how to do it. Furthermore, Adobe appears to promote the EchoSign service which the client didn’t want to use as they didn’t want any additional cost.

Knowing that Adobe Acrobat allows certificate signing, I took a bit of time sitting down at a workstation with Adobe Acrobat Professional to play around with the settings and figured out a way to do it with Microsoft Certificate Authority issued certificates.  My guess is that a lot of others would probably need a quick and cheap solution as this so I thought I’d blog the process.

Step #1 – Create a new Certificate Template for Digital Signatures

Begin by launching the Active Directory Certificate Services console and opening up the templates section, right click on the Code Signing template and select Duplicate Template:

image

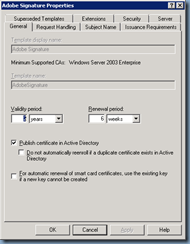
In the General tab, give the Template display name and Template name a meaningful name (I called it Adobe Signature), adjust the Validity period to more than 1 year if desired and check the Publish certificate in Active Directory checkbox:

clip_image001

Navigate to the Request Handling tab and change the Purpose field to Signature and encryption, check the Allow private key to be exported checkbox:

clip_image001[4]

Navigate to the Subject Name tab and if desired, you can change the option to Supply in the request if you want to allow the enroller (the user requesting a certificate signature) to fill out the fields for the certificate or leave it as the default Build from this Active Directory information with Subject name format as Fully distinguished name and User principal name (UPN) checkbox checked.  I actually prefer to leave the setting as the default Build from this Active Directory information because the issued certificates will always be consistent with what fields are filled out and it’s also easier for the enroller to request the certificate:

clip_image001[6]

Navigate to the Security tab, select Authenticated Users and check the Allow – Enroll checkbox:

image

Step #2 – Publish the new Certificate Template

With the new certificate created, navigate to the Certificate Template node in the Certificate Authority console, right click, select New and click on Certificate Template to Issue:

image 

Notice that the new Adobe Signature template is listed:

image

Step #3 – Request a new certificate for the user

With the new certificate template created and published, go to the workstation of a user who needs a digital certificate for signing Adobe Acrobat PDFs, open the MMC and add the Current User store for Certificates.  From within the Certificates – Current User console, navigate to Personal –> Certificates, right click in the right empty window, select All Tasks –> Request New Certificate..:

clip_image001[8]

Proceed through the wizard:

clip_image001[10]clip_image001[12]

Select Adobe Signature as the certificate:

clip_image001[14]

Complete the enrollment:

clip_image001[16]

You should now have a signature issued by the Active Directory integrated Microsoft Certificate Authority:

image

Step #4 – Import Microsoft Certificate Authority Root Certificate into Adobe Acrobat Professional Trusted CAs

What I noticed with Adobe Acrobat Professional is that it does not appear to use the local workstation’s trusted store for Certificate Authorities. This means that even if a certificate is issued by a Microsoft Active Directory integrated Root CA and it is listed in the Trusted Root Certification Authorities, Adobe would not automatically trust it.  So prior to starting to use the certificate enrolled via step 3, we will need to go to every desktop that will be involved with this signing process to manually import the CA. I wished there was an easier way to do this and maybe there is but a brief Google did not reveal a GPO adm available for me to import CAs into Adobe Acrobat Professional (I will update this post if I figure out a way).

Navigate to the Trusted Root Certification Authorities folder in the MMC and right click on the root CA certificate in the store then choose All Tasks –> Export…:

image

Proceed through the wizard to export the root CA’s certificate:

clip_image001[18]

clip_image001[20]

clip_image001[22]

clip_image001[24]

clip_image001[26]

Open Adobe Acrobat Professional:

clip_image001[28]

Click on the Edit tab and select Preferences…:

clip_image001[30]

Navigate to the Signatures category and click on the More button beside Identities & Trusted Certificates:

clip_image001[32]

Select Trusted Certificates on the left windows and click on Import:

clip_image001[34]

Click on the Browse button:

clip_image001[36]

Select the exported root CA certificate:

clip_image001[38]

Click on the Import button:

image

A confirmation window will be displayed indicating the certificate has been imported:

clip_image001[40]

Notice that the certificate is now imported.  Before you proceed, select the certificate and click on Certificate Details:

image

Check the Use this certificate as a trusted root checkbox.  Make sure this step is completed or even though the certificate is imported, Adobe will not trusted it and will display the signatures as signed by an unknown source:

image 

Step #5 – Signing PDFs with certificate signatures

From there, there are 2 options to allow users to sign PDF documents:

  1. Have them select a certificate already in their local desktop’s Certificate store
  2. Have them sign it with a PFX file (an exported certificate in a flat file)

#1 is convenient in the sense that they just select the certificate during signing and a password is not required.  This would be good for users who don’t roam around desktops.

#2 is good for users who may be signing documents from different workstations and the flat file PFX would be easy for them to move around or access via a network share.  Note that the PFX is password protected.

I will demonstrate what both look like:

Have them select a certificate already in their local desktop’s Certificate store:

To have them sign a PDF with a certificate in their local desktop’s store requires no further action.  All they need to do is open up a document in Adobe Acrobat Pro:

clip_image001[42]

Click on the Sign button on the top right corner then select Place Signature:

clip_image001[44]

Click on the Drag New Signature Rectangle button:

clip_image001[46]

Use the lasso to lasso an area where the signature is supposed to be:

clip_image001[48]

Assuming there’s just 1 certificate available, the user’s certificate should already be selected in the Sign As field but if not, select it then click on the Sign button:

image

Save the document:

clip_image001[52]

Note the signature and the Signed and all signatures are valid. note at the top:

image

Clicking on the Signature Panel button will show the signatures applied to the document:

image

Right clicking on the signature will allow you to review the signature properties by clicking on Validate Signature:

image

Note that if Clear Signature is selected, the signature will be marked as cleared but the line item will not be deleted because this allows a full history of what’s been done with the signatures.

image

image

Have them sign it with a PFX file (an exported certificate in a flat file):

To sign with a PFX, we will need to export the issued certificate first similar to the way we did with the root CA certificate.  Navigate to the Personal –> Certificates folder in the MMC and right click on the issued certificate in the store then choose All Tasks –> Export…:

image

Proceed through the wizard to export the certificate:

clip_image001[54]

Ensure the Yes, export the private key is selected:

clip_image001[56]

clip_image001[58]

Enter a password:

clip_image001[60]

Select a path:

clip_image001[62]

clip_image001[64]

With the certificate exported as PFX, proceed by signing PDF documents by opening up a document in Adobe Acrobat Pro:

clip_image001[66]

Click on the Drag New Signature Rectangle button:

clip_image001[68]

Use the lasso to lasso an area where the signature is supposed to be:

clip_image001[70]

In the Sign As drop down menu, select New ID…:

image

Select My existing digital ID from: and A file:

clip_image001[72]

Browse to the exported PFX file, enter the password:

clip_image001[74]

Review the properties of the certificate and click Finish:

image

Proceed by clicking the Sign button:

image

Save the document:

clip_image001[76]

Note the signature and the Signed and all signatures are valid. note at the top:

image

Clicking on the Signature Panel button will show the signatures applied to the document:

image

From here, you can continue to apply other user’s signatures to it as shown here:

image

Note the second signature that’s listed as Rev. 2:

image

This may seem like a simple task to Adobe Acrobat Pro experts but for someone like me who don’t use the application, finding information on how signature works took a bit of time so I hope this helps anyone out there who may find themselves in the same situation as I did.

Which Citrix Receiver do I use when configuring Pass-through authentication?

$
0
0

It appears a few things have changed since the last time I configured pass-through authentication for Citrix Web Interface 5.4 clients and one of the items that confuses me quite a bit is the Citrix Receiver.  As some administrators may know, Citrix now has a http://receiver.citrix.com/ URL that automatically detects what operating system you are using when you launch the page whether you’re using a Mac or PC:

image

The problem with some Citrix engineers such as myself is that this leads me to a download of an executable named CitrixReceiverWeb.exe file:

image

Those who have deployed Citrix in the past would remember that there used to be a few different versions of Citrix Receivers and the one you typically download off of a website without a login is the Online plugin which does not have the SSON component required for pass-through authentication.  The receiver administrators who have dealt with the product in the past would remember that bundles the SSON component is the Citrix Receiver Enterprise package that usually requires a login to download.  To add to the confusion, Citrix has started labeling their Citrix Receiver as version 3.x and 4.x even though they’re really version 13.x.x.x and 14.x.x.x.  My guess is that they decided to do that when they went with the Receiver name rather than Plug-in.

While navigating around the Citrix web site and comparing the receivers available, I noticed that the CitrixReceiverWeb.exe package that is offered through the http://receiver.citrix.com/ URL appears to be exactly the same size as the one receiver that you can select by navigating to the Windows download section:

clip_image001

clip_image001[4]

Although the two receivers are named differently:

  1. CitrixReceiver.exe
  2. CitrixReceiverWeb.exe

… both have the same size of 52,327KB:

clip_image001[6]

So to verify the package contents, I went ahead and extracted the package with the /extract [Destination_name] switch to compare the contents and noticed that they are exactly the same:

clip_image001[8]

**Note the SSONWrapper.msi package in the screenshot above.

From here, I did a test by attempting to install the CitrixReceiverWeb.exe package with the /includeSSON switch:

CitrixReceiverWeb.exe /includeSSON

clip_image001[12]

Ran the install:

clip_image001[14]

clip_image001[16]

clip_image001[18]

Then confirmed that I saw the ssonsvr.exe *32 service after restarting my desktop:

clip_image001[20]

Reviewing the version in Programs and Features show the receiver as 14.0.1.4:

clip_image001[22]

I then went ahead and uninstalled the receiver and did the same for the CitrixReceiver.exe package downloaded here:

clip_image001[24]

… and verfied that the version was the same and that the label of the receiver was the same:

image

This may not make a lot of sense for administrators new to Citrix but basically what I wanted to confirm was that the web package did not have a different label such as Citrix Receiver Web or Online Plugin.

I went on and proceeded to use the CitrixReceiverWeb.exe SSON install to confirm that pass-through authentication worked and it did.

This test sure clarified the new receiver for me and I hope it does the same for others.

Deploying Microsoft Lync 2013 audio and video within a Citrix XenDesktop 5.6 VDI

$
0
0

One of the challenges I’ve had over the past 2 years working with either VMware View or Citrix XenDesktop was to provide an acceptable audio and video experience to users who work within a virtual desktop environment.  I still remember how terrified I was with the audio quality the first time I plugged in a USB headset into a thin client and trying to do a WebEx call with VMware View a year ago and the solution all throughout the web was to use analog mini stereo jack headsets and the popular Teradici driver to send audio in and out to the virtual desktop.  While this solution provided acceptable quality for the user, it wasn’t practical for most environments I worked in as this was not an option for thin clients from HP loaded with their ThinPro OS (has anyone gotten audio out to work with these via analog jacks?) or laptops that don’t come with analog input jacks.

Those who have known me over the past 5 years of my career would know that I’ve also been fortunate enough to get to work with Lync2010 / 2013 and the previous OCS 2007 version deploying the solution as a PBX and I knew there was going to be a day when I’d have to tell a client that I don’t really have a solution for every device they may have to use Lync in a VDI.  Fast forward to today and I’m finally glad that Microsoft has taken the steps to solve the issue by introducing the ability for administrators to configure Lync to use media devices local to the thin or fat client on a remote VDI session but instead of sending traffic to the VDI and back out, it would allow the local client to send traffic directly to the Lync Server and/or another peer using Lync to provide local like user experience.  The solution is quite simple when you look at it at a high level – simply install a strip down version of the Lync client onto the thin or fat client and use that as the engine to drive audio and video to and out from the user.  I must say that I’d wish setting this up was a bit easier but for the audio and video quality I’ve seen, I’m not going to complain.

My first shot at setting this up was with a client who was setting up a new London office with a 50Mb pipe to the Bermuda office.  I was in Bermuda and he was in a London office trying to get Lync calls to work.  This client is extremely technical so I would have to thank him for working with me to get this solution going.  The rough notes and blog post I wrote of the process can be found here:

Fixing the “We didn’t find an audio device, which you need for calling” issue with Lync 2013 client in a Citrix XenDesktop 5.6 Virtual Desktop
http://terenceluk.blogspot.com/2013_09_01_archive.html

The contents of the setup in the blog post above was done over a weekend and I made it a priority to slowly walk through the steps myself this week with a HP t610 thin client so I could document the procedure.

First off, if nothing is set up within the XenDesktop environment and your thin client is just taken out of the box, you will see the following message when you attempt to setup your audio:

We didn’t find an audio device, which you need for calling

If you have one already, try checking Windows Device Manager to make sure it’s installed and working.

clip_image001

The video device appears to work as expected:

clip_image001[4]

Environment Information

Before I begin, I would like to highlight a few important components of the setup:

XenDesktop Version: 5.6

VDI Client: HP t610 with Windows 7 embedded

clip_image001[6]clip_image001[8]clip_image001[14]

Lync Version: Lync Server 2013 with September 2013 updates

Lync Client: Lync 2013 with September 2013 updates

VDI Operating System: Windows 7 Enterprise with SP1 and latest hotfixes

Step #1 - Update Citrix Receiver on the HP t610 thin client to version 4.0

Begin by checking the existing version # of the Citrix Receiver installed onto the thin client:

Citrix Receiver Version: 3.1.0.64091

clip_image001[10]

Version 13.1.0.89

clip_image001[12]

Note the confusing version numbers shown for the About section in the Citrix Receiver vs the Programs and Features.  The receiver we have on this HP t610 thin client is basically version 3.x so we’ll need to upgrade it to version 4.0.

Proceed by going to http://receiver.citrix.com to download the latest receiver:

clip_image001[16]clip_image001[18]

clip_image001[20]

If you need pass-through authentication to work then install the Citrix Receiver as such:

CitrixReceiverWeb.exe /includeSSON

clip_image001[22]

clip_image001[24]clip_image001[26]

… then verify that the ssonsvr.exe *32 service is started after a reboot:

clip_image001[28]

Verify that the receiver version now indicates a version that starts with 14.x.x.x:

14.0.1.4

clip_image001[30]

4.0.1.4

clip_image001[32]

Step #2 - Enable EnableMediaRedirection on Lync 2013 Server

The next step is to ensure that the Lync Client Policy of users who will be redirecting to local devices has EnableMediaRedirection enabled.  The environment for this demonstration has all the users using the Global policy so executing the Get-CsClientPolicy -identity Global cmdlet will show the following:

image

**Note in the above screenshot that EnableMediaRedirection is not enabled.

Proceed by using the following cmdlet to enable it:

Set-CsClientPolicy -identity Global -EnableMediaRedirection $true

clip_image001[34]

Executing the Get-CsClientPolicy -identity Global cmdlet will now show the following:

image

Step #3 - Install Microsoft Lync VDI Plug-in

Proceed to download the Microsoft Lync VDI 2013 plugin (either 32 or 64-bit depending on the OS on the device you are connecting to the VDI).  The HP t610 I am using is running Windows 7 embedded 32-bit so I will download the 32-bit client:

http://www.microsoft.com/en-us/download/details.aspx?id=35457

clip_image001[36]

The package you’ll receive is named lyncvdi.exe with a size of 223,651 KB:

clip_image001[38]

I didn’t have much luck just running the install on the HP t610 as the install will fail once the files are extracted:

clip_image001[40]

The installation of this package failed.

clip_image001[42]

Proceed by extracting the package with the command:

lyncvdi.exe /extract:c:\Lync

clip_image001[44]

clip_image001[46]

Then run the setup.exe executable to install the plugin:

clip_image001[48]

clip_image001[50]clip_image001[52]

clip_image001[54]clip_image001[56]

clip_image001[58]clip_image001[60]

Restart the thin client and you’ll notice that when you connect to your VDI, you will see a new small icon at the bottom right hand corner indicating:

Lync is trying to use your local audio and video devices when you hover the mouse over the icon or click on it:

clip_image001[62]clip_image001[64]

Checking out the Audio Device setup in the Lync client will still continue to read:

We didn’t find an audio device, which you need for calling

If you have one already, try checking Windows Device Manager to make sure it’s installed and working.

Learn More

clip_image001[66]

Step #4 – Configure the registry of the Lync VDI plug-in on the thin client with Lync Server information

The Microsoft Lync VDI Plug-in does not appear to know what Lync server you’ll be signing into (no surprise as you don’t sign into it) so the next step is to manually specify the Lync Server’s URLs by going to the following registry key and adding the following keys:

HKEY_CURRENT_USER\SOFTWARE\Microsoft\Office\15.0\Lync

"ConfigurationMode"=dword:00000001"<—DWORD (32-bit) Value

"ServerAddressInternal"="yourLyncServer.domain.local"<—String Value

"ServerAddressExternal"="yourExternalEdge.domain.com"<—String Value

image

What I would suggest is if your thin clients are going to be joined to the domain, use a GPO with Group Policy preferences to create these 3 registry keys on the thin clients.  If the thin clients are not joined to the domain then add the keys by manually logging in as the generic User account to enter them or putting in a batch file on startup to add it to the user’s account if you’re configuring local accounts for separate users.

Step #5 – Install RDP Updates on the thin client

While I’m not sure if this step is actually necessary for Citrix XenDesktop deployments, it probably wouldn’t hurt to make sure the following 2 updates are applied to the thin client:

http://support.microsoft.com/kb/2592687

clip_image001[1]clip_image001[3]

clip_image001[5]

Windows6.1-KB2592687-x86.msu

clip_image001[7]

http://support.microsoft.com/kb/2574819

clip_image001[9]clip_image001[11]

clip_image001[13]

Windows6.1-KB2574819-v2-x86.msu

clip_image001[15]

Step #6 – Update XenDesktop VDA agent on the VDI to version 7

With the thin client configuration out of the way, proceed with upgrading the XenDesktop VDA agent from 5.6 to version 7 via the XenDesktop 7 installation media. 

**Note that this will render your existing Desktop Director 2.x bundled with XenDesktop 5.6 to no longer be able to manage the desktop for pulling information or shadowing sessions and overcoming this issue isn’t a matter of installing the new Desktop Director from XenDesktop 7 because that does not work with 5.6 DDCs.

--------------------------------------------------------------------------------------------------------------------------------------------------------------------

With the above steps completed, proceed by ensure that your thin client and VDI has been restarted (or at the very least restart the Lync 2013 client in the VDI) then pay attention to the two small computer icons at the bottom right hand corner of the Lync 2013 client:

clip_image001[17]clip_image001[21]

Notice how the computer at the back fades into the background the lights up to white which is an indication that it is trying to connect to the audio and video devices you have connected to the thin client. In a few seconds it should pick up the devices and you will see a green checkmark:

clip_image001[23]

Clicking on it will show the following:

Lync is all set to use your local audio and video devices.

clip_image001[25]

Note that if you go back into the audio and video setup in Lync, you will notice the following message:

This audio functionality isn’t available when Lync is being used in a remote desktop

Audio device tuning is not supported when Lync is running in a remoted environment. To tune your audio device volume levels, please see guidance from your IT administrator.

clip_image001[27]

Video device tuning is not supported when Lync is running in a remoted environment. To tune your video device, please see guidance from your IT administrator.

clip_image001[29]

This just basically means if you want to tune your locally attach devices, you should tune it on the local thin client’s OS.

Hope this helps anyone looking for a walkthrough of how to set up the VDI plugin.  I’m sure as the plugin matures, the setup would be much easier to do.

Notes on how to configure an external NTP time source for a VMware ESXi 5.1 Active Directory PDC emulator domain controller

$
0
0

I’ve been asked several times over the past year with how to properly configure an Active Directory controller with the PDC Emulator FSMO role to sync with an external time source and not relying on the synchronization between the virtual machine’s VMware Tools and the ESXi host.  As most AD administrators would know, time is extremely important because of how Kerberos authentication works. I won’t get into the details of Kerberos and the TGT process but for people who are interested, see the following TechNet article:

Kerberos Explained
http://technet.microsoft.com/en-us/library/bb742516.aspx

The bottom line when looking at the importance of time in Active Directory is that the domain controllers will only tolerate a window of 5 minutes of time drift for a client authenticating with if the clock of the client that is authenticating is off than more of that, authentication would fail.  I’ve come across many virtual environments where authentication problems occur because time is not configured properly configured and I thought I’d just dump all of my notes in a blog post as I don’t always remember myself.

VMware outlines time management in the following KB:

Timekeeping best practices for Windows, including NTP (1318)
http://kb.vmware.com/selfservice/microsites/search.do?language=en_US&cmd=displayKC&externalId=1318

In the context of PDC emulators, there are essentially 2 methods:

  1. Synchronize it with the ESXi host’s clock via VMware Tools
  2. Synchronize your PDC emulator with an external time source on the internet

Both of these methods obviously have their advantages and drawbacks but for this blog post, I will put down my notes on how to perform option #2 which is to synchronize the PDC emulator with an external time source.

Begin by determing where the PDC emulator roles sites by using the netdom query fsmo command then log onto the server and run:

w32tm /query /configuration

You should see an output similar to the following:

C:\>w32tm /query /configuration
[Configuration]

EventLogFlags: 2 (Local)
AnnounceFlags: 10 (Local)
TimeJumpAuditOffset: 28800 (Local)
MinPollInterval: 6 (Local)
MaxPollInterval: 10 (Local)
MaxNegPhaseCorrection: 172800 (Local)
MaxPosPhaseCorrection: 172800 (Local)
MaxAllowedPhaseOffset: 300 (Local)

FrequencyCorrectRate: 4 (Local)
PollAdjustFactor: 5 (Local)
LargePhaseOffset: 50000000 (Local)
SpikeWatchPeriod: 900 (Local)
LocalClockDispersion: 10 (Local)
HoldPeriod: 5 (Local)
PhaseCorrectRate: 7 (Local)
UpdateInterval: 100 (Local)

[TimeProviders]

NtpClient (Local)
DllName: C:\Windows\system32\w32time.dll (Local)
Enabled: 1 (Local)
InputProvider: 1 (Local)
CrossSiteSyncFlags: 2 (Local)
AllowNonstandardModeCombinations: 1 (Local)
ResolvePeerBackoffMinutes: 15 (Local)
ResolvePeerBackoffMaxTimes: 7 (Local)
CompatibilityFlags: 2147483648 (Local)
EventLogFlags: 1 (Local)
LargeSampleSkew: 3 (Local)
SpecialPollInterval: 3600 (Local)
Type: NT5DS (Local)

NtpServer (Local)
DllName: C:\Windows\system32\w32time.dll (Local)
Enabled: 1 (Local)
InputProvider: 0 (Local)
AllowNonstandardModeCombinations: 1 (Local)

VMICTimeProvider (Local)
DllName: C:\Windows\System32\vmictimeprovider.dll (Local)
Enabled: 1 (Local)
InputProvider: 1 (Local)

C:\>

image

Notice the Type under TimeProviders is listed as: Type: NT5DS (Local)

To change the provider to an external time source such as the pooled NTP servers available from:

NTP Pool Project
http://www.pool.ntp.org

… execute the following:

w32tm /config /manualpeerlist:0.pool.ntp.org,1.pool.ntp.org,2.pool.ntp.org,3.pool.ntp.org /syncfromflags:manual /reliable:yes /update

image

Now when you execute:

w32tm /query /configuration

… you should now see the following:

C:\>w32tm /query /configuration
[Configuration]

EventLogFlags: 2 (Local)
AnnounceFlags: 5 (Local)
TimeJumpAuditOffset: 28800 (Local)
MinPollInterval: 6 (Local)
MaxPollInterval: 10 (Local)
MaxNegPhaseCorrection: 172800 (Local)
MaxPosPhaseCorrection: 172800 (Local)
MaxAllowedPhaseOffset: 300 (Local)

FrequencyCorrectRate: 4 (Local)
PollAdjustFactor: 5 (Local)
LargePhaseOffset: 50000000 (Local)
SpikeWatchPeriod: 900 (Local)
LocalClockDispersion: 10 (Local)
HoldPeriod: 5 (Local)
PhaseCorrectRate: 7 (Local)
UpdateInterval: 100 (Local)

[TimeProviders]

NtpClient (Local)
DllName: C:\Windows\system32\w32time.dll (Local)
Enabled: 1 (Local)
InputProvider: 1 (Local)
CrossSiteSyncFlags: 2 (Local)
AllowNonstandardModeCombinations: 1 (Local)
ResolvePeerBackoffMinutes: 15 (Local)
ResolvePeerBackoffMaxTimes: 7 (Local)
CompatibilityFlags: 2147483648 (Local)
EventLogFlags: 1 (Local)
LargeSampleSkew: 3 (Local)
SpecialPollInterval: 3600 (Local)
Type: NTP (Local)
NtpServer: 0.pool.ntp.org,1.pool.ntp.org,2.pool.ntp.org,3.pool.ntp.org (Local)

NtpServer (Local)
DllName: C:\Windows\system32\w32time.dll (Local)
Enabled: 1 (Local)
InputProvider: 0 (Local)
AllowNonstandardModeCombinations: 1 (Local)

VMICTimeProvider (Local)
DllName: C:\Windows\System32\vmictimeprovider.dll (Local)
Enabled: 1 (Local)
InputProvider: 1 (Local)

C:\>

image

With the NTP settings configured on the PDC emulator, the next step is to disable time synchronization with the VMware Tools for the PDC emulator virtual machine.  The following KB outlines the procedure;

Disabling Time Synchronization (1189)
http://kb.vmware.com/selfservice/microsites/search.do?language=en_US&cmd=displayKC&externalId=1189

What you basically need to do is as follows:

Shutdown the virtual machine, edit the settings, navigate to Options –> General –> Configuration Parameters:

image

Then add the following:

tools.syncTime = 0

time.synchronize.continue = 0

time.synchronize.restore = 0

time.synchronize.resume.disk = 0

time.synchronize.shrink = 0

time.synchronize.tools.startup = 0

time.synchronize.tools.enable = 0

time.synchronize.resume.host = 0

image

Note that when you add the row tools.syncTime = 0, you will notice that it disappears.  As the VMware KB states, if you were to open up the VMX, you should see that the parameter inserted as tools.syncTime = "FALSE".

With these configurations completed, ensure that the time is correct and do a simple test by changing the time to an incorrect value, wait a few minutes and make sure that it reverts back to the correct time.

The following are a few other sites that I find useful for configuring time:

The w32tm command’s switches:

Windows Time Service Tools and Settings
http://technet.microsoft.com/en-us/library/cc773263(v=ws.10).aspx

A tool that tests an NTP server:

NTP Server Tool
http://www.ntp-time-server.com/ntp-server-tool.html

Microsoft’s tools to test ports (handy to test NTP outbound ports ensure that the DC can get out to the internet):

PortQry Command Line Port Scanner Version 2.0
http://www.microsoft.com/en-us/download/details.aspx?id=17148

PortQryUI - User Interface for the PortQry Command Line Port Scanner
http://www.microsoft.com/en-us/download/details.aspx?id=24009

VMware View 4.6 linked clone pool provisioning fails with multiple errors

$
0
0

I was called by a client today asking me to to have a look at their VMware View 4.6 for their VDI infrastructure that was reporting vCenter was down.  Fixing vCenter wasn’t too difficult as a few reboot and re-initialization of VMware Heartbeat got the services back up.  With all of the arrows in VMware View pointing upwards and green:

image

… I went ahead check check on the pools only to notice that all them had a red x beside them.  What I noticed was that as soon as I re-enabled by selecting the pool, clicking on Status, then Enable Provisioning, I would see that View sends the commands:

  1. Clone the virtual machine (you can see that the source is the replica with the name: replica-1fab7069…)
  2. Add tag
  3. Reconfigure virtual machine
  4. Delete the virtual machine

After a deleting the created virtual machines, the pool would error out and stop provisioning.  Navigating to the Status tab of the pool would show various messages on the 3 pools I had.  Sorry about the lack of screenshots as I was rushing to troubleshooting this so didn’t actually capture any of them but the message would show up in the highlighted area below:

image

The 2 pools that already existed would error out with the following messages (their respective KB links are included):

Deploying a linked desktop pool fails with the error: Selected parent VM is not accessible (1024566)
http://kb.vmware.com/selfservice/microsites/search.do?language=en_US&cmd=displayKC&externalId=1024566

View Manager Admin console displays the error: Error during provisioning: Unexpected VC fault from View Composer (Unknown) (2014321)
http://kb.vmware.com/selfservice/microsites/search.do?language=en_US&cmd=displayKC&externalId=2014321

The new pool I created with a completely new master image with a new snapshot would fail with the following error:

Error during provisioning: Unable to find folder (1038077)
http://kb.vmware.com/selfservice/microsites/search.do?language=en_US&cmd=displayKC&externalId=1038077

In addition to the errors above, I would also see the error: sdd was not found in the recent tasks on vCenter before the pool errors out.

After spending hours reviewing logs, rebooting servers without any luck, I finally came across this forum thread:

https://communities.vmware.com/thread/304131?start=0&tstart=0

… and went ahead to uninstall then reinstall the same version of the View Composer with the Create a new SSLCertificate option (the only other option is use the existing one).  I noticed that I would still get the error:

View Manager Admin console displays the error: Error during provisioning: Unexpected VC fault from View Composer

… once Composer was reinstalled, so I proceeded to restart vCenter which was also where the Composer was installed and once the services came back up all of the pools began to provision but the status of it would end up being either of the following:

  1. agent unreachable (missing)
  2. unknown (missing)
  3. provisioned (missing)

… then the pool would throw the same error as before:

image

Error during provisioning: 10/6/13 11:20:26 PM ADT: Unexpected VC fault from View Composer (Unknown): see event log for full error

Further troubleshooting of making sure the DHCP scope isn’t out of address leases, AD accounts are cleaned out, etc didn’t lead me any closer to a resolution so as I ran out of ideas, I figure I’ll just change the service account for vCenter and View Composer to my own login which has full permissions to everything:

image

I’m not sure why but this corrected the problem.

I hope this helps anyone out there who might come across this issue as it took quite a bit of time for me to figure it out because other than the error messages I found in the Status tab of the pools, I couldn’t find anything in the View Connection server logs and the Windows event logs.

Upgrading Exchange Server 2010 to Service Pack 3 fails with: “The following error was generated when "$error.Clear(); …”

$
0
0

Problem

You have installed 2 new Exchange Server 2010 with SP1 mailbox servers (future DAG) and 2 hub transport / CAS servers an existing Exchange 2007 organization and proceed to install SP3 onto the servers but noticed that you are able to install it onto the HT/CAS servers and only 1 of the 2 mailbox servers.  The first mailbox server installs without an issue but the second one fails at the Mailbox Role stage with the error:

imageimage

Summary: 6 item(s). 3 succeeded, 1 failed.
Elapsed time: 00:08:01

Language Files
Completed
Elapsed Time: 00:02:55

Restoring services
Completed
Elapsed Time: 00:00:01

Languages
Completed
Elapsed Time: 00:01:17

Mailbox Role
Failed
Error:
The following error was generated when "$error.Clear();
          $name = [Microsoft.Exchange.Management.RecipientTasks.EnableMailbox]::DiscoveryMailboxUniqueName;
          $dispname = [Microsoft.Exchange.Management.RecipientTasks.EnableMailbox]::DiscoveryMailboxDisplayName;
          $dismbx = get-mailbox -Filter {name -eq $name} -IgnoreDefaultScope -resultSize 1;
          if( $dismbx -ne $null)
          {
            $srvname = $dismbx.ServerName;
            if( $dismbx.Database -ne $null -and $RoleFqdnOrName -like "$srvname.*" )
            {
              Write-ExchangeSetupLog -info "Setup DiscoverySearchMailbox Permission.";
              $mountedMdb = get-mailboxdatabase $dismbx.Database -status | where { $_.Mounted -eq $true };
              if( $mountedMdb -eq $null )
              {
                Write-ExchangeSetupLog -info "Mounting database before stamp DiscoverySearchMailbox Permission...";
                mount-database $dismbx.Database;
              }
              $mountedMdb = get-mailboxdatabase $dismbx.Database -status | where { $_.Mounted -eq $true };
              if( $mountedMdb -ne $null )
              {
                $dmRoleGroupGuid = [Microsoft.Exchange.Data.Directory.Management.RoleGroup]::DiscoveryManagementWkGuid;
                $dmRoleGroup = Get-RoleGroup -Identity $dmRoleGroupGuid -DomainController $RoleDomainController -ErrorAction:SilentlyContinue;
                if( $dmRoleGroup -ne $null )
                {
                  Add-MailboxPermission $dismbx -User $dmRoleGroup.Identity -AccessRights FullAccess -DomainController $RoleDomainController -WarningAction SilentlyContinue;
                }
              }
            }
          }
        " was run: "Couldn't resolve the user or group "contoso.com/Microsoft Exchange Security Groups/Discovery Management." If the user or group is a foreign forest principal, you must have either a two-way trust or an outgoing trust.".
Couldn't resolve the user or group "contoso.com/Microsoft Exchange Security Groups/Discovery Management." If the user or group is a foreign forest principal, you must have either a two-way trust or an outgoing trust.
The trust relationship between the primary domain and the trusted domain failed.
Click here for help...
http://technet.microsoft.com/en-US/library/ms.exch.err.default(EXCHG.141).aspx?v=14.3.123.3&e=ms.exch.err.Ex88D115&l=0&cl=cp
Elapsed Time: 00:03:46

Management Tools
Cancelled

Finalizing Setup
Cancelled

The error message includes a link but clicking on it brings you to a page indicating there’s no article written for this error:

image

Searching on the internet returns a lot of posts that suggest either disabling the Discovery Mailbox in the Exchange Management Console deleting the account completely, install SP3 then recreate it.  The challenge I had was that these suggestions did not resolve the issue because it would fail at the same stage and it also appears that the Discovery Mailbox also gets recreated during the process.

Another solution I read off of a forum post was to check the permissions was to check the Full Access permissions of the Discovery Mailbox through the EMC:

image

… and while it was missing a lot of permissions because it only had NT AUTHORITY\SELF:

image 

… while the list should look more like this:

  • DOMAIN\Discovery Management
  • DOMAIN\Exchange Domain Servers
  • DOMAIN\Exchange Servers
  • DOMAIN\Exchange Services
  • DOMAIN\Exchange Trusted Subsystem

image

… adding the above permissions and running the SP3 install continued to fail.

Solution

Having exhausted all of the available resources I could find and knowing I’d probably have to figure this one out myself, I went ahead and reviewed the error message line by line again to see if anything pop out at me but nothing did.  What I ended up doing was run through the following list of what I knew:

  1. The discovery mailbox actually gets recreated by this second mailbox server during the SP3 install
  2. The discovery mailbox is not available when the server that’s being upgraded to SP3 is down

Though probably not accurate at all, the error message appears to suggest some sort of access issue related to this mailbox and if the server was being upgraded, wouldn’t the store be down at some point?  This gave me the idea that since I had 2 mailbox servers with 2 mailbox databases, why not move this discovery mailbox off of the SP3 upgrade failing mailbox server’s database and onto the one that already has SP3 successfully installed:

image 

Executed a move request:

image 

Notice the mailbox is being moved:

image

The move completed:

image

With the discovery mailbox in a different store, I ran the SP3 upgrade again and this time it completed successfully:

image

A bit odd but I hope this helps anyone who might come across this issue as I did.

VMware View 4.6 no longer provisions, refreshes or sends any commands to vCenter 4.1 server even though all status’ are reported as being up

$
0
0

I ran into an issue last night after receiving a call from the same client who had an issue with their View 4.6 environment a few days ago that desktops are no longer being refreshed and all of desktops who have had users logged off of were now stuck in maintenance mode.  The first thought I had was that vCenter probably went down and therefore the commands View was setting over to vCenter were no longer being executed.  Logging into the environment and opening the View Administrator Console webpage showed that there was indeed a red down arrow for vCenter.  Hopping over to vCenter showed that the vpxd service was down and a quick restart got it back up.  Further reviewing the logs on the SQL cluster and the vCenter server showed that the cluster apparently crashed at around 3:49p.m. but recovered by failing over to the other node but vCenter eventually stopped at around 4:30p.m.  No problem, the services are all back up now and all arrows are now pointing upwards and green so I expected to see View actions popping up in the recent tasks window in vCenter.  10 minutes have passed and nothing appears to be happening so I go ahead and force refresh, still nothing. I proceed an go create a test pool, View creates the folder but then stops.  Reviewing the event logs, View Composer logs, View Connection logs showed no errors.  It’s as if either the commands aren’t being sent or there is something wrong with the composer service.  After trying several items such as reinstalling composer, re-entering service account credentials without any luck, I opened a call to VMware.

Fast forward to an hour later when I finally got an engineer on the line because of how busy they were, the engineer spent about an hour clicking around and checking everything I’ve reviewed and said nothing looks wrong.  Seeing how we’re going no where, he reached out to his senior engineer then came back after 30 minutes and told me to shut both of the View connection servers down (the environment had 2).  He then proceeded to wait 5 minutes, power up the first server, wait another 5 minutes after it was started, then boot the second one up.  Within 10 minutes of both servers being up, the desktops started getting refreshed.  His explanation was that this appears to happen to View 4 and 5 environments with more than 1 connection server.  He’s not sure why but it may be the ADAM database needing time to start up, queue commands then send it off which was why we waited.

Not exactly what I expected but I’m glad this worked and I hope this post with no screenshots may be able to help anyone who finds themselves in the same situation.

Automating the process of removing / deleting orphaned and/or stale VDI (virtual desktops) in the VMware View Connection server’s ADAM database (VMware View Manager pools)

$
0
0

To follow up on one of my previous posts I wrote earlier in the year in February:

Manually deleting orphaned and/or stale virtual desktops in VMware View Manager pools
http://terenceluk.blogspot.com/2013/02/manually-deleting-orphaned-andor-stale.html

… I finally got fed up when I had to clean up more than 40 orphaned VDI objects at a client’s environment and took the time to use the native LDIFDE tool bundled with Windows for Active Directory export to automate the deletion of orphaned VDI objects in the ADAM database stored on VMware View’s 4.6 database.

As many View administrators already know, VMware View connection servers actually use an ADAM database to manage part of the VDI objects that are presented to us in the administration console.  Further information is stored in the View Composer database that is hosted on a database server such as Microsoft SQL.  My previous post demonstrated the process of removing orphaned objects via manually using adsiedit to edit the ADAM database on the View Connection servers then with a SQL query that went into all of the tables to remove the entries in a SQL database.  The manual process of using ADSIedit isn’t difficult but rather an extremely inefficient method that contains a bit too many clicks and cross referencing unique identifiers to my liking.  This process is tolerable for maybe 10 to 20 objects but as the number of objects increase, the manual labour becomes way too tedious.  So to make a long story short, one of the methods we can use to automate the process and make it a bit less painful is to use LDIFDE and Excel to organize the names in a format that you can pipe in as a list of VDIs to remove.

For those who are not familiar with the LDFIDE command, this tool basically allows you to export active directory objects into a csv file (or an .ldf file which is pretty much just text), and also allows you to import a list of LDFIDE allows you import a list of objects to remove them from the ADAM/Active Directory database.  So to achieved what I wanted to do, I needed to figure out the following:

  1. Create a list of VDIs with their names that I would like to remove from the ADAM database
  2. Use the LDFIDE command to export the list in #1
  3. Edit the exported list (csv file) to set the objects for removal
  4. Use the LDFIDE command to reimport the list with the objects flagged for removal

**Note: I rarely do this but have been told numerous times that I should state that you should be using this at your own risk and I cannot be held responsible for any damages made to your environment.  Use this at your own risk and back up your ADAM database before you proceed.

Step #1 - Create a list of VDIs with their names that I would like to remove from the ADAM database

This first step to obtain a list of orphaned VDIs is quite easy as it can all be done in the GUI by navigating to the Desktop Status window and clicking on the number beside the status that represents the desktops you would like to know:

image

In the screenshot above, I would like to list all of the Agent unreachable (missing) desktops so I would click on 38.

From here, I would use the little floppy symbol at the top right hand corner to save the list as a csv:

image

image

The only field we really need is the Desktop or DNS Name so choose one of those columns and delete the rest:

image

image

The next step is to add the line:

(pae-DisplayName=

… in the row before the name and a:

)

… in the row after the name as such:

image

From here, copy the fields and paste it into Notepad as such:

image

Then copy the space between the first two columns:

image

Then use the search and replace to remove these spaces:

image

The final product should look as such:

image

Now finally remove the line breaks from each of the rows as such:

image

The final output should look something like this:

(pae-DisplayName=VM-VIEW4-054)(pae-DisplayName=VM-VIEW4-060)(pae-DisplayName=VM-VIEW4-091)(pae-DisplayName=VM-VIEW4-098)(pae-DisplayName=VM-VIEW4-121)(pae-DisplayName=VM-VIEW4-010)(pae-DisplayName=VM-VIEW4-019)(pae-DisplayName=VM-VIEW4-144)(pae-DisplayName=VM-VIEW4-108)(pae-DisplayName=VM-VIEW4-011)(pae-DisplayName=VM-VIEW4-006)(pae-DisplayName=VM-VIEW4-007)(pae-DisplayName=VM-VIEW4-018)(pae-DisplayName=VM-VIEW4-026)(pae-DisplayName=VM-VIEW4-016)(pae-DisplayName=VM-VIEW4-021)(pae-DisplayName=VM-VIEW4-027)(pae-DisplayName=VM-VIEW4-041)(pae-DisplayName=VM-VIEW4-037)(pae-DisplayName=VM-VIEW4-068)(pae-DisplayName=VM-VIEW4-056)(pae-DisplayName=VM-VIEW4-061)(pae-DisplayName=VM-VIEW4-069)(pae-DisplayName=VM-VIEW4-081)(pae-DisplayName=VM-VIEW4-089)(pae-DisplayName=VM-VIEW4-084)(pae-DisplayName=VM-VIEW4-099)(pae-DisplayName=VM-VIEW4-095)(pae-DisplayName=VM-VIEW4-103)(pae-DisplayName=VM-VIEW4-105)(pae-DisplayName=VM-VIEW4-104)(pae-DisplayName=VM-VIEW4-107)(pae-DisplayName=VM-VIEW4-127)(pae-DisplayName=VM-VIEW4-140)(pae-DisplayName=VM-VIEW4-143)(pae-DisplayName=VM-VIEW4-139)(pae-DisplayName=VM-VIEW4-149)(pae-DisplayName=VM-VIEW4-119)

Step #2 - Use the LDFIDE command to export the list in #1

Just so for documenting purposes, the first LDFIDE command I came up with during the test was the following:

ldifde -f orphanedVDIs.txt -s vmv-01 -d "OU=Servers,dc=vdi,dc=vmware,dc=int" -r "(objectClass=pae-Server)"

While the command above allowed me to export all of the VDIs, the problem with the data included in the export was that it included all of the VDIs and all of the attributes.  The text file has way too much information to be easily edited and it doesn’t include a filter to only include the objects we want to remove.  While we can manually delete the information is not needed, it’s not very enjoyable and I would rather manually use ADSIedit than to go through this list.

With that out of the way, the proper command to use is something similar to the following:

ldifde -f orphanedVDIs.txt -s vmv-01 -d "OU=Servers,dc=vdi,dc=vmware,dc=int" -r "(|(pae-DisplayName=view45-006)(pae-DisplayName=view45-010))" -l "DN"

The command above allows us to only export the DN attribute of the objects as well as only the objects that we’ve included after the -r switch.  The | symbol actually represents OR which means we can include as many bracketed pae-DisplayName afterwards to have only those objects exported.

What needs to be done now is to paste the following at the beginning of the text file we edited in step #1:

ldifde -f orphanedVDIs.txt -s bps-vmv-01 -d "OU=Servers,dc=vdi,dc=vmware,dc=int" -r "(|

… and the following at the end:

)" -l "DN"

The cmdlet you should have now is the following:

ldifde -f orphanedVDIs.txt -s vmv-01 -d "OU=Servers,dc=vdi,dc=vmware,dc=int" -r "(|(pae-DisplayName=VM-VIEW4-054)(pae-DisplayName=VM-VIEW4-060)(pae-DisplayName=VM-VIEW4-091)(pae-DisplayName=VM-VIEW4-098)(pae-DisplayName=VM-VIEW4-121)(pae-DisplayName=VM-VIEW4-010)(pae-DisplayName=VM-VIEW4-019)(pae-DisplayName=VM-VIEW4-144)(pae-DisplayName=VM-VIEW4-108)(pae-DisplayName=VM-VIEW4-011)(pae-DisplayName=VM-VIEW4-006)(pae-DisplayName=VM-VIEW4-007)(pae-DisplayName=VM-VIEW4-018)(pae-DisplayName=VM-VIEW4-026)(pae-DisplayName=VM-VIEW4-016)(pae-DisplayName=VM-VIEW4-021)(pae-DisplayName=VM-VIEW4-027)(pae-DisplayName=VM-VIEW4-041)(pae-DisplayName=VM-VIEW4-037)(pae-DisplayName=VM-VIEW4-068)(pae-DisplayName=VM-VIEW4-056)(pae-DisplayName=VM-VIEW4-061)(pae-DisplayName=VM-VIEW4-069)(pae-DisplayName=VM-VIEW4-081)(pae-DisplayName=VM-VIEW4-089)(pae-DisplayName=VM-VIEW4-084)(pae-DisplayName=VM-VIEW4-099)(pae-DisplayName=VM-VIEW4-095)(pae-DisplayName=VM-VIEW4-103)(pae-DisplayName=VM-VIEW4-105)(pae-DisplayName=VM-VIEW4-104)(pae-DisplayName=VM-VIEW4-107)(pae-DisplayName=VM-VIEW4-127)(pae-DisplayName=VM-VIEW4-140)(pae-DisplayName=VM-VIEW4-143)(pae-DisplayName=VM-VIEW4-139)(pae-DisplayName=VM-VIEW4-149)(pae-DisplayName=VM-VIEW4-119))" -l "DN"

You can now use this cmdlet to export the orphaned VDIs you would like to delete into a list as such:

image 

Note that you should see something similar to the following when you open up this exported list:

image

Step #3 - Edit the exported list (csv file) to set the objects for removal

What we need to do now is modify this list and change the add word to delete marking the objects to be deleted:

imageimage

Step #4 - Use the LDFIDE command to reimport the list with the objects flagged for removal

With our list of VDIs to be deleted prepared, the final step is to simply execute the following:

ldifde -i -f orphanedVDIs.txt -s vmv-01

image

Please note that there is no undelete and as soon as you execute this command and remove the VDI objects in the ADAM database, it will get replicated to your other nodes as well so please proceed with caution.

From here on, you can proceed with using the SQL script I included in my previous blog post to remove the objects from the SQL database.  I have yet to find the time to automate that process even more but will try to do so sometime in the future (maybe when I have to do 400 desktops).


Configure LDAPs an Active Directory Domain Controller for LDAP over SSL Connections

$
0
0

I recently had to configure a Directory Sync feature between a cloud based SPAM filtering service and a client’s Active Directory and came across the option of either syncing via regular LDAP port 389 (unecrypted) or LDAPS over SSL port 636.  While the service account the cloud based SPAM filtering service only requires a regular user account with no administrative permissions, I didn’t feel too comfortable with having the service sync via regular LDAP 389 over the internet with the login credentials being sent in clear text.  Yes, I’ve been told that we can lock the traffic down by source IP but I’m sure we all know how that isn’t exactly bulletproof.  So from here, I began configuring the domain controllers with an internal Microsoft Certificate Authority issued certificate to encrypt the traffic.  As I browsed through some old notes I had as I haven’t configured this in a while, I realized that I haven’t written a blog post about it so thought it would be a good idea to do so now so I have something to reference to in the future.  Note that I am configuring all of this on a Windows Server 2012 domain controller and certificate authority.  Both roles are installed onto the same server but I do not recommend doing so as I never liked installing CA services on a DC but this environment I configured this on recently only had 2 servers.

Step #1 – Create a new certificate template for LDAPS

Begin by creating a new certificate template on your internal Microsoft Certificate Authority to issue the certificate that will be used for LDAPS.  Launch the Certificate Authority management console, right-click on the Certificate Templates node and client on Manage:

image

In the Certificate Templates window, locate the Kerberos Authentication template, right click on it and click on Duplicate Template:

 image

Click on the General tab and change the following fields:

Template display name: <Enter a name for the certificate>

Validity period: <Enter the number of years you want an issued certificate to be valid for>

Publish certificate in Active Directory: <I usually check this for convenience purposes so the certificate is displayed when a domain joined member is requesting a certificate>

image

In the Cryptography tab, enter a value for the Minimum key size. I usually enter at least 2048 as that seems to be the minimum size for public CAs these days and is a minimum requirement for Lync 2010/2013 deployments.

image

Navigate to the Subject Name tab and configure the following:

Build from this Active Directory information: Check

Subject name format: None

DNS Name: Check

Service principal name (SPN): Check

image

Lastly, navigate to the Request Handling tab and check the Allow private key to be exported option.  While this is optional, I usually enable it in case you ever need to export and reimport the certificate:

image

Click OK to create the new template and ensure it is now listed in the Certificates Templates:

image

Step #2 – Issue the new Certificate Template

With the new template created, navigate back to the Certificate Authority management console, right click on Certificate Templates, select New and click on Certificate Template to Issue:

image

Select the new certificate that was created and click OK:

image

Ensure that the new certificate is now listed in the Certificate Templates:

image

Step #3 – Request certificate for LDAPS over SSL on a Domain Controller

With the certificate created and published, proceed by navigating to a domain controller, open MMC and add the Certificates snap-in under the Computer account context:

image

Navigate to Certificates (Local Computer) –> Personal –> Certificates then right click on Certificates –> All Tasks –> Request New Certificate…:

image

Follow through the wizard:

image

Select Active Directory Enrollment Policy:

image

Check the new certificate template that was created:

image

Clicking on the Details button would show the following:

image

Click Enroll to request and retrieve the certificate:

image

Note that a new certificate should now be displayed with the following Intended Purposes properties:

  • KDC Authentication
  • Smart Card Logon
  • Server Authentication
  • Client Authentication

image

image 

--------------------------------------------------------------------------------------------------------------------------------------------------------------------

**Note I’ve had a few colleagues ask me why they can’t use the default domain controller policy as shown here:

image

… and my response is that I was never able to get it to work even though most articles appear to suggest the Server Authentication is required for the Enhanced Key Usage properties.

--------------------------------------------------------------------------------------------------------------------------------------------------------------------

With the new certificate on the domain controller, hop onto another member server, launch LDP and try connecting to the DC via port 636 with SSL checked:

image

Hitting the OK button should show that you are now able to connect:

image

Repeat Step #3 for other domain controllers as necessary.

Hope this helps anyone looking for instructions on how to set this up.

Lync messages between 2 federated partners only work 1 way

$
0
0

Problem

You’ve set up federation between 2 Lync Server 2013 environments but notice that only 1 of the company can see presence information and have the ability to send messages while the other company is unable to see presence information from the other company, unable to send messages but is able to receive messages.  Opening up a logging session on the Lync Edge server at the company that is unable to send or see presence information and the logs reveal the following error entries:

**Note that the user tluk@ccs.bm is able to send messages and view presence.

TL_INFO(TF_PROTOCOL) [0]09F8.0C88::10/12/2013-01:39:41.834.00012234 (SIPStack,SIPAdminLog::ProtocolRecord::Flush:2436.idx(196))[1741920323] $$begin_record
Trace-Correlation-Id: 1741920323
Instance-Id: 2BDA
Direction: outgoing;source="internal edge";destination="external edge"
Peer: sip.ccs.bm:49487
Message-Type: response
Start-Line: SIP/2.0 200 OK
From: <sip:tluk@ccs.bm>;tag=2187c36e06;epid=25ff4d1f78
To: <sip:ccs@domain.bm>;epid=e69af42711;tag=ca96430b85
Call-ID: afd96a4c19f7408685609405dff39e7d
CSeq: 4 MESSAGE
Contact: <sip:ccs@domain.bm;opaque=user:epid:6m94aPj8T1WXhLvmR6kj4wAA;gruu>
Via: SIP/2.0/TLS 172.16.37.55:49487;branch=z9hG4bK5391C9B0.0FCE7A99208BC946;branched=FALSE;ms-internal-info="cj7lCn8xAJRUUdlatMoH--sroWxv41foxdQ3JeVVGNT-qZes4PDsNiuwAA";received=69.17.205.55;ms-received-port=49487;ms-received-cid=43E00
Via: SIP/2.0/TLS 172.16.1.152:51919;branch=z9hG4bK353C6B47.C170580869629948;branched=FALSE;ms-received-port=51919;ms-received-cid=500
Via: SIP/2.0/TLS 172.16.1.211:49162;branch=z9hG4bK9A01874C.B60005E6208AD946;branched=FALSE;ms-received-port=49162;ms-received-cid=8F1700
Via: SIP/2.0/TLS 172.16.58.131:54782;received=199.172.198.55;ms-received-port=57155;ms-received-cid=19F00
Content-Length: 0
$$end_record

image

TL_ERROR(TF_CONNECTION) [0]09F8.0C64::10/12/2013-01:39:45.516.000122b4 (SIPStack,SIPAdminLog::WriteConnectionEvent:1222.idx(452))[710685110] $$begin_record

Severity: error

Text: Failed to complete outbound connection

Peer-IP: 69.17.205.55:5061

Connection-ID: 0x44103

Transport: TLS

Result-Code: 0x8007274c

Data: fqdn="sip.ccs.bm";peer-type="FederatedPartner";winsock-code="10060";winsock-info="The peer did not respond to the connection attempt"

$$end_record

image

TL_ERROR(TF_DIAG) [0]09F8.0C64::10/12/2013-01:39:45.516.000122da (SIPStack,SIPAdminLog::WriteDiagnosticEvent:1222.idx(784))[1836810921] $$begin_record

Severity: error

Text: Message was not sent because the connection was closed

SIP-Start-Line: SUBSCRIBE sip:tluk@ccs.bm SIP/2.0

SIP-Call-ID: 57e81be269b942b2a579617dc94553f0

SIP-CSeq: 1 SUBSCRIBE

Peer: 69.17.205.55:5061

$$end_record

image

TL_INFO(TF_DIAG) [0]09F8.0C64::10/12/2013-01:39:45.516.0001259d (SIPStack,SIPAdminLog::WriteDiagnosticEvent:1222.idx(778))[1836810921] $$begin_recordSeverity: information
Text: Routed a locally generated response
SIP-Start-Line: SIP/2.0 504 Server time-out
SIP-Call-ID: 57e81be269b942b2a579617dc94553f0
SIP-CSeq: 1 SUBSCRIBE
Peer: lyncstd01.corp.domain.bm:62684

$$end_record

image

TL_INFO(TF_PROTOCOL) [0]09F8.0C64::10/12/2013-01:39:45.516.000125f5 (SIPStack,SIPAdminLog::ProtocolRecord::Flush:2436.idx(196))[1836810921] $$begin_record
Trace-Correlation-Id: 1836810921
Instance-Id: 2BDB
Direction: outgoing;source="local";destination="internal edge"
Peer: prplyncstd01.corp.domain.bm:62684
Message-Type: response
Start-Line: SIP/2.0 504 Server time-out
From: "CCS"<sip:ccs@domain.bm>;tag=7d7ab30b5f;epid=e69af42711
To: <sip:tluk@ccs.bm>;tag=205B29FB0474E9F50009EEADAE695524
Call-ID: 57e81be269b942b2a579617dc94553f0
CSeq: 1 SUBSCRIBE
Via: SIP/2.0/TLS 10.1.70.50:62684;branch=z9hG4bKF368244B.0850C8B18CE9E93B;branched=FALSE;ms-received-port=62684;ms-received-cid=44000
Via: SIP/2.0/TLS 10.1.70.50:62588;ms-received-port=62588;ms-received-cid=300
Content-Length: 0
ms-diagnostics: 1046;reason="Failed to connect to a federated peer server";fqdn="sip.ccs.bm";peer-type="FederatedPartner";winsock-code="10060";winsock-info="The peer did not respond to the connection attempt";source="sip.domain.bm"
$$end_record

image

TL_WARN(TF_DIAG) [0]09F8.0C64::10/12/2013-01:39:45.516.0001263f (SIPStack,SIPAdminLog::WriteDiagnosticEvent:1222.idx(781))[1836810921] $$begin_recordSeverity: warning
Text: Routing error occurred; check Result-Code field for more information
Result-Code: 0xc3e93c7f SIPPROXY_E_ROUTING_MSG_SEND_CLOSED
SIP-Start-Line: SUBSCRIBE sip:tluk@ccs.bm SIP/2.0
SIP-Call-ID: 57e81be269b942b2a579617dc94553f0
SIP-CSeq: 1 SUBSCRIBE
Peer: 69.17.205.55:5061

$$end_record

image

TL_ERROR(TF_DIAG) [0]09F8.0C64::10/12/2013-01:39:45.516.00012653 (SIPStack,SIPAdminLog::WriteDiagnosticEvent:1222.idx(784))[3012324582] $$begin_recordSeverity: error
Text: Message was not sent because the connection was closed
SIP-Start-Line: NOTIFY sip:tluk@ccs.bm;opaque=user:epid:6478nGN5flqtbdWmNWKPpQAA;gruu SIP/2.0
SIP-Call-ID: b67a5a8669c6498a8b9cff6f03b18d89
SIP-CSeq: 2 NOTIFY
Peer: 69.17.205.55:5061

$$end_record

image

TL_INFO(TF_DIAG) [0]09F8.0C64::10/12/2013-01:39:45.516.00012917 (SIPStack,SIPAdminLog::WriteDiagnosticEvent:1222.idx(778))[3012324582] $$begin_recordSeverity: information
Text: Routed a locally generated response
SIP-Start-Line: SIP/2.0 430 Flow Failed
SIP-Call-ID: b67a5a8669c6498a8b9cff6f03b18d89
SIP-CSeq: 2 NOTIFY
Peer: lyncstd01.corp.domain.bm:62684

$$end_record

image

TL_INFO(TF_PROTOCOL) [0]09F8.0C64::10/12/2013-01:39:45.516.0001296d (SIPStack,SIPAdminLog::ProtocolRecord::Flush:2436.idx(196))[3012324582] $$begin_recordTrace-Correlation-Id: 3012324582
Instance-Id: 2BDC
Direction: outgoing;source="local";destination="internal edge"
Peer: prplyncstd01.corp.domain.bm:62684
Message-Type: response
Start-Line: SIP/2.0 430 Flow Failed
From: <sip:ccs@domain.bm>;tag=23480080
To: <sip:tluk@ccs.bm>;tag=e3520bfb35;epid=25ff4d1f78
Call-ID: b67a5a8669c6498a8b9cff6f03b18d89
CSeq: 2 NOTIFY
Via: SIP/2.0/TLS 10.1.70.50:62684;branch=z9hG4bK1A7CF1F8.E103137E90058948;branched=FALSE;ms-received-port=62684;ms-received-cid=44000
Content-Length: 0
ms-diagnostics: 1046;reason="Failed to connect to a federated peer server";fqdn="sip.ccs.bm";peer-type="FederatedPartner";winsock-code="10060";winsock-info="The peer did not respond to the connection attempt";source="sip.domain.bm"
$$end_record

image 

Solution

There wasn’t a whole lot I could find through searching the error messages so through logically thinking about it, what appeared to be the problem was that the company that could not send messages or see presence information was sending information out but wasn’t receiving any information back (hence the Thepeer did not respond to the connection attempt messages). Seeing how the other company that was able to send and see presence information was federated with other partners and was working properly, I figured it was probably because the other company probably had an outbound port blocked.  A quick telnet via port 443 from the Edge server of the company that wasn’t able to send messages or receive presence information revealed that this was indeed the case and 443 was blocked.  Once the Edge server was allowed TCP 443 outbound, the problem went away.

“Exchange Database iDataAgent” option grayed out with CommVault Simpana 9.0 R2 installer on Exchange Server 2013

$
0
0

Problem

You attempt to install the Exchange Database iDataAgent with the CommVault Simpana 9.0 R2 installer on Exchange Server 2013 but notice that the option grayed out:

image

Hovering over the option displays the following message:

Provides backup and recovery of Microsoft Exchange databases.

This platform is disabled because:

It requires a supported version of Microsoft Exchange.

image 

Solution

As per the CommVault SP3 notes:

http://documentation.commvault.com/hds/release_9_0_0/books_online_1/english_us/service_pack/win32/sp9/list_of_updates.htm

… to add support for Exchange Server 2013, you will need to create the following registry key:

[HKEY_LOCAL_MACHINE\SOFTWARE\GalaxyInstallerFlags]

"bEmulateThirdPartyApps"=dword:00000001

image

image

Note that I had to create the GalaxyInstallerFlags key as it did not exist.  Once the key and dword is created, restart the installer and you should see the Exchange Database iDataAgent available:

image

Using autodiscover to setup a user’s Outlook on a computer not joined to the domain keeps prompting for password

$
0
0

Problem

You have several remote users who are trying to set up their Outlook via the Outlook Anywhere service using Autodiscover to detect the settings but all of them are continuously prompted for their password.  The process looks similar to the following:

image

You enter the appropriate information:

image

The wizard proceeds to use the autodiscover service to set up the mailbox:

image

The user then receives a password prompt:

image

The user proceeds to type in their password but continuously gets prompted as shown above and after 3 or 4 attempts, the user is presented with the following:

An encrypted connection to your mail server is not available.

Click Next to attempt using an unencrypted connection.

image

Solution

Assuming your autodiscover service is set up appropriately and verified with the Microsoft Remote Connectivity Analyzer (https://testconnectivity.microsoft.com/) tool, this issue may be because your internal domain is different than your external SMTP domain.  In this example, the external SMTP domain is <someDomain>.com but the internal domain is<someDomain>.local.  This means that the user’s default UPN login is actually <username>.<someDomain>.local and not<username>.<someDomain>.com.  If we look closing to the default login username presented to the user, we will see that it has defaulted to the user’s email address which is not a valid login for the user:

image

One of the workarounds in this situation is to add a new UPN suffix to the domain with the external domain in Active Directory Domains and Trusts then change the user’s Account tab to use the new UPN:

image

If adding a new UPN suffix is not acceptable, the user can configure their mailbox by select User another account and change the login username to domain\username:

image

Doing so will allow the user to successfully configure their mailbox:

image

I find this simple issue can throw a lot of administrators off so I hope this post would help save someone’s time.

Exchange Server 2013 OWA throws the error: “Error: Your request can't be completed right now. Please try again later.”

$
0
0

Before I begin, let me state that I doubt many others will experienced the same issue I had even though the error message:

Error: Your request can't be completed right now. Please try again later.

… appears quite frequent when searched but none of the solutions fixed my issue.  To save others from going through all of the troubleshooting steps I went through myself as well as with a Microsoft support engineer, what ended up fixing my issue was to treat the server as if I’ve lost it and had to perform a recovery install with the:

Setup /m:RecoverServer /IAcceptExchangeServerLicenseTerms

… command.  There are many articles and blog posts out there demonstrating a recovery install so I’ll just list out the basic steps that I did:

  1. Deploy a new Windows Server 2012 server and don’t join it to the domain
  2. Configure the same drives and letters as the existing Exchange Server 2013
  3. Copy the Exchange databases over to the new server maintaining the same drive and path
  4. Copy the prerequisites required for Exchange over to the new server
  5. Copy the installed Exchange Server 2013 Cumulative Update package (in my case CU2) to the new server
  6. Export the public certificate used for OWA and other services to a new server
  7. Document where Exchange is installed (this information can be found via ADSIEdit by navigating to CN=Ex-15,CN=Servers,CN=First Administrative Group,CN=Administrative Groups,CN=First Organization,CN=Microsoft Exchange,CN=Services,CN=Configuration,DC=Contoso,CN=Local and opening the CN=EX-15 object then viewing the properties of the msExchInstallPath attribute.
  8. Shutdown the existing Exchange Server 2013 server (we will not start this server back up again so make sure you’ve copied what you need off of it)
  9. Reset the old Exchange server’s computer account
  10. Assign the new Exchange server’s IP to be the same as the problematic one
  11. Change the name of the new server to the problematic Exchange server’s name and restart
  12. Join the new renamed server to the domain
  13. Install the prerequisites for Exchange Server 2013 (the downloaded packages and Roles and Features via PowerShell)
  14. Using the same CU2 package, run the command Setup /m:RecoverServer /IAcceptExchangeServerLicenseTerms

image

Once the install is complete, restart the server, log into ECP, mount the IS store, reconfigure the virtual directories (i.e. OWA, OAB, etc), review the event logs, then test the services.  This fixed the issue I had as the Microsoft engineer suspected that here was some file, handler mapping, or a component that wasn’t functioning properly.

With the solution out of the way, I’m going to include the troubleshooting steps below:

Problem

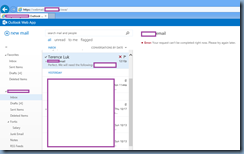
You have a new Exchange Server 2013 deployment (all roles on the same server) with CU2 installed in the environment and while testing OWA, you notice the following error when you attempt to read the content of an email:

Error: Your request can't be completed right now. Please try again later.

image

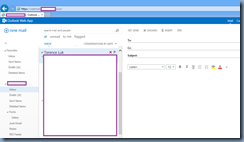
Composing new emails and sending it outbound appears to work properly:

image

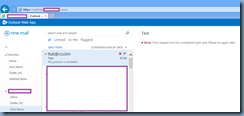
However, browsing the contents of the sent email exhibits the same error:

image

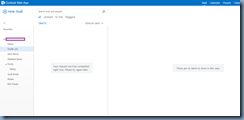
Clicking on the Drafts node display the following:

Your request can’t be completed right now. Please try again later.

There are no items to show in this view.

image

Troubleshooting Steps Performed

The event logs do not show any relevant error messages.

Attempting to remove the net.pipe binding on the Site Bindings of Exchange Back End site in IIS:

image

… as per the following blog post:

http://gaurang-microsofttechnology.blogspot.com/2013/08/error-your-request-cant-be-completed.html

image

image

image

… does not correct the issue.  Note that I’ve confirmed with with a Microsoft engineer that there is no harm in removing this as it’s not used by OWA.

Checking the Port 444 certificate binding shows the default self signed certificate which was confirmed by Microsoft that it is ok for the Exchange Back End site in IIS.

Checking all of the IIS permissions as per the following KB:

Default Settings for Exchange Virtual Directories
http://technet.microsoft.com/en-us/library/gg247612.aspx

… appear to be fine.

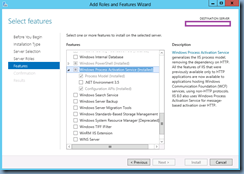
Reinstalling the:

Windows Process Activation Service

  • Process Model
  • Configuration APIs

image

… does not fix the issue.

Trying to rerun the CU2 update does not work as you won’t be able to click the Next button to start the upgrade.  Running CU2 with setup /m:upgrade works but does not fix the issue.

Browsing the IIS logs in the folder:

C:\Program Files\Microsoft\Exchange Server\V15\Logging\HttpProxy\Owa

image

… and opening the latest log after mimiking the issue in OWA you noticed the following lines created:

2013-10-23T02:04:42.337Z,ebcea5c9-fff5-421b-a200-aaef3c04090a,15,0,712,12,,Owa,webmail.contoso.bm,/owa/ev.owa2,,FBA,True,contoso\hugh.nevile,,Sid~S-1-5-21-788572559-3134175131-1749204635-1116,Mozilla/5.0 (compatible; MSIE 9.0; Windows NT 6.1; WOW64; Trident/5.0; chromeframe/30.0.1599.101),199.172.202.68,BM1-AZIM-40-001,200,200,,GET,Proxy,bm1-azim-40-001.contoso.local,15.00.0712.000,IntraForest,WindowsIdentity,Database~2ea1e285-a27c-4183-9931-dad6075ed100~~10/23/2013 2:13:42 AM,,,0,810,1,,1,0,,0,,0,,0,0,59951.0693,0,,,,3,1,59951,1,59958,0,59956,2,3,4,59959,?ns=PendingRequest&ev=PendingNotificationRequest&UA=0&cid=23bef3f4-905a-4782-b4ce-b1e3284f5d96&X-OWA-CANARY=1Rm53J0O10qf83-QL8VTQJ4jmRqnndAIvI239N21LeirqJbvhalTBvn7ONLGfv5yrj94xD4axCg.,,OnBeginRequest=0;,HttpException=ClientDisconnect;
2013-10-23T02:04:42.384Z,a1aefcad-d10a-43e0-8b66-301e1100eaaa,15,0,712,12,,Owa,webmail.contoso.bm,/owa/service.svc,FindConversation,FBA,True,contoso\hugh.nevile,,Sid~S-1-5-21-788572559-3134175131-1749204635-1116,Mozilla/5.0 (compatible; MSIE 9.0; Windows NT 6.1; WOW64; Trident/5.0),199.172.202.68,BM1-AZIM-40-001,405,405,,POST,Proxy,bm1-azim-40-001.contoso.local,15.00.0712.000,IntraForest,WindowsIdentity,Database~2ea1e285-a27c-4183-9931-dad6075ed100~~10/23/2013 2:14:42 AM,,,875,1293,1,,5,0,,0,,0,,0,0,15.5942,0,1,0,2,0,0,0,0,6,0,1,3,3,8,11,?action=FindConversation&UA=0,,OnBeginRequest=5;,WebExceptionStatus=ProtocolError;ResponseStatusCode=405;WebException=System.Net.WebException: The remote server returned an error: (405) Method Not Allowed.    at System.Net.HttpWebRequest.EndGetResponse(IAsyncResult asyncResult)    at Microsoft.Exchange.HttpProxy.ProxyRequestHandler.<>c__DisplayClass20.<OnResponseReady>b__1e();
2013-10-23T02:05:31.649Z,c2614a6e-8846-4b55-9dc8-139e1cc9601e,15,0,712,12,,,,,,,,,,,,,BM1-AZIM-40-001,,,,,,,,,,,,,,,,,,,,,,,,,,600038.8438,,,,,,,,,,,,,,,,,,S:ActivityStandardMetadata.Action=GlobalActivity;I32:ADS.C[UNINSTR]=1;F:ADS.AL[UNINSTR]=4.7919,
2013-10-23T02:05:43.006Z,44349282-87e7-4520-92ad-aeca244490f8,15,0,712,12,,Owa,webmail.contoso.bm,/owa/ev.owa2,,FBA,True,contoso\hugh.nevile,,Sid~S-1-5-21-788572559-3134175131-1749204635-1116,Mozilla/5.0 (compatible; MSIE 9.0; Windows NT 6.1; WOW64; Trident/5.0; chromeframe/30.0.1599.101),199.172.202.68,BM1-AZIM-40-001,200,200,,GET,Proxy,bm1-azim-40-001.contoso.local,15.00.0712.000,IntraForest,WindowsIdentity,Database~2ea1e285-a27c-4183-9931-dad6075ed100~~10/23/2013 2:14:42 AM,,,0,810,1,,1,0,,0,,0,,0,0,60606.254,0,,,,7,1,60581,3,60595,1,60593,4,5,6,60597,?ns=PendingRequest&ev=PendingNotificationRequest&UA=0&cid=23bef3f4-905a-4782-b4ce-b1e3284f5d96&X-OWA-CANARY=1Rm53J0O10qf83-QL8VTQJ4jmRqnndAIvI239N21LeirqJbvhalTBvn7ONLGfv5yrj94xD4axCg.,,OnBeginRequest=0;,HttpException=ClientDisconnect;
2013-10-23T02:06:09.245Z,2d027367-cd3a-40b0-8634-5c74a033db5b,15,0,712,12,,Owa,webmail.contoso.bm,/owa/ev.owa2,,FBA,True,contoso\torgeir.dagsleth,,Sid~S-1-5-21-788572559-3134175131-1749204635-1113,Mozilla/5.0 (Macintosh; Intel Mac OS X 10_8_5) AppleWebKit/536.30.1 (KHTML  like Gecko) Version/6.0.5 Safari/536.30.1,199.172.240.98,BM1-AZIM-40-001,200,200,,GET,Proxy,bm1-azim-40-001.contoso.local,15.00.0712.000,IntraForest,WindowsIdentity,Database~2ea1e285-a27c-4183-9931-dad6075ed100~~10/23/2013 2:10:49 AM,,,0,1140,1,,1,0,,0,,0,,0,0,319723.4178,0,,,,4,0,319712,1,319719,0,319717,2,2,3,319720,?ns=PendingRequest&ev=PendingNotificationRequest&UA=0&cid=ab24e4be-32f9-48f2-877c-cdaf1dd7c816&X-OWA-CANARY=KbqlV02F5EObilbXWME5wiHF9AOHndAIHbXU9aRJUWoCtt2QdtBS3st9SK8UzEhXxw_QjQWdkDo.&n=hn3x0v2p,,OnBeginRequest=0;,
2013-10-23T02:06:30.243Z,66e7d747-37a5-4909-acf4-a8afbf440e7a,15,0,712,12,,Owa,webmail.contoso.bm,/owa/ev.owa2,,FBA,True,contoso\torgeir.dagsleth,,Sid~S-1-5-21-788572559-3134175131-1749204635-1113,Mozilla/5.0 (compatible; MSIE 10.0; Windows NT 6.2; WOW64; Trident/6.0; Touch),199.172.240.98,BM1-AZIM-40-001,200,200,,GET,Proxy,bm1-azim-40-001.contoso.local,15.00.0712.000,IntraForest,WindowsIdentity,Database~2ea1e285-a27c-4183-9931-dad6075ed100~~10/23/2013 2:11:09 AM,,,0,1706,1,,1,0,,0,,0,,0,0,320128.994,0,,,,3,1,320115,4,320124,0,320123,1,2,3,320125,?ns=PendingRequest&ev=PendingNotificationRequest&UA=0&cid=d346ff16-b3cd-4655-9a88-705154896893&X-OWA-CANARY=HQjKAb7cQUqZYxo77UNQ2sZzVEyGndAIaL8fK3fa16q8-KVMLXheqc4LBrRis4iMT7u7NPQS2Zc.,,OnBeginRequest=0;,

image

**Sorry about the word wrap but the lines are supposed to look like what is shown in the screenshot.

The output we’re interested in is actually the following:

WebExceptionStatus=ProtocolError;ResponseStatusCode=405;WebException=System.Net.WebException: The remote server returned an error: (405) Method Not Allowed.    at System.Net.HttpWebRequest.EndGetResponse(IAsyncResult asyncResult)    at Microsoft.Exchange.HttpProxy.ProxyRequestHandler.<>c__DisplayClass20.<OnResponseReady>b__1e();

To fix the error in the logs, perform the following:

Prior to making any changes to IIS, it is recommended to use the following command to backup the site settings first:

%windir%\system32\inetsrv\appcmd.exe add backup "My Backup Name"

The following is an example:

%windir%\system32\inetsrv\appcmd.exe add backup "IIS-Backup-10-22-2013"

The above command will create a folder in the following folder:

C:\Windows\system32\inetsrv\backup

image

After reviewing all the settings with the Microsoft engineer I was working with noticed that the environment with the issue was missing some Handler Mappings for the Default Website:

image 

The following is another environment I have access to and note that the following 3 Handler Mappings is missing:

  1. svc-Integrated-4.0
  2. svc-ISAPI-4.0_32bit
  3. svc-ISAPI-4.0_64bit

… are missing:

imageimage

What ended up bringing the missing handler back was rerunning the prerequsites PowerShell cmdlet (this is for a server with all the roles installed, go to the following URL to find the cmdlets for other configurations http://technet.microsoft.com/en-us/library/bb691354(v=exchg.150).aspx#WS2012MBX):

Install-WindowsFeature AS-HTTP-Activation, Desktop-Experience, NET-Framework-45-Features, RPC-over-HTTP-proxy, RSAT-Clustering, RSAT-Clustering-CmdInterface, RSAT-Clustering-Mgmt, RSAT-Clustering-PowerShell, Web-Mgmt-Console, WAS-Process-Model, Web-Asp-Net45, Web-Basic-Auth, Web-Client-Auth, Web-Digest-Auth, Web-Dir-Browsing, Web-Dyn-Compression, Web-Http-Errors, Web-Http-Logging, Web-Http-Redirect, Web-Http-Tracing, Web-ISAPI-Ext, Web-ISAPI-Filter, Web-Lgcy-Mgmt-Console, Web-Metabase, Web-Mgmt-Console, Web-Mgmt-Service, Web-Net-Ext45, Web-Request-Monitor, Web-Server, Web-Stat-Compression, Web-Static-Content, Web-Windows-Auth, Web-WMI, Windows-Identity-Foundation

… close the IIS manager then execute iisreset command.  This did not fix my issue but probably nice to know for other environments.

We went on to try and recreate the web services directories with the following cmdlets:

Remove-WebServicesVirtualDirectory -Identity "ServerName\EWS (Default Web Site)"

Remove-WebServicesVirtualDirectory -Identity "ServerName\EWS (Exchange Back End)"

New-WebServicesVirtualDirectory -Server "ServerName" -WebSite "Default Web Site"

New-WebServicesVirtualDirectory -Server "ServerName" -WebSiteName "Exchange Back End" -role:mailbox

This did not fix the issue so we then tried to recreate the OWA virtual directories with the following cmdlets:

Remove-owavirtualdirectory -Identity "ServerName\owa (Default Web Site)"

Remove-owavirtualdirectory -Identity "ServerName\owa (Exchange Back End)"

New-owavirtualdirectory -SERVER "ServerName" -WebSite "Default Web Site"

New-owavirtualdirectory -SERVER "ServerName" -WebSiteName "Exchange Back End" -role:mailbox

We also went ahead to check the server component’s state with the cmdlet:

Get-ServerComponentState

… and all of them checked out ok.

--------------------------------------------------------------------------------------------------------------------------------------------------------------------

It was unfortunate that after 6 hours on a call with Microsoft, the engineer wasn’t able to fix it but I did appreciate the effort he put in.  Hope this helps anyone out there who may come across such an issue.

Lync Server 2013 and Avaya RCC integration logs the error: “Start-Line: SIP/2.0 481 Call Leg Does Not Exist”

$
0
0

Problem

You’re setting up an RCC integration between Lync Server 2013 and Avaya’s AES (Application Enablement Services) server and while you’ve set up all of the configuration required for Lync Server 2013, users see a No Phone System Connection error at the bottom of their Lync client:

image

Clicking on the error displays the following:

Cannot connect to the phone system.

The call control server may be temporarily unavailable. If the problem continues, please contact your support team.

clip_image002

Launching the logging tool on the front end server to perform a trace (S4 and SIP) reveals the following errors:

TL_INFO(TF_PROTOCOL) [0]1240.1694::09/18/2013-17:01:41.530.0002f184 (SIPStack,SIPAdminLog::ProtocolRecord::Flush:2436.idx(196))[2759714301] $$begin_record
Trace-Correlation-Id: 2759714301
Instance-Id: B33
Direction: outgoing;source="local"
Peer: 172.16.7.6:49478
Message-Type: response
Start-Line: SIP/2.0 481 Call Leg Does Not Exist
From: <sip:jdowling@contoso.bhl.bm>;tag=d25d5d219e;epid=ded4b550da
To: <sip:aes@aes.contoso.bhl.bm>;tag=7C025889D5D01E62305AC8F8FF841540
Call-ID: 07c2e2224dc1452fa9739adf4661a781
CSeq: 1 CANCEL
Via: SIP/2.0/TLS 172.16.7.6:49478;ms-received-port=49478;ms-received-cid=2000
Content-Length: 0
ms-diagnostics: 2;reason="See response code and reason phrase";HRESULT="0xC3E93C09(PE_E_TRANSACTION_DOES_NOT_EXIST)";source="bhllyncstd13srv.contoso.bhl.bm"
$$end_record

image

Another error reveals the following:

TL_INFO(TF_PROTOCOL) [0]1240.1694::09/18/2013-17:01:41.530.0002f184 (SIPStack,SIPAdminLog::ProtocolRecord::Flush:2436.idx(196))[2759714301] $$begin_record
Trace-Correlation-Id: 2759714301
Instance-Id: B33
Direction: outgoing;source="local"
Peer: 172.16.7.6:49478
Message-Type: response
Start-Line: SIP/2.0 481 Call Leg Does Not Exist
From: <sip:jdowling@contoso.bhl.bm>;tag=d25d5d219e;epid=ded4b550da
To: <sip:aes@aes.contoso.bhl.bm>;tag=7C025889D5D01E62305AC8F8FF841540
Call-ID: 07c2e2224dc1452fa9739adf4661a781
CSeq: 1 CANCEL
Via: SIP/2.0/TLS 172.16.7.6:49478;ms-received-port=49478;ms-received-cid=2000
Content-Length: 0
ms-diagnostics: 2;reason="See response code and reason phrase";HRESULT="0xC3E93C09(PE_E_TRANSACTION_DOES_NOT_EXIST)";source="bhllyncstd13srv.contoso.bhl.bm"
$$end_record

image

In some situations, you may also see the following error logged:

TL_INFO(TF_PROTOCOL) [0]2268.22EC::09/18/2013-15:27:57.415.004c3c79 (SIPStack,SIPAdminLog::ProtocolRecord::Flush:2436.idx(196))[2906464479] $$begin_record
Trace-Correlation-Id: 2906464479
Instance-Id: 322
Direction: incoming
Peer: aes.contoso.bhl.bm:4723
Message-Type: response
SIP/2.0 404 Not found: Session could not be established - no AD record loaded for this user
Start-Line: SIP/2.0 404 Not found: Session could not be established - no AD record loaded for this user
From: "Dowling, James"<sip:jdowling@contoso.bhl.bm>;tag=76adae21b5;epid=ded4b550da
To: <sip:aes@aes.contoso.bhl.bm>
Call-ID: e05b19021ca2409f93abeadeff04ab94
CSeq: 1 INVITE
Via: SIP/2.0/TLS 172.16.1.160:62970;branch=z9hG4bKDFE445FC.559F3707CB33968D;branched=FALSE;rport=62970,SIP/2.0/TLS 172.16.7.6:61597;ms-received-port=61597;ms-received-cid=1900
Content-Length: 0
$$end_record

image

Solution

While I’m sure there may be various reasons that would log these errors, the situation I had was actually because the Enterprise Directory information on the Avaya AES server wasn’t filled out:

image

Once I filled out the information on the AES server, RCC began to work as expected.

Installing Veeam license onto Veeam Backup and Replication 7.0 throws the error: “The provided license is not valid.” or “License is not installed.”

$
0
0

Problem

You’re attempting to install Veeam Backup and Replication 7.0 on a new Windows Server 2012 server but noticed that as you go through the install and enter the license file you received from Veeam (veeam_backup_full_0_4.lic), you are unable to proceed past Provide License step because the following error is thrown:

 The provided license is not valid.

imageimage 

image

Removing the license file and installing Veeam as trial completes without any errors so you attempt to install the license by navigating to Help –> License:

clip_image002

Select the license:

clip_image002[4]

But then receive the following error:

License is not installed.

You need to install a license before you can start using the product.

To install the license, select Menu > Help > License > Install License…

clip_image002[6]

Solution

Searching through the web didn’t provide me with much information on this error so I went ahead and opened a support call with Veeam.  The first response from the engineer was that I may have a Veeam 7 license but I’m installing it into a Veeam 6.5 install but that wasn’t the case so he told me to try opening the license file with notepad to see whether there was actually content in there and to my surprise, there wasn’t.  The .lic file was completely blank.

The engineer proceeded to tell me that he has seen a lot of clients downloading the .lic file from webmail (i.e. Exchange OWA) which ends up corrupting the file. I went back to my Outlook 2013 full client to redownload the file on my laptop and quickly saw the content.  From there, I copied the .lic file to the server which then installed fine.  Strange issue but glad it was a quick fix.  One last point I’d like to try and make is that I asked the engineer whether I could just copy the license file contents to the another notepad then save it as a .lic file and he said no because that wouldn’t work.  Hope this helps anyone who might come across the same issue.


Unable to change an ESXi 5.x server’s hostname in the vSphere client because the OK button is grayed out

$
0
0

I’ve recently been asked at least 5 times over the past 2 months a problem that may seem trivial but at the same time be quite the annoyance.  An administrator attempts to change the hostname of a newly deployed ESXi 5.x server via the vSphere client:

image

… but notices that as soon as they change the name the OK button grays out:

image

Editing the IP address doesn’t enable the button either.

The answer to this issue is actually quite simple and that is because the Domain field isn’t filled out and while you can change the hostname at the console without entering a domain, the same can’t be done in the vSphere client so to enable the OK button, simply enter a domain:

image

Definitely one of the more silly issues I’ve heard about over the past few months.

Citrix XenDesktop Desktop Studio Dashboard displays the message: “Upgrades for some services are available.” and “Services can be upgrade on the following controller:”

$
0
0

I’ve been asked a few times in the past about why the following message:

Upgrades for some services are available.

Services can be upgrade on the following controller:

<controllerFQDN>

Learn more about this upgrade

… is sometimes displayed in the Dashboard of Citrix Desktop Studio when upgrading an administrator has completed upgrading, say, all of the DDCs in a XenDesktop environment:

image

Some administrators have gone as far as telling me they’ve ran the PowerShell cmdlet:

Get-BrokerController

… and can confirm that the ControllerVersion is listed as being the same:

image

While this may seem obvious, of all the times I’ve been asked to look at this, the reason as to why this message is displayed is because not all of the hotfix update packages have been ran on the listed DDC:

clip_image001

If you were to only run the first 3 packages and not the last 4, the version number may indicate the DDC has been upgraded when in fact it is still missing packages for the hotfix update.

How to determine what version of Citrix XenDesktop is installed in an environment

$
0
0

I’ve noticed recently that I’ve been asked about how to determine what version of Citrix XenDesktop is installed in an environment so I thought I’d quickly write a post to demonstrate this.  First off, I don’t think there is a way to determine the version in Desktop Studio as I’ve been unable to find this information in the past when I browsed through the GUI so the way to do it is to use the PowerShell cmdlet:

Get-BrokerController

image

**Note the ControllerVersion field listing the DDCs as version 5.6.4.11.

Taking this version number and searching it in Google with the word Citrix appended to it should return the hotfix update Citrix article and as shown in the following screenshot, this version is Update 4:

clip_image001

Alternatively, if you’re interested in reviewing what version a hotfix update is, you can navigate down towards the bottom of the webpage and locate the Component Versions heading to determine what version the hotfix is:

clip_image001[4]clip_image001[6]

**Note that the 2 screenshots above is Update 7.

Finding a virtual machine in VMware vSphere by the MAC address

$
0
0

I recently had to troubleshoot an issue within a Citrix XenDesktop environment hosted on VMware vSphere 5.1 where one of the DDC (Desktop Delivery Controllers) appeared to have an IP conflict with another VM:

image

So the good news is that I have the MAC address of the conflicting device: 00-50-56-91-33-B4 but the bad news is that when I look this MAC address on a MAC finder site such as:

http://www.coffer.com/mac_find/

image

… I get the following result:

image

Great, it’s a VMware device and I have over hundreds of VMs hosted.

As there isn’t a way to list VMs or search via MAC addresses in the vSphere Client, I had to resort to using PowerShell.  I’m not much of an expert with PowerShell cmdlets since I don’t really use them on a daily basis so I dug up one of my old posts:

Bulk changing port group settings for virtual machines in vSphere 5 with vSphere PowerCLI
http://terenceluk.blogspot.com/2012/02/bulk-changing-port-group-settings-for.html

… which gave me the cmdlet:

Get-VM -Location “XenDesktop VDI Master Images” | Get-NetworkAdapter

The cmdlet gave me a starting point to

Get-VM | Get-NetworkAdapter | Where {$_.MacAddress -eq “00:50:56:91:33:b4”}

image

Unfortunately as shown in the screenshot above, this cmdlet gives me all of the network details of the offending VM but not the name of it.  The way around this is to use the Format-List (or FL for the short form) cmdlet to list all of the properties for the VM including the name as shown here:

image

Note that the name of the VM is the value for Parent.

Connectivity issues between Citrix XenDesktop DDC and virtual desktops causing intermittent connectivity issues and inability to connect

$
0
0

Problem

You notice that you are having connectivity issues between various virtual desktops where it would be in Ready status for a few minutes then switches to Unregistered.  Logging onto your Citrix XenDesktop virtual desktop shows the following event IDs logged:

  • Warning Event ID 1014
  • Warning Event ID 1002
  • Warning Event ID 1017
  • Warning Event ID 1022
  • Warning Event ID 1012
  • Warning Event ID 1048
  • Information Event ID 0
  • Warning Event ID 1001

image

Warning Event ID 1014

The Citrix Desktop Service lost contact with the Citrix Desktop Delivery Controller Service on server 'svrctxddc02.contoso.internal'.

The service will now attempt to register again.

Error details:

Exception 'There was no endpoint listening at http://10.2.1.21/Citrix/CdsController/IRegistrar that could accept the message. This is often caused by an incorrect address or SOAP action. See InnerException, if present, for more details.' of type 'System.ServiceModel.EndpointNotFoundException'

image

Warning Event ID 1002

The Citrix Desktop Service cannot connect to the delivery controller 'http://svrctxddc02.contoso.internal:80/Citrix/CdsController/IRegistrar' (IP Address '10.2.1.21')
Check that the system clock is in sync between this machine and the delivery controller. If this does not resolve the problem, please refer to Citrix Knowledge Base article CTX117248 for further information.
Error Details:
Exception 'Error occurred when attempting to connect to endpoint at address
http://svrctxddc02.contoso.internal:80/Citrix/CdsController/IRegistrar, binding WsHttpBindingIRegistrarEndpoint and contract Citrix.Cds.Protocol.Controller.IRegistrar: System.ServiceModel.EndpointNotFoundException: There was no endpoint listening at http://10.2.1.21/Citrix/CdsController/IRegistrar that could accept the message. This is often caused by an incorrect address or SOAP action. See InnerException, if present, for more details. ---> System.Net.WebException: The remote server returned an error: (404) Not Found.
   at System.Net.HttpWebRequest.GetResponse()
   at System.ServiceModel.Channels.HttpChannelFactory.HttpRequestChannel.HttpChannelRequest.WaitForReply(TimeSpan timeout)
   --- End of inner exception stack trace ---
Server stack trace:
   at System.ServiceModel.Security.IssuanceTokenProviderBase`1.DoNegotiation(TimeSpan timeout)
   at System.ServiceModel.Security.SspiNegotiationTokenProvider.OnOpen(TimeSpan timeout)
   at System.ServiceModel.Channels.CommunicationObject.Open(TimeSpan timeout)
   at System.ServiceModel.Security.SymmetricSecurityProtocol.OnOpen(TimeSpan timeout)
   at System.ServiceModel.Channels.CommunicationObject.Open(TimeSpan timeout)
   at System.ServiceModel.Channels.SecurityChannelFactory`1.ClientSecurityChannel`1.OnOpen(TimeSpan timeout)
   at System.ServiceModel.Channels.CommunicationObject.Open(TimeSpan timeout)
   at System.ServiceModel.Security.SecuritySessionSecurityTokenProvider.DoOperation(SecuritySessionOperation operation, EndpointAddress target, Uri via, SecurityToken currentToken, TimeSpan timeout)
   at System.ServiceModel.Security.SecuritySessionSecurityTokenProvider.GetTokenCore(TimeSpan timeout)
   at System.IdentityModel.Selectors.SecurityTokenProvider.GetToken(TimeSpan timeout)
   at System.ServiceModel.Security.SecuritySessionClientSettings`1.ClientSecuritySessionChannel.OnOpen(TimeSpan timeout)
   at System.ServiceModel.Channels.CommunicationObject.Open(TimeSpan timeout)
   at System.ServiceModel.Channels.ServiceChannel.OnOpen(TimeSpan timeout)
   at System.ServiceModel.Channels.CommunicationObject.Open(TimeSpan timeout)
Exception rethrown at [0]:
   at System.Runtime.Remoting.Proxies.RealProxy.HandleReturnMessage(IMessage reqMsg, IMessage retMsg)
   at System.Runtime.Remoting.Proxies.RealProxy.PrivateInvoke(MessageData& msgData, Int32 type)
   at System.ServiceModel.ICommunicationObject.Open()
   at Citrix.Cds.BrokerAgent.ControllerConnectionFactory.AttemptConnection[T](EndpointReference endpoint, Boolean throwOnError, Boolean allowNtlmAuthentication, String connectUsingIpThisIpAddress, Boolean cacheFactory)' of type 'Citrix.Cds.BrokerAgent.ConnectionFailedException'..

image

Warning Event ID 1017

The Citrix Desktop Service failed to register with any delivery controller.
The service will retry registering with controllers in approximately 17 seconds.
Please ensure that at least one delivery controller is available for Virtual Desktop Agents to register with. Refer to Citrix Knowledge Base article CTX117248 for further information

image

Warning Event ID 1022

The Citrix Desktop Service failed to register with any controllers in the last 2 minutes.

The service will now try to register with controllers at a reduced rate of every 2 minutes.

image

Warning Event ID 1012

The Citrix Desktop Service successfully registered with delivery

controller svrctxddc01.contoso.internal (IP Address 10.2.1.20).

The endpoint address of the controller is http://svrctxddc01.contoso.internal:80/Citrix/CdsController/IRegistrar.

image

Warning Event ID 1048

The Citrix Desktop Service is re-registering with the DDC: 'NotificationManager:NotificationServiceThread: WCF failure or rejection by broker (DDC: svrctxddc01.contoso.internal)'

image

From here, you get another informationalEvent ID 0:

The description for Event ID 0 from source Self-service Plug-in cannot be found. Either the component that raises this event is not installed on your local computer or the installation is corrupted. You can install or repair the component on the local computer.

If the event originated on another computer, the display information had to be saved with the event.

The following information was included with the event:

Self-service Plug-in started (user=Contoso\hleaback).

the message resource is present but the message is not found in the string/message table

image

Then the event ID 1001 warning:

The Citrix Desktop Service failed to obtain a list of delivery controllers with which to register.
Please ensure that the Active Directory configuration for the farm is correct, that this machine is in the appropriate Active Directory domain and that one or more delivery controllers have been fully initialized.
Refer to Citrix Knowledge Base article CTX117248 for further information.
Error details:
Exception 'The communication object, System.ServiceModel.Channels.ServiceChannel, cannot be used for communication because it is in the Faulted state.' of type 'System.ServiceModel.CommunicationObjectFaultedException'

image

The logs then repeat again.

On the actual Citrix XenDesktop DDC, you see the following event IDs logged:

  • Warning Event ID 1060
  • Warning Event ID 1039
  • Information Event ID 1066

image

Warning Event ID 1060

The Citrix Broker Service failed to apply settings on the virtual machine 'VDI-HOLLY.contoso.internal'.

Check that the virtual machine can be contacted from the controller and that any firewall on the virtual machine allows connections from the controller. See Citrix Knowledge Base article CTX126992.

Error details:

Exception 'The request channel timed out while waiting for a reply after 00:00:59.9919992. Increase the timeout value passed to the call to Request or increase the SendTimeout value on the Binding. The time allotted to this operation may have been a portion of a longer timeout.' of type 'System.TimeoutException'.

image

Warning Event ID 1039

The Citrix Broker Service failed to contact virtual machine 'VDI-MARINA.contoso.internal' (IP address 10.2.1.51).
Check that the virtual machine can be contacted from the controller and that any firewall on the virtual machine allows connections from the controller. See Citrix Knowledge Base article CTX126992.
Error details:
Exception 'Client is unable to finish the security negotiation within the configured timeout (00:00:04.9989999).  The current negotiation leg is 1 (00:00:04.9989999).  ' of type 'System.TimeoutException'.

image

Information Event ID 1066

The Citrix Broker Service successfully determined the base settings needed for the Virtual Desktop Agent of machine 'VDI-HOLLY.contoso.internal'.

image

Solution

While there can be multiple reasons as to why these errors would be thrown, I’ve found that these generally point to communications issues between the Citrix XenDesktop DDC and the actual VDA agent (the virtual desktop).  I’ve seen time drift between the DDC and the VDA agent causing such an issue and lately, a duplicate IP address for the Citrix XenDesktop DDC on the network where the DDC is not completely offline but the VDA agent is able to sometimes successfully send traffic to the DDC and sometimes unable to.  If you to encounter these warnings and notice your VDI is listed as unregistered in the Desktop Studio, check that there are no issues between the subnets of your VDI and DDC, no port issues and certainly no IP conflicts.

Viewing all 836 articles
Browse latest View live


<script src="https://jsc.adskeeper.com/r/s/rssing.com.1596347.js" async> </script>