Quantcast
Channel: Terence Luk
Viewing all 836 articles
Browse latest View live

Attempting to add an Exchange 2010 server to a DAG throws the error: “WARNING: Network name 'DAG-01' is not online. Please check that the IP address configuration for the database availability group is correct.”

$
0
0

Problem

You attempt to add a newly built Exchange 2010 mailbox server to an existing DAG but receive the following error:

[PS] C:\Windows\system32>Add-DatabaseAvailabilityGroupServer -Identity DAG-01 -MailboxServer MBX-01
WARNING: Network name 'DAG-01' is not online. Please check that the IP address configuration for the database
availability group is correct.
[PS] C:\Windows\system32>

image

Solution

While there are probably many different reasons why this error would be thrown, the issue I had was because I had an incorrect subnet mask.  The environment I was working in had a /16 subnet for their server subnet (don’t ask me why) and I had incorrectly used a /24:

clip_image002

Once I corrected the subnet mask to a /16:

clip_image002[4]

The Add-DatabaseAvailabilityGroupServer cmdlet ran successfully and the new mailbox database was added to the DAG:

image

image


Exchange 2010 Server DAG Seeding Errors

$
0
0

I recently had to rebuild a failed Exchange 2010 server that was a part of a DAG and while the rebuild went quite smoothly, I had quite a few issues reseeding the database back onto the new server so I thought it would be good to blog 2 of the main issues I had:

Problem #1

Attempting to add a mailbox database copy with the cmdlet Add-MailboxDatabaseCopy throws the error:

[PS] C:\Windows\system32>Add-MailboxDatabaseCopy -Identity "EXDB-02" -MailboxServer MBX-01
A source-side operation failed. Error An error occurred while performing the seed operation. Error: Failed to open a lo
g truncation context to source server 'MBX-02.someDomain.NET'. Hresult: 0xfffffae7. Error: The database was eithe
r not found or was not replicated.. [Database: EXDB-02, Server: MBX-01.someDomain.NET]
    + CategoryInfo          : InvalidOperation: (:) [Add-MailboxDatabaseCopy], SeedInProgressException
    + FullyQualifiedErrorId : 89031D8B,Microsoft.Exchange.Management.SystemConfigurationTasks.AddMailboxDatabaseCopy

[PS] C:\Windows\system32>

image

You notice that the mailbox server has been added as one of the servers for the mailbox database but the Copy Status is listed as Suspended:

image

You attempt to use the Resume Database Copy option in the EMC to resume the seeding:

image

image

… but notice that the Copy Status quickly changes into Failed and Suspended:

image

Alternatively, if you use the EMC to add the mailbox database copy, you see the following error:

Summary: 1 item(s). 0 succeeded, 1 failed.
Elapsed time: 00:00:34


EXDB-02
Failed

Error:
A source-side operation failed. Error An error occurred while performing the seed operation. Error: An error occurred while processing a request on server 'MBX-02'. Error: Couldn't open backup file handle for database 'EXDB-02' to server 'MBX-02'. Hresult: 0x50d. Error: A database backup is already in progress. Please verify that no other seeding or incremental reseeding operations are started for this database, and then try the operation again by rerunning the Update-MailboxDatabaseCopy cmdlet.. [Database: EXDB-02, Server: MBX-01.someDomain.NET]

An error occurred while processing a request on server 'MBX-02'. Error: Couldn't open backup file handle for database 'EXDB-02' to server 'MBX-02'. Hresult: 0x50d. Error: A database backup is already in progress. Please verify that no other seeding or incremental reseeding operations are started for this database, and then try the operation again by rerunning the Update-MailboxDatabaseCopy cmdlet.

Couldn't open backup file handle for database 'EXDB-02' to server 'MBX-02'. Hresult: 0x50d. Error: A database backup is already in progress. Please verify that no other seeding or incremental reseeding operations are started for this database, and then try the operation again by rerunning the Update-MailboxDatabaseCopy cmdlet.
Click here for help...
http://technet.microsoft.com/en-US/library/ms.exch.err.default(EXCHG.141).aspx?v=14.2.247.1&t=exchgf1&e=ms.exch.err.Ex4543D9

Exchange Management Shell command attempted:
Add-MailboxDatabaseCopy -Identity 'EXDB-02' -MailboxServer 'MBX-01' -ActivationPreference '2'

Elapsed Time: 00:00:34

image

As ridiculous as may sound, the way I got the seeding to work was to dismount all of the databases on the active server (the one that wasn’t rebuilt), restart the server, mount the databases, and started the seeding. 

Problem #2

You notice that while the seeding of a database starts and seemingly completes, the Copy Status ends up being as Failed and Suspended:

image

… if you attempt to resume the seeding, the Copy Status will end up being Failed.

Another symptom observed is that the logs on the active database are not truncated even if you turn on circular logging.

Also, you notice the following event logged on the active server:

Exchange Search Indexer has temporarily disabled indexing of the mailbox database EXDB-01 (GUID = 52c3b6c8-c3ef-4912-8b04-e6f7e3eeb438) due to an error (Microsoft.Mapi.MapiExceptionMdbOffline: MapiExceptionMdbOffline: Unable to read events. (hr=0x80004005, ec=1142)
Diagnostic context:
    Lid: 33865 
    Lid: 1494    ---- Remote Context Beg ----
    Lid: 44215 
    Lid: 60049   StoreEc: 0x8004010F
    Lid: 49469 
    Lid: 65341   StoreEc: 0x8004010F
    Lid: 56125 
    Lid: 47933   StoreEc: 0x8004010F
    Lid: 32829 
    Lid: 49213   StoreEc: 0x8004010F
    Lid: 48573 
    Lid: 64957   StoreEc: 0x8004010F
    Lid: 20057   StoreEc: 0x476    
    Lid: 1750    ---- Remote Context End ----
    Lid: 28777   StoreEc: 0x476    
    Lid: 20098 
    Lid: 20585   StoreEc: 0x476    
   at Microsoft.Mapi.MapiExceptionHelper.ThrowIfError(String message, Int32 hresult, SafeExInterfaceHandle iUnknown, Exception innerException)
   at Microsoft.Mapi.MapiEventManager.ReadEvents(Int64 startCounter, Int32 eventCountWanted, Int32 eventCountToCheck, Restriction filter, ReadEventsFlags flags, Boolean includeSid, Int64& endCounter)
   at Microsoft.Exchange.Search.RetriableOperations.ReadEvents(ThreadLocalCrawlData unused1, MapiEventManager eventManager, Int64 watermark, Int32 eventCount, Int64& endCounter)
   at Microsoft.Exchange.Search.RetriableOperations.DoRetriableMapiOperation[SourceType,ReturnType,Parameter1Type,Parameter2Type,Parameter3Type](ThreadLocalCrawlData crawlData, SourceType source, Parameter1Type parameter1, Parameter2Type parameter2, Parameter3Type& parameter3, MapiOperationDelegate`5 operationDelegate)
   at Microsoft.Exchange.Search.NotificationWatcher.GetMapiEvents(Int32 maxEvents, NotificationQueue notificationQueue, Int64& endCount)
   at Microsoft.Exchange.Search.NotificationWatcher.NotificationWatcherThread()), and Operations Manager would never alert it.

image

What ended up fixing this issue for me was to rebuild the full-text index catalog for all of my mailbox databases as per the following KB:

How to Rebuild the Full-Text Index Catalog
http://technet.microsoft.com/en-us/library/aa995966(EXCHG.80).aspx

**Note that the article states that it applies to Exchange 2007 but it works for 2010 as well.

image

Then proceeded to dismount and remount the database that wasn’t truncating the logs to get the logs to truncate.

Once the problematic database was back in good health, I was able to reseed the database onto the new mailbox server without running into the same issue.

Attempting to P2V a Windows 2003 SBS Server with VMware Converter fails with: “FAILED: An error occurred during the conversion: ‘BlockLevelVolumeCloneMgr::CloneVolume: Detected a write error during the cloning of volume \WindowsBitmapDriverVolumeID=[04-D4-91-3A-00-20-D8-07-00-00-00-00]. Error: 67109009 (type: 1, code: 4194313)’”

$
0
0

A colleague of mine recently called me during a P2V operation using the VMware Standalone Converter on an older Dell Tower with Windows 2003 SBS server.  He noticed that the cloning process would briefly start and then fail within 10 minutes with the following error:

Error: Unable to clone volume ‘C:’.

image

FAILED: An error occurred during the conversion: ‘BlockLevelVolumeCloneMgr::CloneVolume: Detected a write error during the cloning of volume \WindowsBitmapDriverVolumeID=[04-D4-91-3A-00-20-D8-07-00-00-00-00]. Error: 67109009 (type: 1, code: 4194313)’

imageimageimageimage

Seeing how the error message was seemingly referencing a bad block on the C drive, I asked him to run a chkdsk /f on the C (note that running a chkdsk on a system drive requires a reboot) as well as any other data drives that were on the server.  My colleague went ahead and ran chkdsk on all of the drives and while some errors were detected and were fixed, the cloning would continue to fail.

After giving it a bit of thought, I asked if he had stopped all of the services (i.e. databases, Exchange, backup agents) on the SBS server prior to launching the cloning operation and the answer was no so I told him to proceed to do so and he was then able to successfully convert the SBS server to a virtual machine:

image

While I can’t really say what service caused the issue, I hope this post will help anyone running into the same issue as I found very little information when trying to search for the error on the internet.

Robocopy script for copying and synchronizing files and folders when migrating Windows file servers

$
0
0

I’m not sure why I haven’t blogged this Robocopy script that I’ve been using over the last 10 years to migrate servers until today when I had trouble finding it because it was in my old emails.  In any case, the following script will mirror the directories between the source and destination servers.  Note that this script uses the /MIR switch which will ensure that the destination folder is completely the same as the source.  This means that if there is a file on the destination folder that isn’t found on the source, it will get deleted so if you accidentally try to mirror an empty source folder that doesn’t contain files with a destination folder that does, all the contents will get deleted!

With dangerous of this script stated, I typically use this script to continuously synchronize files and folders along with the NTFS permissions from an older production file server and a to become production new file server until the night of the cutover when I perform one final synchronization then migrate over.  For information on the switches that are being used, see the following URL:

http://technet.microsoft.com/en-us/library/cc733145.aspx

@ECHO OFF
SETLOCAL

FOR /f "tokens=1-4 delims=/ " %%a in ('date /t') do set vl=%%b%%c%%d
FOR /f "tokens=1-4 delims=/: " %%a in ('time /t') do set tl=%%a_%%b%%c%%dm

SET _source="\\sourceServerName\f$"

SET _dest="\\destinationServerName\f$"


SET _what=/COPYALL /B /SEC /E /MIR /Z
:: /COPYALL :: COPY ALL file info
:: /B :: copy files in Backup mode.
:: /SEC :: copy files with SECurity
:: /E :: copy subdirectories, including Empty ones
:: /MIR :: MIRror a directory tree
:: /Z :: Copy files in restartable mode (survive network glitch).

SET _options=/XO /XF *.LCK /R:5 /W:5 /LOG:Log-SourceServertoDestinationServer_%vl%_%tl%.txt /NFL /NDL /IPG:5
:: /XO :: eXclude Older - if destination file exists and is the same date or newer than the source - don't bother to overwrite it.
:: /XF :: eXclude Files matching given names/paths/wildcards.
:: /R:n :: number of Retries
:: /W:n :: Wait time between retries
:: /LOG :: Output log file
:: /NFL :: No file logging
:: /NDL :: No dir logging
:: /IPG:n :: Inter-Packet Gap (ms), to free bandwidth on slow lines
:: /MON:n :: minimum number of changes that must occur before Robocopy runs again
:: /MOT:m :: minimum time, in minutes, that must elapse before Robocopy runs again


ROBOCOPY %_source% %_dest% %_what% %_options%

--------------------------------------------------------------------------------------------------------------------------------------------------------------------

One of the other switches I commonly use that is not included in the script is the:

/xd <Directory>[ ...]

… that is used to exclude full directories.  This switch comes in handy when you’re trying to copy contents between DFS shares where there a DFS system subfolders handling conflicts.

Newly P2V / VMware Converter converted HP DL series server hangs on Windows startup

$
0
0

It has probably been 4 or 5 years since I’ve had to P2V old HP DL380 G3 servers with Windows Server 2003 but a recent datacenter virtualization project I’ve been involved in had 2 full racks of them. Going through the motions of virtualizing the servers with VMware Converter brought back good memories as well as reminded me of all the issues I’ve had in the past with these servers where one of them was when a newly converted server would hang at various startup phases for hours and seemingly never really load the operating system properly.

Observe the first screenshot of the:

Please wait…

Preparing network connections…

image

… process. I could walk around from the virtual machine for an hour, come back and still see this screen being the same. The next screenshot:

Please wait…

Loading your personal settings…

image

… comes after you’re able to log in and also seemingly takes hours until it loads into the blue desktop wallpaper. In any event, you could wait for hours or days and the server wouldn’t boot or load any faster. I still remember the first time I came across this 5 years ago and how frustrating it was so in hopes that I can save someone else’s frustration, the way to fix this is to restart Windows in safe mode then open the services console as such:

image

From here, disable all of the HP services so that they don’t start. Notice that you may be prompted with a Found New Hardware Wizard but you should just ignore it because it will go away when you install VMware tools.

image

Once all the HP services have been disabled, proceed by restarting the server and you should notice that the boot and login times will revert back to normal. Once in the OS, perform the post virtualization cleanup process (remove unneeded applications, hidden devices that no longer exist, etc.

How to remove or uninstall the HP Network Configuration Utility

$
0
0

I recently had to virtualize a few racks of HP DL380 G3 servers which I haven’t had to do for years and remembered how annoying some of the HP applications on these servers can be. One of the applications that you won’t be able to uninstall via the Add/Remove Programs is the HP Network Configuration Utility as shown in the following screenshot:

image

Opening the utility shows there isn’t an option to disable or uninstall:

image

The way to uninstall it is to actually open the NIC’s properties begin by open the Network Connections window:

image

Open the properties of a NIC:

image

Highlight the HP Network Configuration Utility line item and click on the Uninstall button:

image

You will be asked to reboot upon completing the uninstall:

image

Proceed to restart the server:

image

The HP Network Configuration Utility should no longer be in the system tray once the server has restarted:

image s

Mounting USB drives directly to a virtual machine on an ESXi 5.x host

$
0
0

I’ve been asked several times recently what the process is to mount a USB drive directly to a virtual machine when one is plugged directly to a host and as easy as it really is, I find most people run into problems because they tend to miss the last step so I thought I’d write a blog post for it.

Start by plugging the USB drive into the ESXi host’s USB port and ensure that it’s lit up if there is a LED light somewhere on the drive.

Once the drive is plugged in, proceed with opening the settings of the virtual machine you would like to mount the USB drive and click on the Add button in the settings windows:

image

Select the USB Controller as the device you would like to add and click on Next:

image

Select the Controller type that is supported by the virtual machine operating system (EHCI+UHCI) and click on Next:

image

--------------------------------------------------------------------------------------------------------------------------------------------------------------------

Note that I will receive the warning This controller is not supported for this guest operating system. if I change the type to xHCI:

image

--------------------------------------------------------------------------------------------------------------------------------------------------------------------

Click on the Finish button to add the device:

image

You should now see a USB controller added to the virtual machine:

image 

I find that this is the point where a lot of clients and colleagues ask me my they don’t see the USB hard drive in the virtual machine.  Some say they’ve fiddled around the USB device button found on the console window but don’t see a way to mount the drive:

image

The reason why the drive isn’t shown is that an important step still needs to be done to actually present the USB drive to the virtual machine so proceed and open up the settings window again and click on the Add button:

image

Notice that the available device types in the list now contains USB Device.  Proceed by select the device and click Next:

image

Notice that the USB drive you plugged into is listed as a host USB device.  Select the device if there is more than 1 and click Next:

image

--------------------------------------------------------------------------------------------------------------------------------------------------------------------

Note that if a USB drive is already connected to a virtual machine, the Connection column will indicate which virtual machine it is connected to as shown here:

image

--------------------------------------------------------------------------------------------------------------------------------------------------------------------

Click on Finish:

image

You should now see a USB controller and a USB 1 device representing the USB drive in the settings window:

image

Proceed by closing the settings window and you should now see the USB drive in your virtual machine:

image

This is definitely seemingly an easy task but believe me when I say I’ve been asked a lot of times about this.

Installing Microsoft SQL Server 2012 on Windows Server 2012 throws the error: “Error while enabling Windows feature : NetFx3, Error Code : -2146498298 , Please try enabling Windows feature : NetFx3 from Windows management tools and then run setup again.”

$
0
0

Problem

You’re installing Microsoft SQL Server 2012 on Windows Server 2012 but notice that the install fails with the error:

Error while enabling Windows feature : NetFx3, Error Code : -2146498298 , Please try enabling Windows feature : NetFx3 from Windows management tools and then run setup again. For more information on how to enable Windows features , see http://go.microsoft.com/fwlink/?linkid=227143

image

Solution

The solution is actually quite simple and that is to install .NET Framework 3.5 onto the Windows Server 2012 server via adding features in the Server Manager console:

image 

image

Note the yellow banner in the following screenshot notifying you to specify the installation Windows Server 2012 binaries to proceed:

image 

Make sure you specify the source or the install will fail:

image 

image 

image

With the .NET Framework 3.5 installed, SQL Server 2012 will now install successfully.


Creating a new XenDesktop 5.6 deployment with SQL Server 2012 throws the error: “Cannot write Property Collation. This Property is not available on SQL Server 7.0”

$
0
0

Problem

You attempt to create a new XenDesktop 5.6 deployment with SQL Server 2012 as the back end server but receive the following error when configuring the first desktop delivery controller: 

Cannot write Property Collation. This Property is not available on SQL Server 7.0

image

Clicking on the Details button displays the following error details:

Exception:

    System.Reflection.TargetInvocationException Exception has been thrown by the target of an invocation.

       at Citrix.Console.Common.CallbackEventArguments.OperationCompleteSynchronizer`1.GetResults()

       at Citrix.Console.Common.CallbackEventArguments.OperationCompleteSynchronizer`1.WaitForResults()

      at Citrix.Console.DeliveryCenter.UI.Dialogs.FullDesktopDeploymentWizardViewModel.Commit()

       at Citrix.Console.CommonControls.Wizard.ViewModel.PageContainerViewModel.CommitProgressOperation.PerformOperationInternal()

Inner exception:

    Microsoft.SqlServer.Management.Smo.UnknownPropertyException Cannot write property Collation.This property is not available on SQL Server 7.0.

       at Citrix.Console.InteractionCore.ThreadedScript`1.<ExecuteNext>d__9.MoveNext()

       at Citrix.Console.InteractionCore.ScriptBase.<ExecuteImplementation>d__1.MoveNext()

       at Citrix.Console.InteractionCore.Scheduler.ExecuteNext(ScriptExecution execution)

    HelpLink.ProdName : Microsoft SQL Server

    HelpLink.BaseHelpUrl : http://go.microsoft.com/fwlink

    HelpLink.LinkId : 20476

    HelpLink.ProdVer : 10.50.1600.1 ((KJ_RTM).100402-1540 )

    HelpLink.EvtData1 : Collation

image

You’ve gone through the following KBs:

Microsoft SQL 2012 - Citrix Known Issues – 2012
http://support.citrix.com/article/CTX133393

Unable to Create New XenDesktop Site Using SQL 2012 Server
http://support.citrix.com/article/CTX132438

… and proceed to download the:

Shared Management Object Library from:

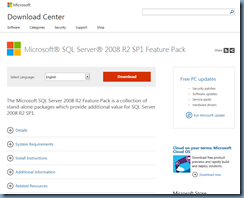
Microsoft® SQL Server® 2008 R2 SP1 Feature Pack. Installing the Service Pack 1
http://www.microsoft.com/en-us/download/details.aspx?id=26728

clip_image001

clip_image001[4]

Then proceed to install it on the DDC via executing SharedManagementObjects.msi:

image

clip_image001[6]

clip_image001[8]

clip_image001[10]

… but notice you still get this error:

image

Solution

The solution was actually quite simple and that was to restart the server.

Notes on Security Banner and IE Settings for Citrix XenApp servers

$
0
0

After realizing that I had to dig deep into my notes and search for registry settings on the web that I’ve used multiple times over the years, I thought I’d write a post to serve as something for me to reference in the future when I’m trying to create a Active Directory GPO for the following:

Prevent the corporate security banner from being presented:

Computer Configuration –> Policies –> Windows Settings –>Security Settings –> Local Policies –> Security Options:

  • Interactive logon: Message text for users attempting to log on –> Enabled
  • Interactive logon: Message title for users attempting to log on –> Enabled

clip_image001clip_image001[4]

Prevent the annoying IE first launch prompts from being presented:

User Configuration –> Policies –> Administrative Templates –> Windows Components –> Internet Explorer:

  • Prevent participation in the Customer Experience Improvement Program –> Enabled
  • Prevent running First Run wizard –> Enabled

Prevent the IE Protected Mode banner not enabled from popping up in the browser:

User Configuration –> Preferences –> Windows Settings –> Registry:

  • Action –> Create
  • Hive –> HKEY_CURRENT_USER
  • Key Path –> Software\Microsoft\Internet Explorer\Main
  • Value name –> NoProtectedModeBanner
  • Value type –> REG_DWORD
  • Value data –> 1
  • Base –> Decimal

clip_image001[6]

Since the latter 2 policies are applied to the user, loopback processing mode is enabled and set to Merge

Computer Configuration –> Policies –> Administrative Templates –> System –> Group Policy:

  • Configure user Group Policy loopback processing mode –> Enabled / Merge

--------------------------------------------------------------------------------------------------------------------------------------------------------------------

For easy reference, the following is a screenshot of the policy settings:

image

Citrix XenDesktop 5.6 Create Catalog “Select Master Image” step throws the error: “Error expanding node”

$
0
0

I recently received a call from a client who was deploying a new Citrix XenDesktop infrastructure and was able to get all the way to creating his first desktop catalog but the wizard would fail with the following error:

Error expanding node

clip_image001clip_image001[4]

What was interesting was that he told me it would only sometimes throw this error and sometimes it wouldn’t.  There were also no errors logged in the event viewer on the Windows Server 2008 R2 DDC.

Having browsed around the server reviewing the configuration and logs for 10 minutes without any noticeable errors, I went ahead and searched for the error which brought me to this KB:

Catalog Creation Master Image Selection Fails with Error expanding node
http://support.citrix.com/article/CTX133616

While the details in the KB wasn’t an exact match to my problem and the resolution didn’t fix my problem, it did give me a hint that this was most likely a connectivity issue to the vCenter from the DDC.  After ensuring name resolution, routes and ports were all working as it should, I realized that maybe this was a certificate issue because since there were 2 DDCs in the Citrix environment, maybe only 1 of them was working. 

To make a long story short, I realized that DDC01 had the vCenter certificate stored in the Trusted People Local Computer store but DDC02 didn’t.  After getting the certificate into DDC02, the error went away.

Using custom attributes in Exchange Server 2013 to apply different email address policies

$
0
0

I was recently asked about what the best approach would be to apply 4 or more different email address policies from within Exchange Server 2013 and as most would probably have probably done the same, the first question I asked was:

Is it possible to use one of the following to distinguish which emaila ddress policy to use?

  1. Recipient container
  2. State or province
  3. Company
  4. Department

… because as most administrators would know, these are the default rules available to filter recipients for configured email address policies:

image

Unfortunately for this environment, I was told that this was not possible because the fields populated for all of the recipients were the same and that cannot be changed.  Since the default attributes could not be used, the next option I proposed was to use the Custom attribute filters and as easy as this may seem, a small typo on Custom Attributes article on TechNet:

http://technet.microsoft.com/en-us/library/ee423541(v=exchg.150).aspx

image

**Note the missing “-“ for the CustomAttribute1 switch.

… threw off this client who was trying to set the value for his recipients. 

[PS] C:\Windows\system32>Get-Mailbox -Identity "Erik Tiller" | Set-Mailbox CustomAttribute1 "some-customAttribute"
A positional parameter cannot be found that accepts argument 'some-customAttribute'.
    + CategoryInfo          : InvalidArgument: (:) [Set-Mailbox], ParameterBindingException
    + FullyQualifiedErrorId : PositionalParameterNotFound,Set-Mailbox
    + PSComputerName        : someServer.someDomain.local

[PS] C:\Windows\system32>

image

Since the client wanted to do this himself and just wanted instructions for me, I compiled an email with the steps and thought I’d also convert it to a blog post.

Before I begin, note that creating email address policies in your Exchange 2013, or earlier versions such as 2010, Organization will not remove already assigned email addresses.  This means that if all of your recipients already have the email address: John.Smith@someDomain.local and you have since removed that domain from your accepted domain policy and from the default email address policy, users that already have this email address will continue to have it.  This is why it’s usually best to create the email address policies first before creating the mailboxes. 

I’ve also been asked several times in the past whether a PowerShell cmdlet is available to remove email addresses for all users and while I’m sure it can be done, the native Set-Mailbox policy only allows you to set or remove email addresses per user.  I’m sure administrators with advance scripting skills may be able to substitute the parameters with variables or loops to accomplish this but I don’t.  Most administrators would probably recommend ADModify to do this instead as it’s GUI based.  With that being said, if anyone has a script that can remove all users’ email addresses aside from the primary, please feel free to post in the comments section.

Begin but determining what string you are going to use to identify which email address policy to use.  The recommendation I made was to simply use the domain names in the string ordering them with the primary domain as the first, followed by a “-“ then the second domain, then the third, etc.  The following is what the email address policies look like:

image

Each of the policies have the Custom Attribute 1 defined as such:

imageimage

image

With the each email address policies configured with the Custom Attribute 1 populated, proceed with using the Set-Mailbox cmdlet (http://technet.microsoft.com/en-us/library/ee423541(v=exchg.150).aspx) to set each user’s mailbox with the appropriate tag:

Set-Mailbox -Identity "Erik Tiller" -CustomAttribute1 “domainA-domainB”

image

Repeat this for each user or group them together in some order so you can use Get-Mailbox | Set-Mailbox to set multiple mailboxes at once.

For those who are interested, the corresponding attribute for the user when viewing the value in ADSIEdit is the extensionAttribute1 attribute shown here:

image 

To for an update of all the email address policies, execute the following cmdlet:

Get-EmailAddressPolicy | Update-EmailAddressPolicy

I personally don’t like using the custom attribute because it requires more administrative effort but if the environment leaves you with no options then this would be better than not having one at all.

New Lync Server 2013 deployment’s Front-End service on Windows Server 2012 fails to start with multiple errors in event logs

$
0
0

Problem

You’ve deployed a new Lync Server 2013 deployment on a Windows Server 2012 server but noticed that immediately after successfully installing the services, issuing and assigning certificates, the Lync Server Front-End service fails to start:

image

Reviewing the Lync Server event logs show the following events:

  • Error – 12308
  • Error – 32201
  • Information – 32189
  • Error – 30941
  • Error – 32175
  • Error – 32178
  • Warning – 32174
  • Information – 32189
  • Error – 32178
  • Information – 32189
  • Error – 32178
  • Information – 32189
  • Error – 30988
  • Error – 32178

… and so on:

image

The details to the events are as follows:

Event ID Error 12309:

A component could not be started. The service has to stop.

Component: Live Communications User Services Error code: 80004005!_HRX! (Unspecified error

!_HRM!)

image

Event ID Error 32201:

Failed to flush data to backup store.

Cause: This may indicate a problem with connectivity to local or backup database or some unknown product issue.

Resolution:

Ensure that connectivity to local and backup database is proper. If the error persists, please contact product support with server traces.

image

Event ID Error 32189:

The following Fabric service for routing groups have been closed:

{8EC325CB-B512-587D-9D03-E940E7CC1490}

{8EC325CB-B512-587D-9D03-E940E7CC1490}

{8EC325CB-B512-587D-9D03-E940E7CC1490}

{8EC325CB-B512-587D-9D03-E940E7CC1490}

{8EC325CB-B512-587D-9D03-E940E7CC1490}

{8EC325CB-B512-587D-9D03-E940E7CC1490}

{8EC325CB-B512-587D-9D03-E940E7CC1490}

.

image

Event ID Error 30941:

Initialize failure.

Error code: 80004005

image 

Event ID Error 32175:

Server is being shutdown because fabric pool manager could not complete initial placement of users.

Cause: This can happen if insufficient number of Front-Ends are available in the Pool.

Resolution:

Ensure that all the Front-Ends configured for this Pool are up and running. If multiple Front-Ends have been recently decommissioned, run Reset-CsPoolRegistrarState -ResetType QuorumLossRecovery to enable the Pool to recover from Quorum Loss and make progress.

image

Event ID Error 32178:

Failed to sync data for Routing group {8EC325CB-B512-587D-9D03-E940E7CC1490} from backup store.

Cause: This may indicate a problem with connectivity to backup database or some unknown product issue.

Resolution:

Ensure that connectivity to backup database is proper. If the error persists, please contact product support with server traces.

image

Event ID Warning 32174:

Server startup is being delayed because fabric pool manager has not finished initial placement of users.

Currently waiting for routing group: {8EC325CB-B512-587D-9D03-E940E7CC1490}.

Number of groups potentially not yet placed: 1.

Total number of groups: 1.

Cause: This is normal during cold-start of a Pool and during server startup.

If you continue to see this message many times, it indicates that insufficient number of Front-Ends are available in the Pool.

Resolution:

During a cold-start of a large Pool it can take upto an hour for the placement process to finish as it needs to populate all the Front-End databases with data from the Backup Store. If the Pool is running and the Front-End is just started, this is normal for some time. If this repeats for a long time, ensure that all the Front-Ends configured for this Pool are up and running. If multiple Front-Ends have been recently decommissioned, run Reset-CsPoolRegistrarState -ResetType QuorumLossRecovery to enable the Pool to recover from Quorum Loss and make progress

image

You’ve tried using the cmdlet Reset-CsPoolRegistrarState -ResetType QuorumLossRecovery but the front-end service continues to fail to start.

Solution

For those who have came across one of my previous posts:

Lync Server 2013 Edge server replication issues on Windows Server 2012
http://terenceluk.blogspot.com/2013/04/lync-server-2013-edge-server.html

Lync Server Access Edge service fails to start with: “… service-specific error code -2146762487”
http://terenceluk.blogspot.com/2013/05/lync-server-access-edge-service-fails.html

… will know that I’ve ran into a few challenges with Lync Server 2013 Edge servers on a Windows Server 2012 operating system.  As noted in the posts above, Windows Server 2012 is more stringent when it comes to trusted certificates and actions such as mistakenly putting an intermediate certificate in the trusted root certificate store can cause replication to stop working between the Edge and front end server.  What’s unfortunate about these issues with having certificates in the incorrect / wrong store is that the event logs doesn’t mention anything remotely suggesting that the issue has to do with certificates.  In this front-end server example, the issue was caused by legacy GPOs placing intermediate QuoVadis certificates into the incorrect store as shown in the following screenshot:

image

Note that the certificates such as QuoVadis Issuing Certification Authority 2 and the others highlighted in red are all Intermediate Certificates but placed into the Trusted Root Certification Authorities:

imageimage

Having worked with various clients’ Active Directory over the past few years, I’ve noticed that something like this happens quite often so the solution is to remove the GPO that is putting the certificate into the Trusted Root Certification Authorities store and then manually deleting or move the certificates on the Lync Server to the appropriate store.  The front end server will start once the certificate issue is resolved:

image

In case anyone is looking for a solution to automate removing these certificates from other servers, have a look at one of my old posts here:

How to remove a trusted Certificate Authority from “Trusted Root Certification Authorities” certificate store on workstations in an Active Directory domain
http://terenceluk.blogspot.com/2012/05/how-to-remove-trusted-certificate.html

Unable to install Windows Server 2008 R2 onto a Cisco UCS C Series C220 M3 server with Microsoft media

$
0
0

As easy as it may seem to Cisco UCS administrators, I’ve found that people who are new to UCS typically run into bare metal Windows Server 2008 R2 installs on to Cisco UCS C Series servers.  I’m writing this blog post because I received a call yesterday from a client who purchased 4 new Cisco UCS C220 M3 servers, took a Windows Server 2008 R2 media and ran into the following issue where the RAID driver isn’t present in the media and therefore prompted the message:

Select the driver to be installed.

A required CD/DVD drive device driver is missing. If you have a driver floppy disk, CD, DVD, or USB flash drive, please insert it now.

Note: If the Windows installation media is in the CD/DVD drive, you can safely remove it for this step.

image

What the client did was go ahead to download the 3.5GB ISO package containing the UCS drivers and try to load it at this prompt.

UCS administrators would know this is not the right approach so my first response to them was to download the Unified Computing System (UCS) Server Configuration Utility to perform the install:

image 

The example I gave them for what this does was that it’s the same as HP SmartStart for HP servers.

I was curious as to whether they did any searches and was told they did but couldn’t find anything so I hope this post will help anyone in the future who may come across this problem.  The following is an old post I wrote that demonstrates what the Unified Computing System (UCS) Server Configuration Utility process looks like:

Installing Windows on a Cisco UCS C Series server with Cisco UCS Server Configuration Utility
http://terenceluk.blogspot.com/2011/07/installing-windows-on-cisco-ucs-c.html

Cisco UCS Server Configuration Utility hangs at “Initializing the kernel…” process on a Cisco UCS C220 M3 server

$
0
0

Problem

You’ve downloaded the Cisco UCS Server Configuration Utility to perform a Windows Server install on a new Cisco UCS C220 M3 server but noticed that it hangs at the:

Initializing the kernel…

image

… for a long time and never continues ending with a black screen.

Solution

I’m not sure if this is common across all Cisco UCS C servers but the cause of this issue at one of my clients was that he was using a USB Lenovo DVD-ROM drive for the install.  After trying several older version of the Cisco UCS Server Configuration Utility without any luck,I went ahead and connected through the CIMC and used the KVM console Virtual Media tab to mount the ISO and noticed that the problem went away.

Not sure if it’s the DVD-ROM drive because I didn’t have any other DVD-ROM drive available to test but I hope this post will save another person a bit of time.


Enabling TLS for Exchange Server 2010

$
0
0

I’ve recently been asked to troubleshoot why TLS wasn’t working for an Exchange 2010 server even though the obvious settings have been configured.  What I’ve found was that most administrators tend to perform only 1 of 2 steps and therefore left wondering why TLS isn’t offered by the Exchange server so this post serves to outline the steps so that I can direct anyone who runs into this issue to this blog post.

How do you know whether your Exchange server is performing opportunistic TLS?

The easiest way to determine whether the Exchange server is performing opportunistic TLS is to simply telnet to the hub transport server via port 25:

telnet localhost 25

image

**Note that I’m logged directly on the Exchange server in the screenshot above so please substitute localhost with either the external MX record or the name / IP of the hub transport server if you’re coming from the internal network.

Execute the command:

ehlo

… and look for 250-STARTTLS in the output:

image

Notice how the screenshot above does not contain the 250-STARTTLS output which means this Exchange server is not going to accept TLS connections.

Step #1 – Turn on “Enable Domain Security (Mutual Auth TLS)” or enable “DomainSecuredEnable” setting:

The settings:

  1. Enable Domain Security (Mutual Auth TLS)
  2. DomainSecuredEnable

… are actually the same as one of them is configured through the Exchange Management Console and the other is through PowerShell. 

Option #1 - Exchange Management Console:

To enable the setting in the EMC, navigate to Microsoft Exchange On-Premises –> Server Configuration –> Hub Transport and select the appropriate receive connector that receives email from the internet:

image

Open up the properties of the receive connector and navigate to the Authentication tab, then check off Enable Domain Security (Mutual Auth TLS):

imageimage

Option #2 - PowerShell:

The second way of enabling the setting is to launch PowerShell then use the Set-ReceiveConnector cmdlet.  You can also check to see if the setting is enabled by using the:

Get-ReceiveConnector <Connector Name> | FL

… and scroll to the DomainSecureEnabled setting:

image

… or execute:

Get-ReceiveConnector <Connector Name> | FLDomainSecuredEnabled

… to only display that setting.

To enable the setting, execute:

Set-ReceiveConnector <Connector Name> -DomainSecureEnabled $true -AuthMechanism TLS

image

Note how the screenshot above now displays the DomainSecureEnabled property as being True.

If you open up the properties of the receive connector, you’ll see that the Enable Domain Security (Mutual Auth TLS) setting is checked off:

image

Step #2 – Assign a certificate to the SMTP service:

I find most administrators tend to miss step 2 which is to assign a certificate to the SMTP service so ensure that you have a certificate with the CN or an entry in the SAN that matches the MX to A record name, then use the:

Get-ExchangeCertificate

… cmdlet to list the certificates:

image

Copy the Thumbprint and then execute the following cmdlet:

Enable-ExchangeCertificate -thumbprint <thumbprint of certificate> -services:SMTP

image

Note that I already had a certificate assigned so was prompted to overwrite the existing certificate.

Now when you telnet to the Exchange server, you should see the 250-STARTTLS option:

image

Unable to delete Exchange Server 2010 mailbox database with no arbitration mailboxes shown

$
0
0

Problem

You attempt to remove a mailbox database but receive the following error:

image

The mailbox database '<Mailbox Database Name>' cannot be deleted.

--------------------------------------------------------
Microsoft Exchange Error
--------------------------------------------------------
The mailbox database 'SomeName - Mailbox Database' cannot be deleted.
SomeName - Mailbox Database
Failed
Error:
This mailbox database contains one or more mailboxes, mailbox plans, archive mailboxes, or arbitration mailboxes. To get a list of all mailboxes in this database, run the command Get-Mailbox -Database <Database ID>. To get a list of all mailbox plans in this database, run the command Get-MailboxPlan. To get a list of archive mailboxes in this database, run the command Get-Mailbox -Database <Database ID> -Archive. To get a list of all arbitration mailboxes in this database, run the command Get-Mailbox -Database <Database ID> -Arbitration. To disable a non-arbitration mailbox so that you can delete the mailbox database, run the command Disable-Mailbox <Mailbox ID>. To disable an archive mailbox so you can delete the mailbox database, run the command Disable-Mailbox <Mailbox ID> -Archive. Arbitration mailboxes should be moved to another server; to do this, run the command New-MoveRequest <parameters>. If this is the last server in the organization, run the command Disable-Mailbox <Mailbox ID> -Arbitration -DisableLastArbitrationMailboxAllowed to disable the arbitration mailbox. Mailbox plans should be moved to another server; to do this, run the command Set-MailboxPlan <MailboxPlan ID> -Database <Database ID>.

--------------------------------------------------------
OK
--------------------------------------------------------

image

You attempt to use the Arbitration switch to see if there are any arbitration mailboxes left on the database but the output does not show any:

[PS] C:\Windows\system32>Get-Mailbox -Database "SomeName - Mailbox Database" -Arbitration

image

Solution

In situations where you have a forest with multiple domains and the mailbox database you’re unable to delete is located in a child domain, you will need to use the:

Set-ADServerSettings -ViewEntireForest $true

… cmdlet prior to running:

Get-Mailbox -Database "SomeName - Mailbox Database" -Arbitration

… in order to view the arbitration mailboxes such as SystemMailbox and FederatedEmail:

[PS] C:\Windows\system32>Set-ADServerSettings -ViewEntireForest $true
[PS] C:\Windows\system32>Get-Mailbox -Database "SomeName - Mailbox Database" -Arbitration
Name                      Alias                ServerName       ProhibitSendQuota
----                      -----                ----------       -----------------
SystemMailbox{1f05a927... SystemMailbox{1f0... abcmbx01         unlimited
SystemMailbox{e0dc1c29... SystemMailbox{e0d... abcmbx01         unlimited
FederatedEmail.4c1f4d8... FederatedEmail.4c... abcmbx01         1 MB (1,048,576 bytes)

[PS] C:\Windows\system32>

image

With the arbitration mailboxes now shown, proceed with moving them to another database with the cmdlet:

Get-Mailbox -Database “<Some Mailbox Database Name>” -arbitration | New-MoveRequest -TargetDatabase “<SomeOther Mailbox Database Name>” 

image

… and then try to delete the mailbox database again:

More information about the Set-AdServerSettings cmdlet can be found at the following TechNet article:

http://technet.microsoft.com/en-us/library/dd298063(v=exchg.141).aspx

Attempt to apply cumulative update database updates to Lync Server 2013 standard server fails with: “Error: An error occurred: "Microsoft.Rtc.Management.Deployment.DeploymentException" "Cannot find any suitable disks for database files. You must manually specify database paths.”

$
0
0

Problem

You attempt to apply cumulative update database updates to a Lync Server 2013 standard server with the cmdlet:

Install-CSDatabase -ConfiguredDatabases -SqlServerFqdn <standardLyncServerFQDN> -Verbose

image

… but it fails with the error:

WARNING: Install-CsDatabase failed.
WARNING: Detailed results can be found at
"C:\Users\administrator.SomeDomain\AppData\Local\Temp\2\Install-CsDatabase-6b80904
b-3c18-43c0-8568-d09c4d0406c1.html".
Install-CsDatabase : Command execution failed: Cannot find any suitable disks for database files. You must manually specify database paths.
At line:1 char:1
+ Install-CsDatabase -ConfiguredDatabases -SqlServerFqdn
lyncstd01.someDomain ...
+ ~~~~~~~~~~~~~~~~~~~~~~~~~~~~~~~~~~~~~~~~~~~~~~~~~~~~~~~~~~~~~~~~~~~~~~~~~~~~~
~~~
    + CategoryInfo          : InvalidOperation: (:) [Install-CsDatabase], Depl
   oymentException
    + FullyQualifiedErrorId : ProcessingFailed,Microsoft.Rtc.Management.Deploy
   ment.InstallDatabaseCmdlet
PS C:\Users\administrator.SomeDomain>

image

Opening the install html log in the folder C:\Users\administrator\AppData\Local\Temp\2\Install-CsDatabase-6b809… show the following:

Error: An error occurred: "Microsoft.Rtc.Management.Deployment.DeploymentException" "Cannot find any suitable disks for database files. You must manually specify database paths.

image

Solution

I find that most people who come across this error would immediately think that the upgrade process is unable to locate the Lync databases and that additional information needs to be Install-CSDatabase cmdlet.  Unfortunately, that is usually not the solution as this is usually due to insufficient drive space on the drive where the database is located.  In this example, the database is stored on the C drive and it currently only has 12GB of free drive space:

image

Most forum posts suggest that you need at least 20GBs but the first time I encountered this problem, I noticed that 16GB appeared to be sufficient:

image

image

Attempting to download Lync Server 2013 topology throws the error: “Cannot open database "xds" requested by the login. The login failed.Login failed for user 'someDomain\someAdmin'. ---> System.Data.SqlClient.SqlException: Cannot open database "xds" requested by the login. The login failed.Login failed for user 'someDomain\someAdmin'.”

$
0
0

Problem

You’re logged onto the Lync Server 2013 server and attempt to use Topology Builder to download the Lync topology:

image

… but receive the following error:

Cannot open database "xds" requested by the login. The login failed.Login failed for user 'someDomain\someAdmin'. ---> System.Data.SqlClient.SqlException: Cannot open database "xds" requested by the login. The login failed.Login failed for user 'someDomain\someAdmin'. 

The following is the complete output:

Downloading topology...
Attempting to perform the InitializeDefaultDrives operation on the 'FileSystem' provider failed.
System.Management.Automation.CmdletInvocationException: Cannot read topology. Verify that the topology data is accessible. ---> Microsoft.Rtc.Common.Data.SqlConnectionException: Cannot open database "xds" requested by the login. The login failed.Login failed for user 'someDomain\someAdmin'. ---> System.Data.SqlClient.SqlException: Cannot open database "xds" requested by the login. The login failed.Login failed for user 'someDomain\someAdmin'.   at System.Data.SqlClient.SqlInternalConnection.OnError(SqlException exception, Boolean breakConnection, Action`1 wrapCloseInAction)   at System.Data.SqlClient.TdsParser.ThrowExceptionAndWarning(TdsParserStateObject stateObj, Boolean callerHasConnectionLock, Boolean asyncClose)   at System.Data.SqlClient.TdsParser.TryRun(RunBehavior runBehavior, SqlCommand cmdHandler, SqlDataReader dataStream, BulkCopySimpleResultSet bulkCopyHandler, TdsParserStateObject stateObj, Boolean& dataReady)   at System.Data.SqlClient.TdsParser.Run(RunBehavior runBehavior, SqlCommand cmdHandler, SqlDataReader dataStream, BulkCopySimpleResultSet bulkCopyHandler, TdsParserStateObject stateObj)   at System.Data.SqlClient.SqlInternalConnectionTds.CompleteLogin(Boolean enlistOK)   at System.Data.SqlClient.SqlInternalConnectionTds.AttemptOneLogin(ServerInfo serverInfo, String newPassword, SecureString newSecurePassword, Boolean ignoreSniOpenTimeout, TimeoutTimer timeout, Boolean withFailover)   at System.Data.SqlClient.SqlInternalConnectionTds.LoginNoFailover(ServerInfo serverInfo, String newPassword, SecureString newSecurePassword, Boolean redirectedUserInstance, SqlConnectionString connectionOptions, SqlCredential credential, TimeoutTimer timeout)   at System.Data.SqlClient.SqlInternalConnectionTds.OpenLoginEnlist(TimeoutTimer timeout, SqlConnectionString connectionOptions, SqlCredential credential, String newPassword, SecureString newSecurePassword, Boolean redirectedUserInstance)   at System.Data.SqlClient.SqlInternalConnectionTds..ctor(DbConnectionPoolIdentity identity, SqlConnectionString connectionOptions, SqlCredential credential, Object providerInfo, String newPassword, SecureString newSecurePassword, Boolean redirectedUserInstance, SqlConnectionString userConnectionOptions)   at System.Data.SqlClient.SqlConnectionFactory.CreateConnection(DbConnectionOptions options, DbConnectionPoolKey poolKey, Object poolGroupProviderInfo, DbConnectionPool pool, DbConnection owningConnection, DbConnectionOptions userOptions)   at System.Data.ProviderBase.DbConnectionFactory.CreatePooledConnection(DbConnectionPool pool, DbConnectionOptions options, DbConnectionPoolKey poolKey, DbConnectionOptions userOptions)   at System.Data.ProviderBase.DbConnectionPool.CreateObject(DbConnectionOptions userOptions)   at System.Data.ProviderBase.DbConnectionPool.UserCreateRequest(DbConnectionOptions userOptions)   at System.Data.ProviderBase.DbConnectionPool.TryGetConnection(DbConnection owningObject, UInt32 waitForMultipleObjectsTimeout, Boolean allowCreate, Boolean onlyOneCheckConnection, DbConnectionOptions userOptions, DbConnectionInternal& connection)   at System.Data.ProviderBase.DbConnectionPool.TryGetConnection(DbConnection owningObject, TaskCompletionSource`1 retry, DbConnectionOptions userOptions, DbConnectionInternal& connection)   at System.Data.ProviderBase.DbConnectionFactory.TryGetConnection(DbConnection owningConnection, TaskCompletionSource`1 retry, DbConnectionOptions userOptions, DbConnectionInternal& connection)   at System.Data.ProviderBase.DbConnectionClosed.TryOpenConnection(DbConnection outerConnection, DbConnectionFactory connectionFactory, TaskCompletionSource`1 retry, DbConnectionOptions userOptions)   at System.Data.SqlClient.SqlConnection.TryOpen(TaskCompletionSource`1 retry)   at System.Data.SqlClient.SqlConnection.Open()   at Microsoft.Rtc.Common.Data.DBCore.PerformSprocContextExecution(SprocContext sprocContext)   --- End of inner exception stack trace ---   at Microsoft.Rtc.Management.Store.Sql.XdsSqlConnection.ReadDocItems(ICollection`1 key)   at Microsoft.Rtc.Management.ScopeFramework.AnchoredXmlReader.Read(ICollection`1 key)   at Microsoft.Rtc.Management.WritableConfig.AnchoredXmlSchemaCache.get_Item(ScopeClass scopeClass)   at Microsoft.Rtc.Management.Xds.ManagementConnection.GetAnchoredXmlWrapperFromReader(SchemaId schemaId)   at Microsoft.Rtc.Management.Xds.ManagementConnection.ReadTopologyXml(TypedXml& typedXml, AnchoredXml& anchoredXml)   at Microsoft.Rtc.Management.Xds.ManagementConnection.ReadTopology(TypedXml& topologyXml, Topology& topology)   at Microsoft.Rtc.Management.Xds.XdsCmdlet.<ReadTopology>b__5()   at Microsoft.Rtc.Management.Internal.Utilities.DeImpersonator.<>c__DisplayClass1.<Run>b__0()   at Microsoft.Rtc.Management.Internal.Utilities.DeImpersonator.Run[T](Boolean dropImpersonation, Func`1 func)   at Microsoft.Rtc.Management.Xds.XdsCmdlet.ReadTopology()   --- End of inner exception stack trace ---   at System.Management.Automation.Internal.PipelineProcessor.SynchronousExecuteEnumerate(Object input, Hashtable errorResults, Boolean enumerate)   at System.Management.Automation.Runspaces.LocalPipeline.InvokeHelper()   at System.Management.Automation.Runspaces.LocalPipeline.InvokeThreadProc()
Failed
Finished

image

Another common error is the following:

Download Current Topology

Topology Builder could not copy the topology from the Central Management store. Cannot read topology. Verify that the topology data is accessible.

image

Solution

I’ve been called a few times over the past year for this error and realized that the more prominent explanations out there on the internet right now is that this can happen during an install of Lync Server 2013 where errors might be thrown and the solution is to reinstall.  While this may be true because a failed install may leave an XDS database that’s incomplete, the calls I’ve received in the past are usually from administrators who have had Lync Server 2013 running in their environment but noticed this error even though the environment is working as expected.  The cause for this error in my past experience with the indicated symptoms is that the administrator is using an account that does not have permissions to the XDS database (just as the error indicates).

I believe SQL Server 2000 was the last version of SQL that automatically assigned local administrators sysadmin rights in the database and while I know many administrators typically enter domain admins in as administrators during SQL Server 2005, 2008 and 2012 installs, larger organizations do not.  This is why the companies I see this happen most are larger ones with dedicated SQL administrators that do not like regular Active Directory administrators to have full sysadmin rights to their precious SQL servers.

The database in question here is the XDS database stored on either a backend database server if you’re using the Enterprise Edition of Lync Server 2013 or the local SQL install if you are using the Standard Edition.  Taking a peak into the XDS database’s Security node displays the following accounts that are assigned some permissions to the XDS database:

  • domain\RTCUniversalConfigReplicator
  • domain\RTCUniversalReadOnlyAdmins
  • domain\RTCUniversalServerAdmins
  • localServer\RTC Local Administrators
  • localServer\RTC Local Config Replicator
  • localServer\RTC Local Read-only Administrator

image

Now I will admit that I don’t usually work with large clients that have individual teams for various Microsoft products but there are the odd ones that do so the Lync administrator may not have any permissions to the SQL database hosting the Lync databases.  What I find interesting is that either of the following is happening for standard edition installs:

  1. The Lync installer for standard edition adds the account used to install Lync as an administrator as a sysadmin for the local SQL instance.
  2. SQL Server Express automatically adds the account installing it as a sysadmin for the SQL instance.

I haven’t actually really looked into this but I do believe it’s a result of #2. To cut a long story short, what basically needs to be done here is to either grant the account that is having problems downloading the topology sysadmin to the database or db_owner rights to the XDS database.  Adding the account to any of the accounts listed above (i.e. domain\RTCUniversalServerAdmins) does not work and adding the account to the CSAdministrators group doesn’t either.

Outlook 2010 client unable to connect to newly deployed Exchange Server 2013

$
0
0

Problem

You’ve deployed a new green field deployment of Exchange Server 2013 in an environment, applied cumulative update 2 but notice that when you attempt to connect with an Outlook 2010 client, you notice that the configuration passes the Establish network connection step, then the Search for username@domain.com server settings step but fails at the Log on to server step with the the following error:

The connection to Microsoft Exchange is unavailable. Outlook must be online or connected to complete this action.

image

Clicking on the OK button will display the Microsoft Exchange window with the Microsoft Exchange server field filled with a:

GUID number followed by @domain.com

… and the Mailbox field with:

=SMTP:username@domain.com

image

Changing the *Specify the authentication method for external clients to use when connecting to your organization from:

Negotiate

image

… which Exchange gives the warning:

warning

Microsoft Exchange versions earlier than Exchange Server 2013 do not support the Negotiate client authentication method. Connectivity to public folders and mailboxes hosted on earlier versions may be affected.

image

… to:

NTLM

image

… does not resolve the issue.

Solution

I’m not sure why but one of the first few results from searching

outlook 2010 unable to connect to exchange server 2013

… was the following KB:

Outlook is unable to connect to Exchange 2013 public folder or auto-mapped mailbox
http://support.microsoft.com/kb/2839517

… but the hotfix did not resolve my issue.

After trying multiple suggestions from various source I found from searching without any luck, I decided to first update Outlook 2010 RTM (no service pack version 14.0.4763.1000) with SP1 (version 14.0.6029.1000) which unfortunately did not fix the issue.  I then proceeded to download Outlook 2010 SP2, applied it and noticed that I was then able to connect.  The following is a screenshot of the version that was able to connect to the newly deployed Exchange 2013 server:

Version: 14.0.7106.5001

image 

A bit of a frustrating problem so I hope this post would be able to save someone the frustration and some time.

Viewing all 836 articles
Browse latest View live


<script src="https://jsc.adskeeper.com/r/s/rssing.com.1596347.js" async> </script>