Quantcast
Channel: Terence Luk
Viewing all 836 articles
Browse latest View live

Active Directory domain authentication missing in a new VMware vCenter 5.5 installation

$
0
0

I’ve been asked several times over the past month about this so I thought it would be a good idea to write a quick blog post to point my colleagues to.

Problem

You’ve just completed the installation of vCenter 5.5 onto a Windows Server 2008 R2 server and noticed that you are unable to log on with your Windows local administrator account or a domain admin account.  The only way you’re able to log in is with the SSO’s vsphere.local domain’s administrator account:

vsphere.local\administrator

… or …

administrator@vsphere.local

image

While attempting to add permissions to vCenter:

clip_image001

You notice that you can select either the local Windows’ server’s accounts or the SSO domain but the Active Directory domain which this Windows server is joined to does not show up:

image

The results are also the same when you use the vSphere Web Client:

image

Solution

It’s important to understand that the SSO component in vCenter 5.5. has been rewritten with RSA database completely removed (remember how clumsey the install for 5.1 was?)  Another change is that vCenter by default does not automatically include Active Directory authentication for vCenter as SSO continues to mature so in order to authenticate with AD credentials, you’ll need to configure it by using the vSphere Web Client.  Begin by launching a browser and go to the following URL:

https://<vCenter Server IP or Name>:9443/vsphere-client

Log in and navigate to Single Sign-On –> Configuration –> Identity Sources and click on the + sign:

image

The Add identity source window is where you will configure authentication against other directories:

image

The one we’re interested in is the Active Directory (Integrated Windows Authentication) so proceed by selecting that radio button and fill out the appropriate fields:

image

You should now see the domain you’ve configured in the Identity Sources tab and should now be able to grant permissions to users and groups in that domain for authenticating:

image

I personally find this to be a great change as we’re now able to add different types of domain for authentication whether through Windows integrated or the other options such as:

  • Active Directory as a LDAP Server
  • Open LDAP

This evidently makes it easier for a hosting provider to configure a shared vCenter to authenticate against multiple directories.


Lync 2013 client’s conversations list displays an exclamation mark with the message: “There are Exchange connectivity issues. Your conversation history cannot be retrieved.”

$
0
0

Problem

You’ve received complains from users that their Lync 2013 client’s conversations list displays an exclamation mark with the message:

There are Exchange connectivity issues. Your conversation history cannot be retrieved.

image

If the user navigates to File –> View Conversation History from the Lync 2013 client, Outlook is automatically launched and the conversation history (with content) is displayed.

Solution

A quick search on the internet shows a Microsoft rep suggesting the following:

This issue might be related to any of the situations below.

  1. The computer time is different from the local time.
  2. The Outlook credential is wrong.
  3. The primary account in Outlook is not the same with the account that you sign in to Lync.
  4. The Exchange Autodiscover is not working correctly.

What ended up being the issue at the environment I came across this was because they did not have an autodiscover.domain.com A record in their internal DNS and as soon as I created the record, the error went away.

Setting the “Microsoft Exchange server” autodiscover configuration in Outlook to ClientAccessArray object in Exchange Server 2010

$
0
0

Problem

You’ve created your ClientAccessArray object in your Exchange 2010 organization with the cmdlets:

New-ClientAccessArray
http://technet.microsoft.com/en-us/library/dd351149(v=exchg.141).aspx

Set-ClientAccessArray
http://technet.microsoft.com/en-us/library/dd351174(v=exchg.141).aspx

… and confirmed that the object is created properly with:

Get-ClientAccessArray

image

… but noticed that the autodiscover configuration for the Microsoft Exchange server field in Outlook is still pointing to one of the CAS servers you have configured in a Windows NLB cluster:

image

Solution

The reason why you may see this behavior is because the RpcClientAccessServer setting for the mailbox database the user is connecting to hasn’t been changed to use the ClientAccessArray object.  To determine this, use the following cmdlet:

Get-MailboxDatabase "Bermuda Mailbox Database" | FL Name,RpcClientAccessServer

image

To change this, use the following cmdlet:

Set-MailboxDatabase “Bermuda Mailbox Database” -RpcClientAccessServer casarray.domain.com

image

Once this property of the mailbox database has been set properly, Outlook clients configured with autodiscover should now use the ClientAccessArray object:

image

Note that existing clients already configured prior to this change will not be updated.

Slow / jerky / lag scroll performance with Excel 2013 in Citrix XenDesktop 5.6

$
0
0

Problem

You notice that your virtual desktops in your Citrix XenDesktop 5.6 infrastructure exhibits extremely slow, jerky or lag when scrolling Excel 2013 spreadsheets.  You’ve tried installing the latest 5.6.300 VDA agent as well as the 7.0 and 7.1 VDA agents but it does not improve the performance.  Scrolling in a spreadsheet with rolls extending past the visible screen clearly lags in the sense that you can scroll up and down 3 or 4 times yet the spreadsheet doesn’t scroll until a few seconds later where it seemingly decides to take the last scroll input (i.e: you scroll up 5 times and down 6 times but only the last scroll downwards is captured):

clip_image002

Solution

I’m not sure if it’s the string I used to search for this issue but the returned results on Google did not point me to the following KB that had a solution to my issue:

Office 2013 Video Performance Issues with XenDesktop VDA
http://support.citrix.com/article/CTX139236

To fix this scrolling issue, simply click on the File tab in Excel:

clip_image002[5]

Selection Options:

clip_image002[7]

Click on the Advanced button:

clip_image002[9]

Scroll down to the Display area and enable (check the checkbox) of Disable hardware graphics acceleration:

clip_image002[11]clip_image002[13]

Alternatively, you can either create a GPO and apply it to the user account or create a GPO and apply it to the VDI computer account with Loopback set to merge.  The following is where the registry is located:

HKEY_CURRENT_USER\Software\Microsoft\Office\15.0\Common\Graphics

clip_image002[15]

**Note the DisableHardwareAcceleration DWORD

clip_image002[17]

The following is what a GPO updating this registry would look like:

Key Path: Software\Microsoft\Office\15.0\Common\Graphics
Value Name: DisableHardwareAcceleration
Value type: REG_DWORD
Value: 1

clip_image002[19]

clip_image002[21]

Connecting to Citrix XenDesktop 5.6 virtual desktops through a Web Interface configured with pass-through authentication fails after flashing a black screen

$
0
0

Problem

Environment:

  • 2 x Citrix Web Interface at version 5.4.2.59
  • 2 x Citrix XenDesktop 5.6 DDCs at version 5.6 with Hotfix 7
  • VDA Agent on VDIs at version 5.6.300
  • Pass-through authentication is configured for website
  • Client used to connect to Web Interface portal is joined to the domain

Symptoms:

  • User is able to successfully log into the pass-through authentication page from the fat / thick client via URL directing to Web Interface website (no CAG)
  • Clicking on the XenDesktop Dedicated Desktop icon briefly shows the Citrix Receiver launch with the progress bar at about ¼ then disappears
  • The Desktop Viewer window appears to launch displaying a black screen (in some cases he may see an out of place username and password prompt displayed by the Windows 7 VDI)
  • Within seconds, the black screen disappears and he is back to his fat / thick client’s desktop with the web page
  • Continuing to click on the dedicated desktop or pooled desktop icons exhibit the same behavior
  • Testing with a single or dual monitor setup exhibit the same symptoms
  • Using his same credentials on the t610 in the same VLAN which is also configured for pass-through authentication does not exhibit the same behavior

Troubleshooting:

While reviewing the event logs on the virtual desktop that the user failed to log into, the following event ID 1620 warning followed by the event ID 1030 informational events were logged during the unsuccessful login attempts:

image

The details to those events are:

Event ID Warning: 1260

Log Name: Application

Source: Citrix ICA Service

Event ID: 1260

Level: Warning

ICA connection is cancelled because auto-logon is enforced and auto-logon failed. For more information, see http://support.citrix.com/proddocs/topic/online-plugin-121-windows/ica-sson-enable.html.

image

Event ID Warning: 1030

Log Name: Application

Source: Citrix Desktop Service 

Event ID: 1030

Level: Information

The Citrix Desktop Service detected that a user session has ended. Session 0:635200501869038107 for user 'domain\jsmith' has ended.

image

Clicking on the link provided in the warning (http://support.citrix.com/proddocs/topic/online-plugin-121-windows/ica-sson-enable.html) isn’t much help as it brings you to a:

404 page Not Found: The Requested Page Cannot Be Displayed

… that Citrix probably took off:

clip_image002

Troubleshooting Steps Tried:

Searching for the string provided 5 or 6 results with various suggestions such as:

1. Turning on Kerberos in the Citrix GPO ADM for the fat / thin clients <-- Did not work

imageclip_image002[4]

2. Modify the Web Interface pass-through authentication page’s domain settings to use FQDN instead of NetBIOS <-- Did not work

image

3. Edit either the local policy or via GPO for the VDI’s: Computer Configuration -> Policies -> Windows Settings -> Security Settings -> Local Policies -> User Rights Assignment <-- I can’t see why we would need to change this as the issue is intermittent

4. Use the Get-BrokerSite cmdlet on a DDC to ensure that TrustRequestSentToTheXmlServicePort is set to True:

image

Solution

While I have yet to determine the root cause, the workaround solution I put in for this problem to buy me some more troubleshooting time was to add the following following registry key onto the VDI:

HKLM\SOFTWARE\Policies\Citrix

DWORD: EnforceAutoLogon

Value: 0

image

As per the following forum post, a Citrix engineer wrote the following:

http://forums.citrix.com/thread.jspa?threadID=284282

First off, in XD5, the default behavior when pass-through credentials aren't properly provided has changed. In XD4, you would get prompted to authenticate at the VDA Winlogon screen if SSON failed. In XD5, by default anyways, the VDA will drop the connection if credentials aren't properly received. To workaround this behavior, create a new DWORD value called 'EnforceAutoLogon' in HKLM\Software\Policies\Citrix, and set it to 0. This will change the VDA behavior to dump you back out to the Winlogon screen instead of just closing the connection.

So basically what’s happening here is that pass-through authentication isn’t working on the fat / thick client downstairs and the default behavior for XenDesktop 5 is to drop connections if the credentials aren’t passed over.  With the registry shown above set on the VDI, XenDesktop will not drop the connection but rather display the following:

clip_image001

Note that if you can’t update the catalog of a pool for whatever reason or perhaps unable to log onto dedicated VDIs because users are logged on, you can use a GPO assigned to the computer object to add this registry key in as such:

image

image

Hive: HKEY_LOCAL_MACHINE

Key Path: SOFTWARE\Policies\Citrix

Value name: EnforceAutoLogon

Value type: REG_DWORD

Value data: 0

--------------------------------------------------------------------------------------------------------------------------------------------------------------------

Not exactly the best solution but users who wonder why they need to retype their credentials is much better than users who are unable to connect.

Citrix XenApp and XenDesktop Pass-Through Authentication works with website authentication but not application or desktop authentication

$
0
0

To follow up with my previous post:

Connecting to Citrix XenDesktop 5.6 virtual desktops through a Web Interface configured with pass-through authentication fails after flashing a black screen
http://terenceluk.blogspot.com/2013/11/connecting-to-citrix-xendesktop-56.html

I finally found some time over the weekend to sit down and perform some uninterrupted troubleshooting to determine the root cause of why the environment’s pass-through authentication worked for authenticating the user through the Web Interface portal but does not work when launching an application where it would display the following prompt:

image

… or while launching a XenDesktop VDI (with the help of the registry key to disable enforce auto logon):

image

What ended up being the issue after combing through the configuration as I referenced an older blog post I wrote:

Lessons learned with Citrix Web Interface 4.6 Pass-Through Authentication
http://terenceluk.blogspot.com/2012/01/lessons-learned-with-citrix-web.html

… was that the Active Directory GPO with the Citrix pass-through authentication only had the ComputerConfiguration portion configured:

image

… but not the User Configuration.  Once I got the User Configuration portion configured, pass-through authentication began functioning as it should:

image

Hope this helps anyone out there who may come across the same symptoms in their environment.

Removing and adding a renamed desktop into a Citrix XenDesktop 5.6 Existing pool throws the error: “The computer domain\computername could not be imported because User domain\computername could not be found.”

$
0
0

Problem

You have a desktop in a Citrix XenDesktop 5.6 Existing pool that you need to rename so you proceed with the following:

  1. Remove it from the existing desktop group
  2. Delete it from the desktop catalog
  3. Clone the virtual machine in vCenter to a new name so that the flat files corresponds to the virtual machine name
  4. Log into the new virtual desktop and rename the Windows name
  5. Restart the desktop
  6. Right click on the same Existing catalog and select Add Machines
  7. Select the newly cloned virtual machine

What you notice is that as you get to the prompt where you select a Active Directory computer account and select the new renamed computer account, you receive the following error:

The computer domain\computername could not be imported because User domain\computername could not be found.

Clicking the OK button displays another window with the error:

Sequence contains no elements

Solution

I’m not exactly sure why but this has happened to me twice over the past month and the resolution for both incidents was to restart the DDCs.  Once the DDCs are restarted, I am then able to add the machines with the new account.

Connecting to VMware View 5.1.2 desktop via PCoIP displays a black screen when in full screen

$
0
0

Problem

You’ve just added a new existing virtual machine into a VMware View pool and attempt to connect to it via the VMware View client but the following black screen:

image

What you notice is that if you restore the size of the VMware View client to a window instead of full screen, you are able to see the virtual desktop’s login screen properly.  Everything else works as expected when working in side this resized window:

image

You’ve confirmed that the resolution of the monitor you’re using which is 1920 x 1080:

image

… is either smaller or the same as the VMware View pool settings:

image

Note that the pool settings is configured with:

Max number of monitors: 2

Max resolution of any one monitor: 1920 x 1200

The settings for the virtual desktop indicates that VMware View has set the configuration to:

Number of displays: 2

Total video memory: 35.19

image

You notice that if you try to shutdown the virtual machine, change the video memory to 40MB, View would quickly change it back to 35.19MB.

Solution

What’s important to note is that it is expected behavior for View to change the video memory back to 35.19MB as that is the predefined settings for the monitoring configuration set in the pool and the only way to increase the memory for the desktops is to actually change the pool settings as such:

Max number of monitors: 4

Max resolution of any one monitor: 2560 x 1600

image

Once the pool settings are in, VMware View would reconfigure all of the desktops regardless of whether they’re powered on or off to the following settings:

Number of displays: 4

Total video memory: 125

image

What solved my issue was to increase the resolution in the pool settings to be higher than the resolution of monitor, wait till View has completed the changes to the video card, restart the virtual machine once so that the new video card settings are in effect, then shutdown the virtual machine and then power it back on.  Note that I’ve tried restarting the virtual machine multiple times but still received the black screen which I suspect is related to the description in the following KB:

Configuring PCoIP for use with View Manager (1018158)http://kb.vmware.com/selfservice/microsites/search.do?cmd=displayKC&docType=kc&docTypeID=DT_KB_1_1&externalId=1018158

I didn’t get to try restarting the virtual machine via the vSphere client but I believe it probably would have worked if I did.


Unable to search GAL with less than 4 characters via Exchange Server 2010 ActiveSync

$
0
0

Problem

You attempt to search the Global Address List (GAL) via a phone that uses Exchange Server 2010 ActiveSync but notice that the search fails when you search with 3 characters or less:

imageimageimage

**Note that the screenshots above are from a Blackberry z10 device’s Look up… feature.

Searching with 4 characters or more works as expected:

imageimageimage

Reviewing the IIS Logs on the CAS server in the directory:

C:\inetpub\logs\LogFiles\W3SVC1

image

Reveals the following:

2013-12-05 14:11:43 10.64.16.20 POST /Microsoft-Server-ActiveSync/default.eas Cmd=Search&DeviceType=BlackBerry&User=contoso.com%5CKAB&DeviceId=BB24D90407&Log=V140_LdapC8_LdapL15_RpcC14_Pk4017638333_Error:SearchStringTooShort_Pic0_SrchL2_As:AllowedG_Mbx:contosoBDAMS01.contoso.com_Dc:contosoBDADC01.contoso.com_Throttle0_Budget:(A)Conn%3a0%2cHangingConn%3a0%2cAD%3a%24null%2f%24null%2f1%25%2cCAS%3a%24null%2f%24null%2f0%25%2cAB%3a%24null%2f%24null%2f0%25%2cRPC%3a%24null%2f%24null%2f0%25%2cFC%3a1000%2f0%2cPolicy%3aDefaultThrottlingPolicy%5Ffafb1bd7-839a-4db2-b37c-7ef5a58823d0%2cNorm_ 443 contoso.com\KAB 10.64.16.17 RIM-Z10-STL100-1/10.1.0.4633 200 0 0 265

image

The text that identifies the search string too short in the log is:

Error:SearchStringTooShort

Solution

A bit of research on the internet revealed that in Exchange Server 2010, the default minimum amount of characters required to search the GAL via ActiveSync is 4 characters instead of 2 which is the default setting for Exchange 2003 (the Exchange 2007 organization I had to troubleshoot also exhibited the same behavior). As a result of this change, attempting to search with 3 or less characters on a BES 10 device which uses a BES 10 server that uses ActiveSync to retrieve information from Exchange Server 2010 would fail.  To correct this issue, edit the web.config file on all of the CAS servers at the following directory:

C:\Program Files\Microsoft\Exchange Server\V14\ClientAccess\Sync

image

Backup the web.config file prior to making the change:

image

Locate the<appSettings> section:

image

Add the following text with the appropriate value desired (we’ll use 2 for this example to allow searching with 2 characters) between the <appSettings> and </appSettings> tag as such:

<!-- Sets the minimum number of characters required for searching -->

<add key="MinGALSearchLength" value="2"></add>

image

Perform a iisreset command on the CAS server once the changes have been made:

image

Searches with 2 characters should now work:

imageimageimage

Hope this helps anyone who may come across this issue.

Configuring Netscaler VPX appliance throws the error: “Java Applet could not be loaded”

$
0
0

Environment:

NetScaler VPX Version: NS10.1: Build 121.10.nc, Date: Oct 18 2013, 10:25:05

image

Internet Explorer Version: 9.0.8112.16421

image

Java Version: Java 7 Update 45

image

--------------------------------------------------------------------------------------------------------------------------------------------------------------------

I don’t think I’ve ever been as frustrated with web administration consoles that are browser based and rely on Java as the NetScaler VPX appliance, Compellent and Cisco UCS.  Earlier versions of Java last year was easily to fix as all you needed to do was uncheck the Keep temporary files on my computer then delete the files:

imageimage

image

… but the later versions with the error:

Downloading Applet…

imageimage

… then after being stuck at 1% for a period of time, the following is presented:

Cannot load Applet

Java Applet could not be loaded

Details

Possible reasons:

JRE(Java Runtime Environment) not installed.

JRE is installed but not running.

Java browser plug-in is not installed or not enabled.

image

I’ve gone on to try disabling verification as some forums suggested:

imageimage

… or looking for the security option to switch to a lower medium level which does not appear to be present for the latest Java version I downloaded today (December 8, 2013).

After spending over 30 minutes researching solutions which non corrected the issue, I went ahead and tried Google Chrome 31.0.1650.64 which ended up working.  

image

Not exactly the best solution but it was enough for me as all I wanted was to make a small change to the NetScaler VPX appliance.

Attempting to move a mailbox from Exchange 2003 server throws the error: “Mailbox database ‘2d14e873-68fc-4475-acf6-1eb3f3909753’ is offline.”

$
0
0

Problem

You attempt to move a mailbox from Exchange 2003 server with the New Local Move Request but receive the following error:

imageimage

Summary: 1 item(s). 0 succeeded, 1 failed.
Elapsed time: 00:00:05

KAKnights-Fubler
Failed

Error:
Mailbox database '2d14e873-68fc-4475-acf6-1eb3f3909753' is offline.

MapiExceptionLogonFailed: Unable to make connection to the server. (hr=0x80040111, ec=1010)
Diagnostic context:
    ......
    Lid: 11672   dwParam: 0x6D9      Msg: EEInfo: NumberOfParameters: 4
    Lid: 8856    dwParam: 0x6D9      Msg: EEInfo: prm[0]: Unicode string: ncacn_ip_tcp
    Lid: 8856    dwParam: 0x6D9      Msg: EEInfo: prm[1]: Unicode string: BBSexch01.someSchool.someNetwork.bm
    Lid: 12952   dwParam: 0x6D9      Msg: EEInfo: prm[2]: Long val: -545057711
    Lid: 12952   dwParam: 0x6D9      Msg: EEInfo: prm[3]: Long val: 382312662
    Lid: 45169   StoreEc: 0x824    
    Lid: 44273 
    Lid: 59431   EMSMDB.EcDoConnectEx called [length=110]
    Lid: 34855   EMSMDB.EcDoConnectEx returned [ec=0x3F2][length=56][latency=0]
    Lid: 56945 
    Lid: 59431   EMSMDB.EcDoConnectEx called [length=110]
    Lid: 34855   EMSMDB.EcDoConnectEx returned [ec=0x3F2][length=56][latency=15]
    Lid: 59505   StoreEc: 0x3F2    
    Lid: 52465   StoreEc: 0x3F2    
    Lid: 60065 
    Lid: 33777   StoreEc: 0x3F2    
    Lid: 59805 
    Lid: 52209   StoreEc: 0x3F2    
    Lid: 56583 
    Lid: 52487   StoreEc: 0x3F2    
    Lid: 19778 
    Lid: 27970   StoreEc: 0x3F2    
    Lid: 17730 
    Lid: 25922   StoreEc: 0x3F2    
Click here for help...
http://technet.microsoft.com/en-US/library/ms.exch.err.default(EXCHG.141).aspx?v=14.3.158.1&t=exchgf1&e=ms.exch.err.ExC2B9A8

Exchange Management Shell command attempted:
'someSchool.someNetwork.bm/BBS Students/S4 Students/KAKnights-Fubler' | New-MoveRequest -TargetDatabase 'BBS Alumni Database'

Elapsed Time: 00:00:00

 Solution

While there are various reasons why this error would be thrown, one of them is that the Exchange 2003 server’s mailbox store does not have proper permissions.  Check the permissions on the store’s properties to ensure that the Allow inheritable permissions from the parent to propagate to this object and all child objects. Include these with entries explicitly defined here. is selected:

image

image

image

Quick way to adjust send and receive connector limits in Exchange 2010 and 2013

$
0
0

I find myself referencing a note I have in my drafts to quickly change send and receive limits for connectors on Exchange 2010 and 2013 so just in case I ever lose that the draft email I have, I thought I’d just blog the commands so I can reference it if I don’t have access to my mailbox.

Use the following cmdlets to quickly set send and receive size limits on all connectors configured on an Exchange server:

Set-TransportConfig -MaxSendSize 100MB -MaxReceiveSize 100MB

Get-ReceiveConnector | Set-ReceiveConnector -MaxMessageSize 100MB

Get-SendConnector | Set-SendConnector -MaxMessageSize 100MB

Disabling Exchange 2010 ActiveSync, OWA, POP, IMAP or MAPI access for mailboxes with PowerShell

$
0
0

I’ve recently been asked by an administrator at a school to suggest the best way of preventing students from setting up an Outlook profile for their mailboxes.  The first thought that I had was that we could simply disable MAPI access via the Mailbox Features tab in the Exchange Management Console

image

Enable or Disable MAPI for a User Mailbox
http://technet.microsoft.com/en-us/library/bb124497(v=exchg.141).aspx

The challenge was that there are thousands of students in the school and manually clicking in the GUI to disable the MAPI feature wasn’t the best choice so we turned to PowerShell.

The 2 cmdlets we’ll be using to turn off MAPI access are the following:

Get-Mailbox
http://technet.microsoft.com/en-us/library/bb123685(v=exchg.141).aspx

Set-CASMailbox
http://technet.microsoft.com/en-us/library/bb125264(v=exchg.150).aspx

The first Get-Mailbox is to retrieve the mailboxes which will then be piped into the Set-CASMailbox cmdlet.

The following is an example of retrieving all of the mailboxes from a mailbox database then piping it into the set cmdlet to disable MAPI:

Get-Mailbox -Database "Students Database" | Set-CASMailbox -MAPIEnabled $false

image

Note that if you have more than 1000 objects returned from the Get-Mailbox cmdlet then you will receiving the warning:

WARNING: By default, only the first 1000 items are returned. Use the ResultSize parameter to specify the number of items returned. To return all items, specify "-ResultSize Unlimited". Be aware that, depending on the actual number of items, returning all items can take a long time and consume a large amount of memory. Also, we don't recommend storing the results in a variable. Instead, pipe the results to another task or script to perform batch changes.

I’ve ran this cmdlet in a few environments and noticed that it applies the changes to more than 1000 objects but just to be the safe, I usually run it with the additional -ResultSize unlimited switch:

Get-Mailbox -Database "Students Database" -ResultSize unlimited | Set-CASMailbox -MAPIEnabled $false

image

From here, you can randomly select users to ensure the MAPI feature is turned off

image

Note the warning message:

There are more results available than are currently displayed. To view them, increase the value for the ResultSize parameter.

You can change this limit of 1000 objects returned setting as shown in the following article:

http://technet.microsoft.com/en-us/library/ee332311.aspx

Click on the Recipient Configuration node on the left Modify the Maximum Number of Recipients link on the right:

image

Then change the vaue for Maximum recipients to display:

image

The GUI may not be the most optimal way of reviewing the configuration change so going back to PowerShell, you can use the following cmdlet to list all of the recipient objects in a store with their mailbox feature settings:

Get-Mailbox -Database "Students Database" -ResultSize unlimited | Get-CASMailbox

image

If the list is too long, you can either use the | more command at the end as such:

Get-Mailbox -Database "Students Database" -ResultSize unlimited | Get-CASMailbox | more

… or simply pipe the output to a text file:

Get-Mailbox -Database "Students Database" -ResultSize unlimited | Get-CASMailbox> C:\mailboxfeatures.txt

--------------------------------------------------------------------------------------------------------------------------------------------------------------------

Note that to disable or enable the other features, simply replace -MAPIEnabled with any of the following:

  • ActiveSyncEnabled
  • OWAEnabled
  • PopEnabled
  • ImapEnabled

Installing VMware View Composer service prompts the message: “The system must be rebooted before installation can continue.”

$
0
0

While the problem outlined in this post isn’t specific or caused by VMware View but rather Microsoft Windows Server 2008 R2, it was an issue I encountered today that threw me off for a few minutes until I was able to determine the cause.

Problem

You attempt to install VMware View Composer on a Windows Server 2008 R2 server:

image

… but notice that the installer is unable to continue as you are prompted with the message:

The system must be rebooted before installation can continue.

imageimage

Solution

As noted in the beginning of this post, the issue wasn’t specific to VMware View’s Composer install but rather a stuck pending operation in Windows. The following KB outlines 2 registry keys:

http://kb.vmware.com/selfservice/microsites/search.do?language=en_US&cmd=displayKC&externalId=1029288

  • HKEY_LOCAL_MACHINE\SYSTEM\CurrentControlSet\Control\Session Manager\PendingFileRenameOperations
  • HKEY_LOCAL_MACHINE\SYSTEM\CurrentControlSet\Control\Session Manager\FileRenameOperations

… that should be checked.  The server that I was working on turned out to have values defined in the PendingFileRenameOperations that could not successfully complete after multiple reboots:

image

What I ended up doing was open up the Multi-String value and deleted what appeared to be printer drivers:

image

image

image

This immediately corrected the issue and I was then able to continue installing the VMware View Composer service on the server:

imageimage

Setting up a new Outlook profile throws the error with Exchange Server 2010: “The connection to Microsoft Exchange is unavailable. Outlook must be online or connected to complete this action.”

$
0
0

Problem

You attempt to set up a new mail profile with Outlook 2010 via autodiscover or manually:

image

… but receive the following message:

You must restart Outlook for these changes to take effect.

image

… followed by:

The connection to Microsoft Exchange is unavailable. Outlook must be online or connected to complete this action.

image

Clicking on the OK button brings up the Microsoft Exchange window with the Microsoft Exchange server field is filled in with the appropriate Exchange CAS server and the Mailbox field is filled in with: =SMTP:<email address>:

image

Clicking cancel reveals a red X beside the Log on to server step:

image

Solution

One of the reasons why this would happen is if the Microsoft Exchange Address Book service is stopped on the CAS server:

image

The issue I had while troubleshooting this was that the environment had 2 CAS servers load balanced via NLB where 1 of the CAS server had the service started while the other one didn’t thus causing some users to experience this while others did not so make sure that you check all of the CAS servers if there is more than 1 in the environment:

image

Once this service is started, Outlook should now successfully configure the profile:

image


Installing VMware vSphere Replication Appliance 5.5

$
0
0

I recently had to deploy a VMware vSphere Replication Appliance version 5.5 and since I had to screenshot the process for documentation purposes, I thought I’d write a blog post in case anyone is interested in seeing what the process looks like.

Deploying vSphere Replication Appliance

Begin by downloading either the ZIP or ISO from the VMware download section and be aware that the ISO is not bootable as the appliance is deployed via an OVF file.  The contents of the ISO whether extracted or mounted contains the following files and folders:

image

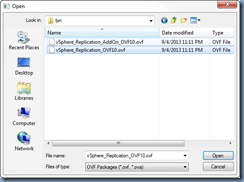
The folder we’re interested in is the bin folder which contains 2 ovf files:

  • vSphere_Replication_AddOn_OVF10.ovf
  • vSphere_Replication_OVF10.ovf

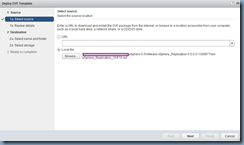
The ovf file with AddOn in the name is used in an SRM deployment and the one without is for standalone deployments.  For the purpose of this demonstration, I’ll be deploying a standalone appliance without SRM so the ovf I’ll be using is vSphere_Replication_OVF10.ovf.

Log onto the VMware vSphere Web Client:

image

Note that the VMware vSphere Replication Administration deployment guide found here:
http://pubs.vmware.com/vsphere-55/topic/com.vmware.ICbase/PDF/vsphere-replication-55-admin.pdf

… clearly indicates on page 27 that you need to use the VMware vSphere Web Client to deploy the appliance:

image 

Once logged into vCenter, click on the vCenter node on the left hand pane:

image

Then click on the vCenter Servers node selecting the vCenter that you will be deploying the appliance:

image

Proceed by clicking on the Manage tab:

image

Under Settings then Advanced Settings, scroll down to confirm that the VirtualCenter.FQDN is set properly:

image

With this confirmed, navigate back out to the vCenter Home view and click on Hosts and Clusters:

image

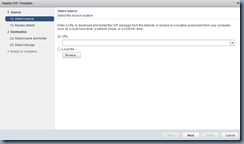
Expand the Datacenter containing the cluster that you would like to deploy the appliance then right click on the cluster and select Deploy OVF Template…:

image

You will then be prompted to download and install the Client Integration Plug-in:

image

Proceed with downloading and installing the plug in, close the browser and log back into vCenter and repeat the steps above to deploy the OVF:

image

image 

image

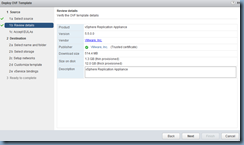
Continue through the wizard:

image

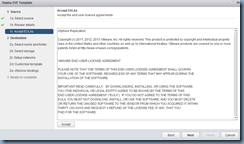
Accept the EULA:

image

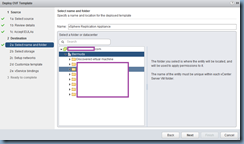
Provide a name for the appliance in the Name field and select the folder you would like to place the appliance:

image

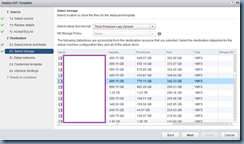
Select the datastore that you would like to store the appliance:

image

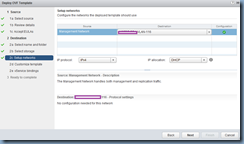
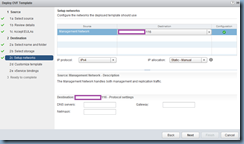
Depending on your environment, you can choose either to use DHCP or statically assign an IP address to the appliance:

image

I’m going to use static so I’ve selected Static - Manual  for the IP allocation option which will then allow me to set the DNS servers, Gateway, and Netmask:

image

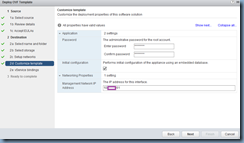
Continue by entering a password for the appliance’s root account and configure a Management Network IP address:

image

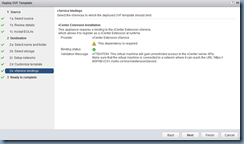
Be aware of the vService bindings information:

image

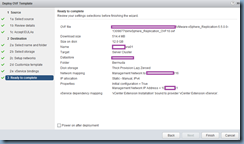
Review the details to the configuration settings that were entered and click Finish to begin the OVF deployment:

image

Note the status of the OVF deployment on the right hand Recent Tasks pane:

image

imageimage

Once the deployment is complete, you should then see the new appliance under the cluster:

image

Continue by powering on the appliance:

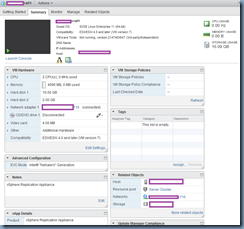
image

image

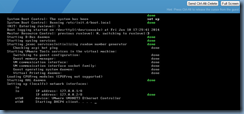
… and ensure that the appliance successfully powers on:

image

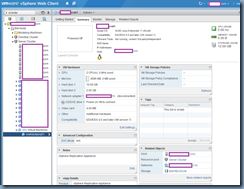
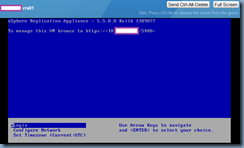
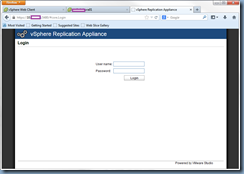
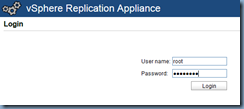
Once the appliance has successfully booted up, you can then browse to it via https://<ipAddress>:5480 and log in with the root account:

imageimage

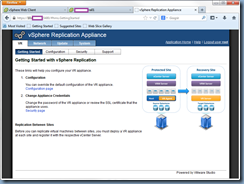
Most of the settings configuration pertains to the appliance itself (i.e. network):

image

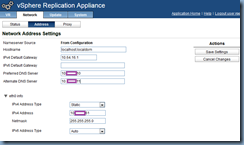
One of the settings I always configure after the deployment is the Network–> Address where you could update the host name and add another DNS server entry:

image

Once you’ve configured the additional settings required for the replication appliance, proceed by shutting down the vSphere Web Client and re-launching as you will not see the vSphere Replication icon in the Home screen until you do:

imageimage

Once you’ve re-logged into the vSphere Web Client with the vSphere Replication icon now present, continue and click on it:

image

Click on the Home tab to ensure that there is a green check mark beside the appliance then click on the Manage button:

image

Verify that there is a green check mark beside the Availability field:

image

At this point, the appliance at this site is ready to be used for local replication/backup.  Continue by deploying another appliance with the same steps above to an alternate site if replicating VMs to another site is required.

Setting up replication to another site

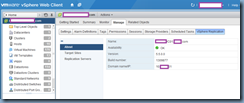
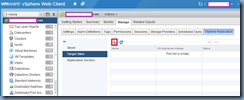
Once another replication appliance has been set up at another site, you can add the 2nd site as a target site to replicate to.  Being by navigating to the vSphere Replication section in the vSphere Web Client, select the Target Sites node and click on the little server icon to add a target site:

image

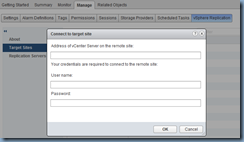
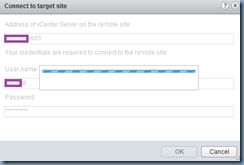
Fill in the remote vCenter server name and enter credentials with permissions to connect:

image

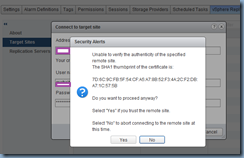
Since I’m using self-signed certificates in the environment, I will receive the following warning for the certificate presented.  Proceed by selecting Yes to trust the certificate and connect:

image

image

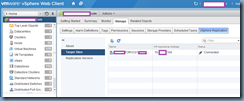
Once the connection is successfully established, you will see the remote vCenter listed in the Target Sites:

image

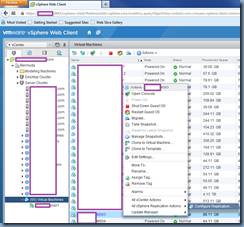
With the target site added, proceed with navigating to either the Hosts and Clusters or VMs and Templates view, right click on a virtual machine and select vSphere Replication Actions then Configure Replication:

image

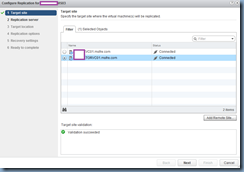
Select the target vCenter (where you’re replicating to) from the list:

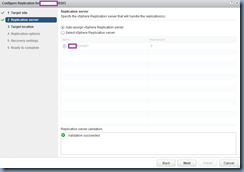
image

Unless you have more than 1 vSphere Replication Appliance in the target vCenter, the auto assign should pick up the one in the target site as shown below:

image

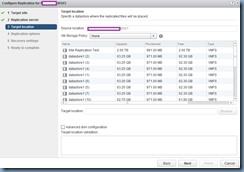
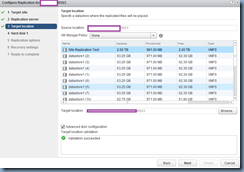
Select the target datastore you would like the replicated copy of the VM to be stored:

image

Note that checking the Advanced disk configuration check box gives you the ability to configure additional options such as disk format and VM Storage Policy:

image image

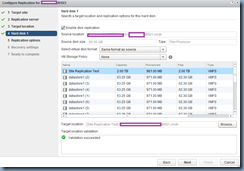
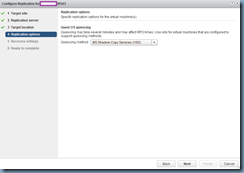
The next screen allows you to choose the quiescing method which is either none or MS Shadow Copy Services (VSS):

imageimage

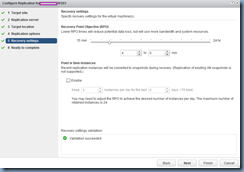
The last configurable screen allows you to set the RPO (basically the frequency of replication) and the amount of instances to keep (how many different point in time instances you can recover with):

image

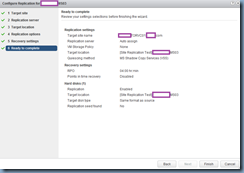
Review the settings configured and click Finish to complete the configuration:

image

Browsing the remote datastore should almost instantly show that a folder for the replicated VM is created with a new vmdk created:

image

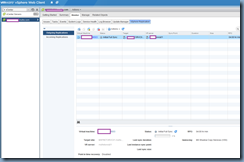
If you’d like to check the status of the replication, simply navigate to the vCenter instance of the source site, click Monitor–> vSphere Replication–> Outgoing Replications:

image

Selecting the replicated VM will display more information at the bottom of the window:

image

Providing Remote Desktop Web Access (RD Web Access) for Mac OS X clients

$
0
0

As many administrations probably know, the RDC (Remote Desktop Connection) for Mac bundled with Office 2011:

image

… does not support the RD Gateway Server Settings feature the Windows RDC client provides:

image

This has been a problem quite a few of the clients I manage who uses Remote Desktop Web Access (RD Web Access) for remote access because some of the users use Mac OS X laptops. There were a few 3rd party applications available but sometimes the added cost or having to manage another application wasn’t ideal so I’ve been extremely excited when I recently realized that Microsoft has released a new RDC client (version 8.0.3 – Updated December 11, 2013) for Macs that now support RD Gateway Server Settings:

image

image

imageimage

imageimage

Definitely good news for all the administrators out there who have had issues providing remote access to users that use a Mac and does not run Windows in parallel.  Now if only there was a solution for Macs to access remotely published applications through the webpage portal…

Outlook Profile continues to get created by Microsoft Office Customization Tool configuration even though Microsoft Office 2010/2013 has been reinstalled

$
0
0

I’ve recently been asked to look at an issue where a previous install of Microsoft Office 2013 with customizations such as the following were made:

image

… but a decision was made afterwards that these should be removed so the administrator would uninstall the installation, modify the MSP file, reinstall but noticed that Outlook would continue to automatically create a profile as defined in the previous installation.

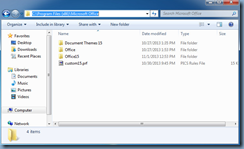
The reason for this behavior is actually quite simple and that’s because OCT actually creates a custom15.prf (or 14 for Office 2010) within the Microsoft Office directory which contains the customizations for the Outlook profile creation:

32-Bit Office:  C:\Program Files (x86)\Microsoft Office

64-Bit Office:  C:\Program Files\Microsoft Office

File name:  custom15.prf

clip_image001

The PRF file is actually a simple text file that you can open with Notepad to browse the customizations as shown in the following screenshot:

clip_image001[4]

clip_image001[6]clip_image001[8]

As most would have probably guessed, the way around this is to either delete the whole directly after Office has been uninstalled or simply delete the PRF file.

Adobe Reader prints PDFs very small on the top left hand corner or prints an error

$
0
0

I ran into an interesting issue the other day where a client told me that printing PDFs with Adobe Reader would either print extremely small on the top left hand corner (1” x 2” or 1” x 1.5”) of a page or print the following error on the actual printout:

ERROR: invalidfont

OFFENDING COMMAND: show

STACK:

(                   )

What I discovered was that these issues appear to be related to the Adobe Reader being unable to send the format of the text or the font of the text to the printer.  The workaround that appears to fix this issue is to adjust the Advanced settings in the print menu as such:

clip_image002

clip_image002[4]clip_image002[6]

After adjusting these settings, the printer should be able to correctly print out the document.

Notes on Citrix XenDesktop 5.6 performance testing with various latency and bandwidth settings

$
0
0

Before I begin, I’d like to state that this post is meant to be something I can quickly reference to in the future and they are just my observations from working with a colleague to test Citrix XenDesktop 5.6 through a WAN emulator and thin client.  I can’t fully guarantee the accuracy of the tests but what I can say is that we tried our best to build the test pod as close to production environment we’ve been having issues with as possible.

Test Pod Components

XenDesktop Version: 5.6 DDCs x 2

VDA Agent Version: 5.6.300

Desktops: Dedicated desktops with Windows 7, 2 x vCPU, 8GB RAM

Storage: 3Par SAN with 20+ SAS drives

Hypervisor: vSphere 5.1 U1

WAN Emulator: WANem

Riverbed: Virtual Appliance

Firewall:  Stonegate

Monitors: 3 x 24” monitors at 2560x1440

Thin Client: HP t610 with Windows 7 Embedded

--------------------------------------------------------------------------------------------------------------------------------------------------------------------

Here are the observations:

  • We noticed through our testing is that the highest latency we could set before noticeable typing delay by either a word or half a word was 100ms. 
  • 100ms was definitely workable as the slight delay would mostly be noticeable by faster typers
  • 150ms would cause one to half a word typing delay for users who type fast while slower ones would notice a few characters.  Either way, while 150ms was still workable, most users would notice typing delays.
  • 100ms doesn’t affect the mouse cursor in the regular VDI as much but it does affect the cursor in RDP sessions. 
  • Any latency above 150ms causes the mouse movement delays extremely noticeable in RDP sessions where it can be annoying.
  • In terms of bandwidth, we noticed we could push the Mbps usage upwards to 8Mbps by simply opening up a browser, navigate to www.flickr.com, then scroll through a page full of images.
  • We also noticed that we could push the Mbps usage upwards to 10.2Mbps if we open up Google Earth (the VDA has the optimization pack for DirectX) and navigate around complex terrain such as Paris’ housing neighborhood.
  • General usage appears to require around 2 to 5Mbps depending on what is done in the desktop.
  • All traffic are spiky in nature so bandwidth usage is not pinned to a high usage rate.
  • Riverbed’s non multi-stream optimization can provide reductions but only in a limited capacity.

We haven’t actually done testing with multi-stream where we can prioritize traffic but once we do, I’ll try to remember to update this post.

Viewing all 836 articles
Browse latest View live


<script src="https://jsc.adskeeper.com/r/s/rssing.com.1596347.js" async> </script>