Quantcast
Channel: Terence Luk
Viewing all 836 articles
Browse latest View live

Unabled to delete mailbox in Exchange 2013 Exchange Administrative Center with the error: “Active Directory operation failed on domainController.com. This error is not retriable. Additional information: Access is denied. Active directory response: 00000005: SecErr: DSID-03151D15, problem 4003 (INSUFF_ACCESS_RIGHTS), data 0”

$
0
0

Problem

You’re logged into the Exchange 2013 server Exchange Administrative Center and attempt to delete a user’s mailbox but receive the following error:

Active Directory operation failed on domainController.com. This error is not retriable. Additional information: Access is denied. Active directory response: 00000005: SecErr: DSID-03151D15, problem 4003 (INSUFF_ACCESS_RIGHTS), data 0

image

Solution

One of the causes for this error message is that the Active Directory account you are attempting to delete does not have Inheritance enabled.  To correct the issue, simply enable inheritance in the security policy for the account before attempting to delete it in Exchange 2013’s Exchange Administrative Center:

image

image

image


Unable to sign into on-prem Skype for Business after installing patches in December 2015

$
0
0

I’ve had a few clients and colleagues notice that they are no longer able to sign into Skype for Business after installing Windows updates sometime in December.  The error message they receive when they attempt to sign in is as follows:

Can’t sign in to Skype for Business

The address you typed is not valid.

Valid addresses use the format username@domain (someone@example.com). Make sure there are no spaces in the address.

Click Back to retype the address.

image

What I’ve noticed back in December was that the only way to fix this issue was to uninstall the updates outlined in the following KB article:

MS15-128: Description of the security update for Lync 2013 (Skype for Business): December 8, 2015
https://support.microsoft.com/en-us/kb/3114351

Now that we’re into the 2016 new year, it looks like Microsoft has released the following KB that outlines this issue:

"The address type is not valid" error when you sign in to Lync 2013 (Skype for Business) by using domain\username format
https://support.microsoft.com/en-us/kb/3114687

… and released a patch offerred in the following KB to fix the issue:

January 12, 2016, update for Lync 2013 (Skype for Business) (KB3114502)
https://support.microsoft.com/en-us/kb/3114502

The 64-bit patch found in the KB above is name lync2013-kb3114502-fullfile-x64-glb.exe and is 106,360KB in size.  I’ve tested this with a few SfB clients that exhibited this issue and can confirm that it fixes the issue.

Enabling TLS 1.0 for VMware Horizon View 6.2.1 to allow Horizon View 3.3 or older clients to connect

$
0
0

Problem

As a follow up to one of my previous posts:

Upgrading from VMware Horizon View 6.0.1 to 6.2.1 causes connections to throw the error: “Unable to connect to desktop: There is no available gateway for the display protocol. Try again, or contact your administrator if this problem persists.”
http://terenceluk.blogspot.com/2016/01/upgrading-from-vmware-horizon-view-601.html

I finally got a chance to take some time to test the following KB that outlines the steps required to enable TLS 1.0 for backward compatibility with VMware Horizon View 6.2.0 and earlier:

Configure security protocols for PCoIP for Horizon 6 version 6.2 and later, and Horizon Client 3.5 and later (2130798)
http://kb.vmware.com/selfservice/microsites/search.do?language=en_US&cmd=displayKC&externalId=2130798

To provide a bit of background for the issue, let me reference the release notes found at the following URL that describes the TLS changes to PCoIP connections:

Release Notes for VMware Horizon 6 version 6.2.1
https://pubs.vmware.com/Release_Notes/en/horizon-6-view/horizon-621-view-release-notes.html

What's New in This Release of Horizon 6

  • VMware Horizon View 6.2.1 is a maintenance release. Some known issues from previous releases are resolved. For more information, see Resolved Issues.
  • To improve security, SSLv3 is no longer supported. By default, TLS 1.1 and TLS 1.2 are enabled. TLS 1.0 is enabled for outgoing connections to support vSphere 5.x, but is disabled for incoming connections. If the vSphere version is 6.x, it is recommended that TLS 1.0 be disabled for outgoing connections.
  • For PCoIP connections, by default, TLS 1.1 and TLS 1.2 are enabled and TLS 1.0 is disabled. Horizon Client 3.3 and earlier versions use only TLS 1.0 for PCoIP. View Agent versions earlier than 6.2 also use only TLS 1.0. To support Horizon Client 3.3 and earlier versions, as well as View Agent 6.1.x and earlier versions, if you use the PCoIP Secure Gateway, you can enable TLS 1.0 for PCoIP connections by following the instructions in KB 2130798, Configure security protocols for PCoIP for Horizon 6 version 6.2 and later, and Horizon Client 3.5 and later.
  • For Blast Secure Gateway and the HTML Access agent, by default, TLS 1.1 and TLS 1.2 are enabled and TLS 1.0 is disabled. You can configure the security protocols and cipher suites for both components. See Configuring Security Protocols and Cipher Suites for Blast Secure Gateway in the View Security document and Configure Security Protocols and Cipher Suites for HTML Access Agent in the Horizon Client and View Agent Security document.
  • Linux desktops now support clipboard redirection, single sign-on, and smart card redirection. The Setting Up Horizon 6 for Linux Desktops guide also documents additional bulk-deployment scripts.

The text highlighted in red are the changes to TLS that could potentially cause connectivity issues between older VMware View or Horizon View clients due to TLS 1.0 being disabled.

Testing Environment

With the background of the issue described let me begin by listing the details of the environment I used for testing:

Horizon View Connection Servers: 2 (1 for external connections and 1 for internal connections)
Horizon View Connection Server Version: 6.2.1-3284346
Horizon View Security Server Version: 6.2.1-3284346
Horizon View Agent: 6.2.1-3284346

Internal Connection Tests - Use PCoIP Secure Gateway for PCoIP connects to machine is Disabled

The View Connection server currently has the following settings configured:

Use secure Tunnel connection to machine: disabled

Use PCoIP Secure Gateway for PCoIP connections to machine: disabled

Use Blast Secure Gateway for HTML access to machine: disabled

image

Attempting to access this environment with one of the Wyse Windows Embedded thin clients with an unsupported Horizon Client 3.1.0 build-2085634:

image

… will display a blackscreen for a few seconds then disconnect with the following error:

The connection to the remote computer ended.

image

As per the KB article mentioned above:

Configure security protocols for PCoIP for Horizon 6 version 6.2 and later, and Horizon Client 3.5 and later (2130798)
http://kb.vmware.com/selfservice/microsites/search.do?language=en_US&cmd=displayKC&externalId=2130798

I proceeded to add the following registry key to my virtual desktop with the 6.2.1 agent in a pool:

HKLM\Software\Teradici\PCoIP\pcoip_admin
Name: pcoip.ssl_protocol
Type: REG_SZ
Value: TLS1.0:TLS1.1:TLS1.2

The registry can either be manually added or the following command can be executed:

reg add "HKLM\Software\Teradici\PCoIP\pcoip_admin" /v "pcoip.ssl_protocol" /t REG_SZ /d TLS1.0:TLS1.1:TLS1.2 /f

image

From here, connections to the virtual desktop with the unsupported Horizon Client 3.1.0 build-2085634 completes successfully without any errors.

Internal Connection Tests - Use PCoIP Secure Gateway for PCoIP connects to machine is Enabled

Changing the View Connection server’s settings to:

Use secure Tunnel connection to machine: enabled

Use PCoIP Secure Gateway for PCoIP connections to machine: enabled

Use Blast Secure Gateway for HTML access to machine: disabled

image

… with the registry added and then attempting to connect to the virtual desktop with the unsupported Horizon Client 3.1.0 build-2085634 fails with the error:

The connection to the remote computer ended.

Proceeding to add the following registry key to the view connection server:

HKLM\Software\Teradici\SecurityGateway
Name: SSLProtocol
Type: REG_SZ
Value: tls1.2:tls1.1:tls1.0

… either via:

reg add "HKLM\Software\Teradici\SecurityGateway" /v "SSLProtocol" /t REG_SZ /d tls1.2:tls1.1:tls1.0 /f

… or manually via the registry editor:

image

Then attempting to connect to the virtual desktop with the unsupported Horizon Client 3.1.0 build-2085634 fails with the same error message.

Note that I tried multiple troubleshooting steps but was unable to get internal View Horizon Clients that were older than 3.3 to successfully connect.

External Connection Tests

Logging onto the VMware Horizon View Security server and adding the registry key:

HKLM\Software\Teradici\SecurityGateway
Name: SSLProtocol
Type: REG_SZ
Value: tls1.2:tls1.1:tls1.0

… either manually through the regisry editor or via:

reg add "HKLM\Software\Teradici\SecurityGateway" /v "SSLProtocol" /t REG_SZ /d tls1.2:tls1.1:tls1.0 /f

… allows me to connect successfully connect with an unsupported Horizon Client 3.1.0 build-2085634.  However, attempting to connect with an even older View Client 5.0.0 build-481677:

image

image

… will through the following error:

The View Connection Server connection failed. A security error occurred.

image

It’s worth noting that I did not add the registry key to the View Connection server that was paired with the View Security server as it did not appear to matter.

Conclusion

The conclusion from my tests is as follows:

  1. I was able to use the registry entry to provide access to View Connection Server 6.2.1 and View Agent 6.2.1 from an unsupported TLS 1.0 client if I am not using PCoIP Secure Gateway for PCoIP connections to the machine meaning your View client is just being brokered directly to virtual desktop
  2. I was unable to use the registry entry to provide access to View Connection Server 6.2.1 and View Agent 6.2.1 from an unsupported TLS 1.0 client if I am using PCoIP Secure Gateway for PCoIP connections to the machine meaning your View client actually traverses through the View Connection server in order to connect to the virtual desktop
  3. I was able to use the registry entry to provide access external access through the View Security Server 6.2.1 and View Agent 6.2.1 from an unsupported TLS 1.0 client by adding the registry entry on the Security server and View agent

What had me stumped at the end of this test was why I could not get #2 to work so comments on what I did incorrectly are welcomed.

I hope this helps anyone who may come across this issue.

Licensing VMware App Volumes

$
0
0

I recently had to assist a client with licensing their VMware App Volumes software as the trial period was coming to an end and I noticed that the process was a bit confusing so I thought I’d write this short blog post in case someone runs into the same issue.

Problem

Logging into the My VMware portal after purchasing your VMware App Volumes licensing will display the following 15 character license key:

xxxxx-xxxxx-xxxxx-xxxxx-xxxxx

image

What I thought I needed to do was simply copy the serial key and paste it into the console but when I launched the App Volumes Manager, clicked on the Licensing tab, then Edit:

image

I quickly noticed that I was asked to upload some sort of a license file with a .key extension:

image

Solution

While I’m not really sure what the serial key is for, the way to license the App Volumes Manager is to actually navigate back to My VMware and to the downloads section:

image

As shown in the screenshot above, an Unlimited Desktops key file is available for download under the App Volumes ISO item. Proceed to download the file to the server:

image

image

Then upload the file in the licensing section to license VMware App Volumes:

image

image

Viewing Adobe PDFs within Internet Explorer 11 throws the error: “There is a problem with Adobe Acrobat/Reader. If it is running, please exit and try again. (0:104)”

$
0
0

Problem

I was recently involved with an Internet Explorer upgrade for a client with VMware Horizon VIew virtual desktops accelerated with SanDisk’s ioVDI solution where we noticed that after upgrading from Internet Explorer 9 to 11, we were no longer able to open PDFs from within the browser as the following error is presented:

There is a problem with Adobe Acrobat/Reader. If it is running, please exit and try again. (0:104)

image

Solution

Through the week long troubleshooting process, we were able to identify three possible solutions to the problem.

Solution #1 – Configure Internet Explorer to launch the Adobe PDF in a new seperate window

This was one of the easiest solutions we found through the forums but it was not practical for the environment because we had web applications that required PDFs to be launched from within the Internet Explorer 11 window.

Solution #2 – Configure IE 11 Tab Process Growth to 1 and disable Adobe Protected Mode

The environment we worked in had an application that required the Tab Process Growth for IE 11 to be set to the value of 0. 

User Configuration – Policies – Administrative Templates – Windows Components – Internet Explorer

Set tab process growth

image

image

What we noticed was that if we set the value to 1 via the GPO:

image

… or via the registry:

HKEY_CURRENT_USER\Software\Microsoft\Internet Explorer\Main

REG_DWORD named TabProcGrowth

clip_image002clip_image002

------------------------------------------------------------------------------------------------------------------------------------------

**Note that if the above registry key does not work, try the following alternate location that also appears to work:

image

HKEY_CURRENT_USER\Software\Polices\Microsoft\Internet Explorer\Main

------------------------------------------------------------------------------------------------------------------------------------------

… and disable Protected Mode for Adobe Acrobat Reader DC 2015 as demonstrated in my previous post:

Disabling “Enable Protected Mode at startup” and “Enable Enhanced Security” for Adobe Acrobat Reader DC 2015
http://terenceluk.blogspot.com/2016/01/disabling-enable-protected-mode-at.html

… then the error will no longer be presented.

Solution #3 – Disable redirectusertemp for SanDisk ioVDI

The two solutions above would not have met our requirements for the organization and we were left wondering why our virtual desktops exhibited this problem but not our physical desktops.  Through further investigation and a bit of luck, we noticed errors being thrown in the Adobe Acrobat Reader DC 2015 referencing the directory:

C:\Windows\Temp\iotdx-disposable

As demonstrated in one of my previous posts:

VMware Horizon View virtual desktops experience temporary drive space issues with SanDisk Fusion-io ioVDI integration
http://terenceluk.blogspot.com/2015/08/vmware-horizon-view-virtual-desktops.html

I recently noticed that an environment with SanDisk ioVDI redirecting Windows files to a disposable disk could case issues if the drive fills up.  In this situation, the drive did not fill up but Adobe appears to have problems writing to it.  What we noticed was that this issue could be fixed if we iottool command on the VDI and disable the user temp folder from redirecting.

image

The command to execute would be as follows:

iottool redirectusertmp disable

Once executed, restart the system.

------------------------------------------------------------------------------------------------------------------------------------------

This issue took quite a bit of time and resources and I hope this post will help others who may come across this issue.

Attempting to connect to a VMware Horizon View desktop via PCoIP displays a black screen and does not disconnect

$
0
0

Problem

You’ve deployed a new Windows desktop, created a manual desktop pool and then added the desktop to the pool. With the newly added desktop listed as Available in the Status column, you attempt to connect to the desktop via PCoIP with your VMware Horizon View client but all you see is a black screen:

image

The session does not cut off and navigating to the VMware Horizon 6 View Administrator shows that the session is in a Connected state:

image

You’ve confirmed that you’ve set the monitor resolution for the desktop pool to a high resolution:

image

Solution

This issue threw me off for a bit of time because I’ve come across this issue before as mentioned in one of my previous posts:

Connecting to VMware View 5.1.2 desktop via PCoIP displays a black screen when in full screen
http://terenceluk.blogspot.com/2013/11/connecting-to-vmware-view-512-desktop.html

I had a feeling it was the video memory but never bothered to check the actual virtual machine’s settings because I assumed they were adjusted and when I finally did, it was set to:

Number of displays: 1

Total video memory: 8 MB

image

These settings were lower than the minimum required for the lowest monitor resolution that VMware Horizon View provides:

Max number of monitors: 1

Max resolution of any one monitor: 1680x1050

image

When set to the lowest resolution indicated above, the Video card for the virtual machine settings are configured as:

Number of displays: 1

Total video memory: 13.5 MB

image

… which is still higher than the original virtual machine settings.  The cause of my issue because I failed to remember that changing the resolution settings for the desktop pool does not get applied to the virtual desktops unless the desktop is completed Powered Off.  A restart of the desktop will not change the Video card settings and since this was a manual desktop pool with the Remote Machine Power Policy set to Ensure machines are always powered on, the desktop was never really powered off after being added to the pool.

To correct the issue, I simply changed the Remote Machine Power Policy set to Take no power action:

image

… powered off the machine, let View reconfigure the virtual machine, powered it back on with the new Video card settings and the problem went away.

As a reference, setting the monitor resolution for the pool to:

Max number of monitors: 4

Max resolution of any one monitor: 2560x1600

image

Configures the virtual machine’s Video card settings as:

Number of displays: 4

Total video memory: 125 MB

image

Using a CSV list to create Active Directory contacts

$
0
0

I’ve recently been asked to convert a set of contacts exported from Outlook as a CSV file into Active Directory contacts. This was the first time I’ve had to do something like this and this exercise made me realize that Outlook contacts actually had much more fields available than Active Directory contacts so if anyone is about to embark on this task, note that there are going to be many fields that you would not be able to bring into Active Directory.

The way I approached this was to begin by determining what fields were available for Active Directory contacts. This can be easily determined by reviewing the tabs and fields of an Active Directory contact in Active Directory Users and Computers:

imageimage

imageimage

From here, the next step is to determine what fields in the Contact object maps to the ones that we will use to import via a CSV file. To do this, I executed the following csvde command to export existing contacts from AD to review the fields:

csvde -f exportContacts.csv -d OU=Contacts,DC=domain,DC=com

image

Opening up this CSV file will list the following available attributes:

  • DN
  • objectClass
  • ou
  • distinguishedName
  • instanceType
  • whenCreated
  • whenChanged
  • uSNCreated
  • uSNChanged
  • name
  • objectGUID
  • objectCategory
  • dSCorePropagationData
  • cn
  • sn
  • givenName
  • displayName
  • memberOf
  • proxyAddresses
  • targetAddress
  • mailNickname
  • internetEncoding
  • countryCode
  • legacyExchangeDN
  • textEncodedORAddress
  • mail
  • msExchHideFromAddressLists
  • msExchPoliciesIncluded
  • msExchRecipientDisplayType
  • msExchVersion
  • showInAddressBook
  • msExchUMDtmfMap
  • altRecipientBL
  • initials
  • company
  • mAPIRecipient
  • msExchALObjectVersion
  • telephoneNumber
  • homeMTA
  • extensionData
  • homeMDB
  • garbageCollPeriod
  • mDBUseDefaults
  • userAccountControl
  • codePage
  • pwdLastSet
  • primaryGroupID
  • objectSid
  • accountExpires
  • sAMAccountName
  • sAMAccountType
  • userPrincipalName
  • ipPhone
  • lastLogonTimestamp
  • msExchHomeServerName
  • msExchMailboxSecurityDescriptor
  • msExchUserAccountControl
  • msExchMailboxGuid
  • msExchPoliciesExcluded
  • msExchMDBRulesQuota
  • msExchUserCulture
  • msExchRecipientTypeDetails
  • altRecipient
  • badPwdCount
  • badPasswordTime
  • lastLogoff
  • lastLogon
  • logonCount
  • lockoutTime
  • deliverAndRedirect
  • msDS-
  • SupportedEncryptionTypes

Opening up a CSV file that was created from exporting Outlook contacts will display the following attributes:

  • Title
  • First Name
  • Middle Name
  • Last Name
  • Suffix
  • Company
  • Department
  • Job Title
  • Business Street
  • Business Street 2
  • Business Street 3
  • Business City
  • Business State
  • Business Postal Code
  • Business Country/Region
  • Home Street
  • Home Street 2
  • Home Street 3
  • Home City
  • Home State
  • Home Postal Code
  • Home Country/Region
  • Other Street
  • Other Street 2
  • Other Street 3
  • Other City
  • Other State
  • Other Postal Code
  • Other Country/Region
  • Assistant's Phone
  • Business Fax
  • Business Phone
  • Business Phone 2
  • Callback
  • Car Phone
  • Company Main Phone
  • Home Fax
  • Home Phone
  • Home Phone 2
  • ISDN
  • Mobile Phone
  • Other Fax
  • Other Phone
  • Pager
  • Primary Phone
  • Radio Phone
  • TTY/TDD Phone
  • Telex
  • Account
  • Anniversary
  • Assistant's Name
  • Billing Information
  • Birthday
  • Business Address
  • PO Box
  • Categories
  • Children
  • Directory Server
  • E-mail Address
  • E-mail Type
  • E-mail Display Name
  • E-mail 2 Address
  • E-mail 2 Type
  • E-mail 2 Display Name
  • E-mail 3 Address
  • E-mail 3 Type
  • E-mail 3 Display Name
  • Gender
  • Government ID Number
  • Hobby
  • Home Address PO Box
  • Initials
  • Internet
  • Free Busy
  • Keywords
  • Language
  • Location
  • Manager's Name
  • Mileage
  • Notes
  • Office Location
  • Organizational ID Number
  • Other Address PO Box
  • Priority
  • Private Profession
  • Referred By
  • Sensitivity
  • Spouse
  • User 1
  • User 2
  • User 3
  • User 4
  • Web Page

**Notice how much more attributes are available for an Outlook contact so if you are to convert these into AD contacts then you will need to determine where to put the additional information.

I’ve created the following table that maps what AD attribute maps to which CSV fields:


AD Attribute

Value

DN

CN=First name Initia. Last name,OU=Test,OU=Contacts,DC=domain,DC=com

objectClass

contact

ou


distinguishedName

CN=First name Initia. Last name,OU=Test,OU=Contacts,DC=domain,DC=com

instanceType

4

whenCreated

20160110232419.0Z

whenChanged

20160110232548.0Z

uSNCreated

53027203

uSNChanged

53027234

name

First name Initia. Last name

objectGUID

X'01709c730e93d24db092bac6744cda3c'

objectCategory

CN=Person,CN=Schema,CN=Configuration,DC=domain,DC=com

cn

First name Initia. Last name

sn

Last name

c

BM

l

City Address

st

State/provice Address

title

Job Title

description

Description

postalCode

Zip/Postal Code Address

postOfficeBox

P.O. Box Address

physicalDeliveryOfficeName

Office

telephoneNumber

Telephone Number General

facsimileTelephoneNumber

Fax

givenName

First name

initials

Initia

displayName

Display name

info

Notes

co

Bermuda

department

Department

company

Company

streetAddress

Street

wWWHomePage

Web Page

countryCode

60

ipPhone

IP phone

mail

E-mail General

homePhone

Home

mobile

Mobile

pager

Pager

With the above information, simply create a spreadsheet with the AD attribute as the column headings, fill in the appropriate values for the contacts, save it as a CSV file then use the csvde command below to import and create the AD contacts:

csvde -I -f c:\ContactsImport.csv

image

Attempting to migrate a mailbox from Exchange 2007 Server to 2013 throws the error: “Error: MigrationPermanentException: Active Directory property ‎'homeMDB‎' is not writeable on recipient”

$
0
0

Problem

You attempt to migrate a mailbox from Exchange 2007 Server to Exchange 2013 Server through in the Exchange Server 2013 administrative console but the move fails with:

Data migrated:
Migration rate:
Error: MigrationPermanentException: Active Directory property ‎'homeMDB‎' is not writeable on recipient ‎'domain.com/Disabled Accounts/Rewan, Sheena‎'. --> Active Directory property ‎'homeMDB‎' is not writeable on recipient ‎'domain.com/Disabled Accounts/Rewan, Sheena‎'.
Report: srewan@domain.bm Download the report for this user
Last successful sync date:
Status: 
Queued duration:
In-progress duration:
Synced duration:
Stalled duration:

image

Solution

I find the most probable cause to this error when attempting to migrate a mailbox is due to Inheritance being turned off for the user object’s security permissions.  Proceed to open the user account’s security properties and ensure Inheritance is enabled:

image

image

image


Unable to manage NetScaler administration console with Active Directory account

$
0
0

Problem

You’ve configured the requirements to allow Active Directory to log into your NetScaler appliance and while authentication appears to work and allows you to log into the administration console, you are presented with the following message:

2 error(s) encountered.
Not authorized to execute this command [show ns license]
Not authorized to execute this command [show ns features]

image

Clicking OK displays a page with no information populated and you are unable to administer the appliance.

Solution

I’ve received quite a few calls from colleagues and clients about this error and what I’ve noticed is that it is caused by missed configuration the majority of the time.  One of the common missed configuration is forgetting to fill in the following two settings under the Other Settings section:

  • Group Attribute
  • Sub Attribute Name

image

The correct settings are as follows:

Group Attribute – memberOf

Sub Attribute Name – cn

image

If these settings do not correct the issue, please refer to my previous post to double check whether something else was missed:

Configure NetScaler Appliance to allow administration with Active Directory accounts
http://terenceluk.blogspot.com/2015/06/configure-netscaler-appliance-to-allow.html

Attempting to install Skype for Business Server 2015 KB3061064 fails with: “There were errors during the installation process. For details, see the log file at C:\SfB KB3061064 Update\Skype_patchinstallerlog--[2016-01-31][16-22-02].txt”

$
0
0

Problem

You’ve downloaded the Skype for Business Server 2015 KB3061064 installer from:

https://support.microsoft.com/en-us/kb/3061064

… but noticed that when the update installer successfully installs all the updates aside from:

3097645 Update for Skype for Business Server 2015 6.0.9319.102

image

The error presented reads:

Skype for Business Server 2015 Update Installer

There were errors during the installation process. For details, see the log file at C:\SfB KB3061064 Update\Skype_patchinstallerlog-<serverName>-[2016-01-31][16-22-02].txt

image

image

Opening the Skype_patchinstallerlog-<serverName>-[2016-01-31][16-22-02].txt displays the following error:

[1/31/2016 4:30:05 PM] ERROR 1603: Server.msp had errors installing.

image

Solution

As shown in the log file above, the error message doesn’t really provide much information as to why the item in the patch failed.  The next troubleshooting step in this case is to review the Skype for Business Server 2015 Deployment Log that is usually an html file found in the following directory:

%userprofile%\AppData\Local\Temp

The log we are interested in is the html file that was last written:

image

Launching this log in this case revealed that my C drive had less than 32GB free which was what the minimum requirement for patching the server required:

Error: An error occurred: "Microsoft.Rtc.Management.Deployment.DeploymentException""Install-CsDatabase was unable to find suitable drives for storing the database files. This is often due to insufficient disk space; typically you should have at least 32 GB of free space before attempting to create databases. However, there are other possible reasons why this command could have failed. For more information, see http://go.microsoft.com/fwlink/?LinkId=511023"

image

Simply increasing the C drive space to a size that had 32GB free will allow the patch to install.

Attempting to add View Composer settings to a new VMware Horizon View deployment throws the error: “Error while checking the administrator. Please re-check your information.”

$
0
0

Problem

You’ve completed deploying a new set of VMware Horizon View 6.2.1 servers in an environment and began configuring the View Composer settings:

image

View Composer is collocated with the vCenter so you select the View Composer co-installed with vCenter Server option:

image

However, you receive the following error when committing the configuration settings:

Server Error

Error while attempting to connect to View Composer.

image

Server Error

A connection problem occurred between Connection Server, View Composer, and vCenter Server. Check that all the services are running and the ports and URLs are entered correctly.

image

Further attempts to continue without configuring the View Composer and then going back into the vCenter properties to configure it will throw the following error:

Server Error

Error while checking the administrator. Please re-check your information.

Solution

This error threw me off for over a few hours as I’ve never come across this issue and the only KB I could find to assist with troubleshooting this error was the following:

Adding the View Composer to the View Connection server fails with the error: Error while adding the administrator. Please re-check your information (1035626)
http://kb.vmware.com/selfservice/microsites/search.do?language=en_US&cmd=displayKC&externalId=1035626

… which point to connectivity errors but telnet tests to the View Composer port connect.  Further review of the debug logs show cryptic LDAP errors:

2016-01-19T21:16:40.737-04:00 ERROR (0644-152C) <pool-2-thread-1> [MessageBusSslConfigManager] Error reading common configuration: GSS-SPNEGO
2016-01-19T21:16:40.737-04:00 WARN  (0644-0A8C) <pool-1-thread-1> [LdapContextManager] Can't create a new LdapContext for server ldap://127.0.0.1:389/DC=vdi,DC=vmware,DC=int: javax.naming.AuthenticationException: GSS-SPNEGO [Root exception is javax.security.sasl.SaslException: Failed to initiate authentication: com.vmware.vdi.common.winauth.WinAuthCodifiedException: Failed to start authentication negotiation: Unknown error [Caused by com.vmware.vdi.common.winauth.WinAuthCodifiedException: Failed to start authentication negotiation: Unknown error]]

image

After not making any progress and waiting for a call back from the VMware engineer, I decided to ask the client to move the server to a different VLAN which caused the issue to instantly go away.  The client wasn’t able to tell me what the difference between the VLANs were but I assume there must have been some difference in firewall, routing or security rules.

Dell Wyse Device Manager Version 5.0 WDMServiceLog process pegs processor at 100%

$
0
0

Problem

Dell Wyse Device Manager Version 5.0 is installed onto a Windows Server 2012 R2 server:

clip_image002

… and you notice that the WDMServiceLog (32 bit) / RptSvcLog.exe process consistently consumes close to 100% of the CPU process pegging the processor at 100% and allowing the server down to a crawl:

clip_image002

clip_image002[4]

Solution

While the following may not be the best solution for the issue as it’s more of a workaround, it was the only one I could find while searching:

http://www.technicalhelp.de/forums/topic/problem-with-wdm-service-log-makes-cpu-usage-go-to-100/

The suggestion was to disable the WDM Service Logs logging service found here in the Preferences options:

clip_image002[6]

Disabling this service will cause the WDMServiceLog (32 bit) / RptSvcLog.exe never to run and therefore fixes the issue.

Removing a Skype for Business Server 2015 Standard Server and Conference Directory

$
0
0

I was recently asked to assist with removing a Skype for Business Server 2015 Standard server from an environment after an administrator deployed a new Standard Edition server in an effort to upgrade the operating system from Windows Server 2012 R1 to R2 because the former continuously bluescreened and rebooted ever few hours.  All the users had been moved over the new pool but the administrator was unable to remove the Conference Directory which would then allow him to remove the legacy standard edition server.

The first step, which was to remove the Conference Directory, is to use the cmdlet:

Get-CsConferenceDirectory

… to list the conference directories so that we could identify which directory belonged to which pool:

image

As shown in the screenshot above, the conference directory that we would like to remove is the first one with the identity value of 1 (lyncstd01).  The next step is to use the cmdlet:

Remove-CsConferenceDirectory -Identity 1

… to remove the directory but when this cmdlet is executed, the output indicates that the removal was unsuccessful:

PS C:\> Remove-CsConferenceDirectory -Identity 1

Remove-CsConferenceDirectory : Conference directory with ID "1" is not empty.

If you delete this conference directory, you will affect users who use dial-in

conferencing. If you are sure that you want to delete it, use the Force

parameter with this command.

At line:1 char:1

+ Remove-CsConferenceDirectory -Identity 1

+ ~~~~~~~~~~~~~~~~~~~~~~~~~~~~~~~~~~~~~~~~

+ CategoryInfo : NotSpecified: (:) [Remove-CsConferenceDirectory]

, ConferenceDirectoryException

+ FullyQualifiedErrorId : Conference directory with ID "1" is not empty. I

f you delete this conference directory, you will affect users who use dial

-in conferencing. If you are sure that you want to delete it, use the Forc

e parameter with this command.,Microsoft.Rtc.Management.ConferenceDirector

yCmdlets.RemoveConferenceDirectoryCmdlet

PS C:\>

If you’ve verified that all the users are moved off and there are no associations to the pool, it is safe to use the -force switch option to forcefully remove the pool as such:

Remove-CsConferenceDirectory -Identity 1 -force

The output should be similar to the following:

PS C:\> Remove-CsConferenceDirectory -Identity 1 -force

WARNING: Conference directory with ID "1" will not be checked to see if it is

safe to delete because the operation was invoked with the Force parameter.

Confirm

Are you sure you want to perform this action?

Performing the operation "Remove-CsConferenceDirectory" on target "Conference

directory 1".

[Y] Yes [A] Yes to All [N] No [L] No to All [S] Suspend [?] Help

(default is "Y"):Y

PS C:\>

image

What I’ve noticed quite often when I get called is that administrators tend to execute Enable-CsTopology immediately only to find that the Conference Directory gets recreated.  What you should actually do at this point is to proceed with using the Topology Builder to delete the Standard Edition server, then publish the topology.  By following this proceedure, the pool will not get recreated and the publishing should complete successfully with both pool and conference directory removed.

image

Installing / Enabling Adobe Flash on Windows Server 2012 R2

$
0
0

I’ve been asked several times last year about how to install / enable Adobe Flash on a Windows Server 2012 R2 server and while I’m not a supporter of installing any Adobe products on servers, there are situations where it’s handy to have.  The following steps demonstrates how to get it installed / enabled:

If you ever attempt to access a web page such as the VMware Horizon View Administration webpage with Internet Explorer on a WIndows Server 2012 R2 server, you’ll be presented with the following:

View Administrator requires Adobe Flash 10.1 or higher. Click below to download.

image

Attempting to run an installer downloaded from the Adobe site will display the following message:

Adobe Flash Player 16.0 Installer

The installation encountered errors:

Your Microsoft Internet Explorer browser includes the latest version of the Adobe Flash Player built-in. Windows Update will inform you when new versions of the Flash Player are available.

image

image

To install / enable Adobe Flash, launch the Server Manager and click on Add roles and features:

image

Click through the wizard until you reach the Features options and scroll down to the User Interfaces andInfrastructure item:

image

Expand the User Interfaces andInfrastructure item and enable the Desktop Experience option:

imageimage

image

Proceed with the install:

image

image

Once the component has been installed and server rebooted, Adobe Flash should now be enabled for InternetExplorer:

image

If for whatever reason it isn’t enabled, click on the IE options icon on the top right corner, then open Manage add-ons:

image

From within the Toolbars and Extensions menu, you should see a Shockwave Flash Object item displayed. If it is disabled, proceed to enabling it:

image

VMware Horizon View Agent installation fails with: "Error 1311. Source file not found:"

$
0
0

Problem

You attempt to install the VMware Horizon View agent onto a Windows 7 virtual machine but the installation fails with the following error message:

Error 1311. Source file not found:

C:\Users\<userName>\Appdata\Local\Temp\{68CA9784-0791-433F-8EBF-0714B20B627F}~setup\VmwVau~1.cab. Verify that the file exists and that you can access it.

Navigate to the path above shows that the VmwVau~cab file exists and permissions are set correctly:

imageimage

Solution

This issue threw me off for a bit because the only information I could find on the internet was that the VMware Horizon View agent installer was corrupted but comparing the files did not show any differences in byte count:

image

Since I’ve ran out of options, I went ahead and downloaded the agent directly from the VMware portal rather than copying it from a file share I had downloaded the file to previously and the installation completed.


Unable to search Skype Directory when logged in through the Edge Server after upgrading to Skype for Business Server 2015

$
0
0

Problem

You’ve successfully completed upgrading your Lync Server 2010 or 2013 environment to Skype for Business Server 2015 but noticed that you receive the following error when attempting to use the SKYPE DIRECTORY tab to search the Skype directory:

Search for Skype contacts by name, Skype Name, email address, phone number, and location.

An error occurred during the search. Please try again, and contact your support team if the problem continues.

image

You’ve confirmed that the Edge server properties in the Topology Builder has the following configuration enabled:

Enable Skype-Skype federation search for this Edge pool (port 4443)

Choose this option, Skype-Skype federation will have federation search enabled by default.

image

You’ve successfully recreated the Skype Public Provider with:

New-CsPublicProvider -Identity Skype -ProxyFqdn federation.messenger.msn.com –IconUrl https://images.edge.messenger.live.com/Messenger_16x16.png -NameDecorationRoutingDomain msn.com -NameDecorationExcludedDomainList "msn.com,outlook.com,live.com,hotmail.com" -VerificationLevel UseSourceVerification -Enabled $true -EnableSkypeIdRouting $true -EnableSkypeDirectorySearch $true

You’ve noticed that the SKYPE DIRECTORY search feature works when you are internally logged in:

image

Using the Remote Connectivity Analyzer tool online at https://testconnectivity.microsoft.com/ returns green status with no errors.

Solution

This issue threw me off for an hour because all the external tests I ran came back in good health yet it was apparently there was something wrong with the Edge server because searching the Skype directory worked internally.  As I began running out of ideas, I decided to check the TMG publishing rule for the Web Services and to my surprise threw the following error when I attempted to test the rule:

image

All of the required secure 4443 port publishing tests failed with the error:

image

Category: Destination server certificate error

Error details: 0x80090322 – The target principal name is incorrect.

Action: Go to http://go.microsoft.com/fwlink/?LinkId=115965

To confirm that external web services was indeed broken, I attempted to browse to the URL:

https://<domain>/groupexpansion/service.svc

… and was able to confirm I did not get a authentication prompt. After spending a bit of time reviewing the TMG publishing rule then replacing the external web services certificate to use an internally generated certificate rather than the same certificate used on the TMG that was published by an external CA, the tests were finally in good health:

image

Correcting the issue with SfB’s Web Services fixed the Skype directory lookup error when logging in through the Edge server:

image

Hope this helps anyone out there who may come across this issue as the root cause wasn’t obvious because publishing the Web Services through TMG meant using the Remote Connectivity Analyzer tool online at https://testconnectivity.microsoft.com/ returns green if the TMG is able to listen to traffic but not successfully communicate to the Lync front-end pool.

Configuring Load Balanced LDAPS Load Balancing Virtual Server on NetScaler version 11

$
0
0

I recently had to configure a Load Balanced LDAPS Load Balancing Virtual Server on a NetScaler version 11 for a client and since the procedure is slightly different than earlier versions, I took the time to document the steps so I can write this post for future reference.  The Netscaler used in this example will be a VPX 200 NS11.0 62.10.nc:

image

Step #1 – Create Server Objects

Begin by logging into the NetScaler appliance and navigating to Traffic Management > Load Balancing > Servers and create the server objects that represent your domain controllers that will be used in the load balancing virtual server:

image

For this example, I will be creating 3 server objects for 3 Domain Controllers:

image

image

Step #2 – Create LDAPS Monitor

With the server objects created, navigate to Management > Load Balancing > Monitors to create the monitor object that will reach out to the domain controllers and execute an LDAPS query to verify the health of the server:

image

Type in a name to represent this monitor that will query servers to verify LDAPS is operational, select LDAP as the Type:

image

Leave all of the text fields as the default then scroll all the way down to the bottom and select the Secure checkbox:

image

**Note that previous to NetScaler version 11, we would have had to customize the regular LDAP monitor script (nsldap.pl) to perform LDAPS health verification.

Scroll back up to the top of the page and select the Special Parameters tab:

image

Proceed to fill in the following fields:

Script Name: nsldap.pl

Dispatcher IP: 127.0.0.1

Dispatcher Port: 3013

Base DN: dc=yourDomain,dc=com

Bind DN: svc_netscaler@yourDomain.com

Filter: cn=builtin

Password: <password for the service account>

image

Proceed by clicking on the Create button to create the monitor:

image

Step #3 – Create Service Group

With the server objects representing the domain controllers and monitor capable of querying to verify the health of LDAPS, continue by creating a service group that represents the domain controllers that will represent a physical site or a logical separation from other domain controllers in your environment. For the purpose of this example, I will be creating a group that represents domain controllers that reside in the same datacenter. Navigate to Management > Load Balancing > Service Groups and click on the Add button:

image

Type in a name to represent the Load Balancing Service Group then select SSL_TCP as the Protocol then click on the OK button to continue:

image

Proceed by clicking on the No Service Group Member item:

image

In the Create Service Group Member window, click on the Server Based option:

image

image

Then select the server objects that were created earlier to represent the domain controllers:

image

With the servers selected, put in the value 636 as the Port number then click on the Create button to create the Service Group Member:

image

Continue by clicking the OK button:

image

With the Service Group Members assigned, continue by clicking on the Monitors button on the right side of the menu then click on the No Service Group to Monitor Binding item:

image

image

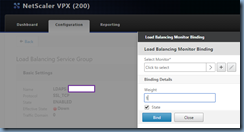
In the Load Balancing Monitor Binding window, click on the Select Monitor option:

image

Select the LDAPS monitor that was created earlier in Step #2:

image

Click on the Bind button:

image

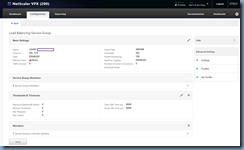
Before navigating out of the Load Balancing Service Group, click on the 3 Service Group Members item:

image

Select one of the domain controllers and then click on Monitor Details:

image

Verify that the Last Response status is labeled as Success – Probe succeeded:

image

Repeat for the other domain controllers then proceed to exit out of the monitors then click on Done to complete the creation of the Load Balancing Service Group:

image

It’s important to note that the Effective State may be labeled as DOWN after the initial creation but a few refreshes of the console should list it as being up:

image

image

Step #4 – Create the Load Balancing Virtual Server

With the server, the monitor and the service group representing the domain controllers created, proceed by importing the certificate that will be used to secure the traffic to the load balancing virtual server’s VIP when clients attempt to connect to the FQDN that resolves to the IP address:

image

Then create a new load balancing virtual server:

image

Enter a name to represent the load balancing virtual server, SSL_TCP as the Protocol, a unique IP address for this virtual server, and 636 for the Port and the Ok button to apply the configuration:

image

Continue by click on the No Load Balancing Virtual Server ServiceGroup Binding item:

image

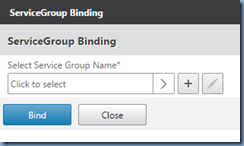
Select the service group that was created earlier:

image

image

Click on the Bind button:

image

Click on the Continue button:

image

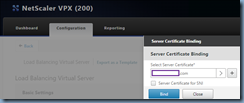
Click on the No Server Certificate item:

image

Select the certificate used for this load balancing virtual server:

image

image

Click on the Bind button to bind the certificate to the load balancing virtual server:

image

Click on the Continue button:

image

Then the done button to complete the creation:

image

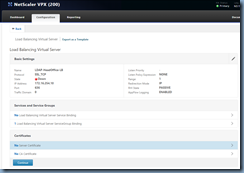
The new load balancing virtual server representing the 3 domain controllers for LDAPS configuration is now ready to be used:

image

Changing Exchange Server 2013 UM dial plan for Unified Messaging enabled users

$
0
0

I was recently told by our telephony engineer that we needed to create a new UM dial plan with the URI Type set as SIP URI for our internal users that are using Exchange Unified Messaging for voicemail because of the migration from Exchange 2007 to 2013:

image

The GUI did not provide a way to simply move user accounts from one UM dial plan to another so I resorted to PowerShell cmdlets and thought it would be a good idea to document the process then blog it so I can reference it in the future.

Step #1 – Identify users in the legacy UM dial plan

Begin by identifying the users that you intend on moving from the legacy UM dial plan with the following cmdlet:

Get-UMMailbox | where {$_.UMDialPlan -eq "Mintflower"} | Format-Table –Wrap -AutoSize

image

The list displayed from the cmdlet above will list the users currently enabled for Unified Messaging with their dial plan set to the legacy one.

Step #2 – Disable Unified Messaging for users in legacy dial plan while retaining configuration

Next, execute the following cmdlet to disable the users for unified messaging but retain their configuration such as extensions:

Get-UMMailbox | where {$_.UMDialPlan -eq "Mintflower"} | Disable-UMMailbox -KeepProperties $True -confirm:$false

The cmdlet will produce output similar to the following listing the users that have been affected:

image

**Note that if the list above continues more users than the screen buffer has, pipe out the output with > C:\UMusers.txt

Document the PrimarySMTPAddress field for each user in the output above.

Step #3 – Enable users for Unified Messaging assigned to the new UM dial plan

With the users’ PrimarySMTPAddress field list, execute the following for each user:

Enable-UMMailbox -Identity enorville@ccs.bm -UMMailboxPolicy “Bakery Lane Default Policy

Substitute the email address and the UMMailboxPolicy as required.

Unable to complete installing Skype for Business Server 2015 KB3061064 update

$
0
0

Problem

You attempt to install the Skype for Business Server 2015 KB3061064 (https://support.microsoft.com/en-us/kb/3061064) but notice that the installation fails with:

Checking service status. This may take a couple minutes...

System.Management.Automation.CommandNotFoundException: The term 'Get-CsWindowsSe

rvice' is not recognized as the name of a cmdlet, function, script file, or oper

able program. Check the spelling of the name, or if a path was included, verify

that the path is correct and try again.

at System.Management.Automation.Runspaces.PipelineBase.Invoke(IEnumerable inp

ut)

at SkypeServerUpdateInstaller.PowershellRunner.RunCmd(String script, ICollect

ion`1& errors)

at SkypeServerUpdateInstaller.PowershellRunner.RunScript(String scriptFileNam

e, ICollection`1& errors)

at SkypeServerUpdateInstaller.MachineStatusChecker.Check(String& errorMessage

)

KB3097644 for OcsCore.msp was already installed... Skipping

KB3097649 for UcmaRuntime.msp was already installed... Skipping

KB3097646 for Caa.msp was already installed... Skipping

KB3097708 for OCSMCU.msp was already installed... Skipping

Installing 5 of 1 Updates for [Skype for Business Server 2015 6.0.9319.102]

Installing KB3097645 for Server.msp

ERROR 1603: Server.msp had errors installing.

KB3097642 for WebComponents.msp was already installed... Skipping

KB3097647 for EnterpriseWebApp.msp was already installed... Skipping

SkypeForBusinessPerfCounters.msi was already installed... Skipping

rewrite_2.0_rtw_x64.msi was already installed... Skipping

image

There were errors during the installation process. For details, see the log file at C:\KB3061064\Skype_patchinstallerlog-<serverName>-[2016-02-06][12-35-56].txt

image

Reviewing the Skype for Business Server 2015 Update Installer window shows that all the components were successfully updated aside from the Update for Skype for Business Server 2015:

image

Opening and reviewing the log:

C:\KB3061064\Skype_patchinstallerlog-<serverName>-[2016-02-06][12-35-56].txt

… dsplays the following output:

2/6/2016 12:35:56 PM] Starting Skype for Business Server 2015 Cumulative Update Installer, version 6.0.9319.102
[2/6/2016 12:35:56 PM] Checking service status. This may take a couple minutes...
[2/6/2016 12:35:57 PM] Exception: System.Management.Automation.CommandNotFoundException: The term 'Get-CsWindowsService' is not recognized as the name of a cmdlet, function, script file, or operable program. Check the spelling of the name, or if a path was included, verify that the path is correct and try again.
   at System.Management.Automation.Runspaces.PipelineBase.Invoke(IEnumerable input)
   at SkypeServerUpdateInstaller.PowershellRunner.RunCmd(String script, ICollection`1& errors)
   at SkypeServerUpdateInstaller.PowershellRunner.RunScript(String scriptFileName, ICollection`1& errors)
   at SkypeServerUpdateInstaller.MachineStatusChecker.Check(String& errorMessage)
[2/6/2016 12:35:57 PM] Embedded patch description: Update for Core Components
[2/6/2016 12:35:57 PM] Embedded patch OcsCore.msp is referred by KB #3097644
[2/6/2016 12:35:57 PM] Embedded patch OcsCore.msp can be researched at URL
http://support.microsoft.com/?kbid=3097644
[2/6/2016 12:35:57 PM] Embedded patch OcsCore.msp is at version 6.0.9319.102
[2/6/2016 12:35:57 PM] Product with GUID {A766C25B-A1D1-4711-A726-AC3E7CA4AAB3} is at version 6.0.9319.102 and is associated with patch OcsCore.msp which this installer has at version 6.0.9319.102
[2/6/2016 12:35:57 PM] OcsCore.msp, version 6.0.9319.102 is up-to-date on this server.
[2/6/2016 12:35:57 PM] Embedded patch description: Update for Core Runtime 64-bit
[2/6/2016 12:35:57 PM] Embedded patch UcmaRuntime.msp is referred by KB #3097649
[2/6/2016 12:35:57 PM] Embedded patch UcmaRuntime.msp can be researched at URL
http://support.microsoft.com/?kbid=3097649
[2/6/2016 12:35:57 PM] Embedded patch UcmaRuntime.msp is at version 6.0.9319.102
[2/6/2016 12:35:57 PM] Product with GUID {902F4F35-D5DC-4363-8671-D5EF0D26C21D} is at version 6.0.9319.102 and is associated with patch UcmaRuntime.msp which this installer has at version 6.0.9319.102
[2/6/2016 12:35:57 PM] UcmaRuntime.msp, version 6.0.9319.102 is up-to-date on this server.
[2/6/2016 12:35:57 PM] Embedded patch description: Update for Conferencing Attendant
[2/6/2016 12:35:57 PM] Embedded patch Caa.msp is referred by KB #3097646
[2/6/2016 12:35:57 PM] Embedded patch Caa.msp can be researched at URL
http://support.microsoft.com/?kbid=3097646
[2/6/2016 12:35:57 PM] Embedded patch Caa.msp is at version 6.0.9319.102
[2/6/2016 12:35:57 PM] Product with GUID {73472766-329F-4fd8-91AF-458E702498CF} is at version 6.0.9319.102 and is associated with patch Caa.msp which this installer has at version 6.0.9319.102
[2/6/2016 12:35:57 PM] Caa.msp, version 6.0.9319.102 is up-to-date on this server.
[2/6/2016 12:35:57 PM] Embedded patch description: Update for Conferencing Server
[2/6/2016 12:35:57 PM] Embedded patch OCSMCU.msp is referred by KB #3097708
[2/6/2016 12:35:57 PM] Embedded patch OCSMCU.msp can be researched at URL
http://support.microsoft.com/?kbid=3097708
[2/6/2016 12:35:57 PM] Embedded patch OCSMCU.msp is at version 6.0.9319.102
[2/6/2016 12:35:57 PM] Product with GUID {6184864A-8DCD-44DE-885D-B6C0AF668033} is at version 6.0.9319.102 and is associated with patch OCSMCU.msp which this installer has at version 6.0.9319.102
[2/6/2016 12:35:57 PM] OCSMCU.msp, version 6.0.9319.102 is up-to-date on this server.
[2/6/2016 12:35:57 PM] Embedded patch description: Update for Response Group Service
[2/6/2016 12:35:57 PM] Embedded patch RGS.msp is referred by KB #3097643
[2/6/2016 12:35:57 PM] Embedded patch RGS.msp can be researched at URL
http://support.microsoft.com/?kbid=3097643
[2/6/2016 12:35:57 PM] Embedded patch RGS.msp is at version 6.0.9319.102
[2/6/2016 12:35:57 PM] Product with GUID {11CFB169-07EA-489D-BF8C-D8D29525720E} is at version 0.0 and is associated with patch RGS.msp which this installer has at version 6.0.9319.102
[2/6/2016 12:35:57 PM] Product with GUID {11CFB169-07EA-489D-BF8C-D8D29525720E} is not installed on this server.
[2/6/2016 12:35:57 PM] Embedded patch description: Update for Skype for Business Server 2015
[2/6/2016 12:35:57 PM] Embedded patch Server.msp is referred by KB #3097645
[2/6/2016 12:35:57 PM] Embedded patch Server.msp can be researched at URL
http://support.microsoft.com/?kbid=3097645
[2/6/2016 12:35:57 PM] Embedded patch Server.msp is at version 6.0.9319.102
[2/6/2016 12:35:57 PM] Product with GUID {A593FD00-64F1-4288-A6F4-E699ED9DCA35} is at version 6.0.9319.0 and is associated with patch Server.msp which this installer has at version 6.0.9319.102
[2/6/2016 12:35:57 PM] Server.msp, version 6.0.9319.102 is NOT up-to-date on this server.
[2/6/2016 12:35:57 PM] Embedded patch description: Update for Web Components Server
[2/6/2016 12:35:57 PM] Embedded patch WebComponents.msp is referred by KB #3097642
[2/6/2016 12:35:57 PM] Embedded patch WebComponents.msp can be researched at URL
http://support.microsoft.com/?kbid=3097642
[2/6/2016 12:35:57 PM] Embedded patch WebComponents.msp is at version 6.0.9319.102
[2/6/2016 12:35:57 PM] Product with GUID {2A65AB9C-57AD-4EC6-BD4E-BD61A7C583B3} is at version 6.0.9319.102 and is associated with patch WebComponents.msp which this installer has at version 6.0.9319.102
[2/6/2016 12:35:57 PM] WebComponents.msp, version 6.0.9319.102 is up-to-date on this server.
[2/6/2016 12:35:57 PM] Embedded patch description: Update for Skype for Business Web Application
[2/6/2016 12:35:57 PM] Embedded patch EnterpriseWebApp.msp is referred by KB #3097647
[2/6/2016 12:35:57 PM] Embedded patch EnterpriseWebApp.msp can be researched at URL
http://support.microsoft.com/?kbid=3097647
[2/6/2016 12:35:57 PM] Embedded patch EnterpriseWebApp.msp is at version 6.0.9319.102
[2/6/2016 12:35:57 PM] Product with GUID {A185550F-9598-49B1-907A-E0BF5FBED77E} is at version 6.0.9319.102 and is associated with patch EnterpriseWebApp.msp which this installer has at version 6.0.9319.102
[2/6/2016 12:35:57 PM] EnterpriseWebApp.msp, version 6.0.9319.102 is up-to-date on this server.
[2/6/2016 12:35:57 PM] Product with GUID {3F699640-D097-457B-8229-0CE8F7B31DCB} is at version 6.0.9319.102 and is associated with patch SkypeForBusinessPerfCounters.msi which this installer has at version 6.0.9319.102
[2/6/2016 12:35:57 PM] SkypeForBusinessPerfCounters.msi, version 6.0.9319.102 is up-to-date on this server.
[2/6/2016 12:35:57 PM] Rewrite Module is at version 7.1.1952.0 and is associated with patch rewrite_2.0_rtw_x64.msi which this installer has at version 7.1.1952.0
[2/6/2016 12:35:57 PM] rewrite_2.0_rtw_x64.msi, version 7.1.1952.0 is up-to-date on this server.
[2/6/2016 12:35:59 PM] Beginning installation of selected binaries...
[2/6/2016 12:35:59 PM] Executing command: msiexec.exe  /update "C:\KB3061064\Server.msp" /passive /norestart /l*vx "C:\KB3061064\Server.msp-conBMLYNCSTD01-[2016-02-06][12-35-59]_log.txt"
[2/6/2016 12:36:12 PM] ERROR 1603: Server.msp had errors installing.
[2/6/2016 12:39:33 PM] ERROR: SkypeServerUpdateInstaller failed to successfully install all patches

image

Opening the LCSSetup_Commands in the %userprofile%\appdata\temp folder reveals the following:

--------------------------------------------------------------------------------------------

02/06/201612:36:08

powershell -noprofile -command "& Install-CsDatabase -Update -DatabaseType Registrar -Verbose "

--------------------------------------------------------------------------------------------

& : The term 'Install-CsDatabase' is not recognized as the name of a cmdlet,

function, script file, or operable program. Check the spelling of the name, or

if a path was included, verify that the path is correct and try again.

At line:1 char:4

+ & Install-CsDatabase -Update -DatabaseType Registrar -Verbose

+ ~~~~~~~~~~~~~~~~~~

+ CategoryInfo : ObjectNotFound: (Install-CsDatabase:String) [],

CommandNotFoundException

+ FullyQualifiedErrorId : CommandNotFoundException

image

Solution

I performed quite a few troubleshooting steps but was unable to get past the error and what finally worked for me was to rerun the Setup or Remove Skype for Business Server Components in the Skype for Business Server 2015 – Deployment Wizard console:

image

image

Then rerun the update installer:

image

Creating a Citrix NetScaler High Availability pair without wiping out an existing configuration

$
0
0

Problem

I’ve received quite a few calls over the past year from clients and colleagues about situations where they had an existing single node NetScaler appliance deployed and decided to create an HA pair at a later time but noticed that adding a new NetScaler with no configuration to create the HA pair would wipe out the configuration of the existing node.  This issue has happened to me as well in the past and it’s one of the worst situations to be in if you did not have backup so this blog post serves to demonstrate how to add a new node to create an HA pair while keeping the configuration.

First off, I’ve tested creating the HA pair by adding the other node from:

  1. The node that already contains configuration
  2. The node that does not contain configuration

Both yield the same results where the new NetScaler without any configuration would assume the Primary role for the Master State.  The following screenshots demonstrates what happens when I add the NetScaler with the IP address 10.32.30.101 without any configuration to an existing NetScaler with configuration with the IP address 10.32.30.100:

image

image

image

Note how the NetScaler with the IP address 10.32.30.101 which contains no configuration has assumed the Primary role of the Master State thus wiping out the configuration of the existing NetScaler with configuration with the IP address 10.32.30.100.  The result would be the same if you decided to use the NetScaler with configuration to add the other node without configuration.

Solution

To avoid having the new NetScaler with no configuration assume the Primary role of the Master State status, log onto the NetScaler appliance with no configuration, navigate to High Availability and open up the properties of the node:

image

From within the Configure HA Node properties window, change the High Availability Status from ENABLED(Actively Participate in HA) to STAY SECONDARY (Remain in Listen Mode):

imageimage

image

With the new High Availability Status set to STAY SECONDARY (Remain in Listen Mode), proceed to add the node with the configuration:

image

Once added, you will see that the node without configuration will remain as Secondary while the newly added node with configuration is Primary:

image

Proceed by editing the properties of the Secondary node (the new NetScaler without configuration) and change the High Availability Status back to ENABLED(Actively Participate in HA):

image

image

You should now have a new NetScaler HA pair with the configuration of the single node appliance.

Viewing all 836 articles
Browse latest View live


<script src="https://jsc.adskeeper.com/r/s/rssing.com.1596347.js" async> </script>