Quantcast
Channel: Terence Luk
Viewing all 836 articles
Browse latest View live

Configuring Lync Server 2013 with Exchange 2010 OWA

$
0
0

One of the questions I get asked most frequently about Lync Server 2013 is how to configure the integration with Exchange 2010 OWA so users can use the Outlook Web App for IM because most of the material out there on the web were written for Lync Server 2010 and Exchange Server 2010.  The short answer is that nothing has really changed so the instructions provided for Lync Server 2010 would actually work for Lync Server 2013 but since I’ve had to walk through a lot of people on the process, I thought I’d write a blog post to demonstrate it.

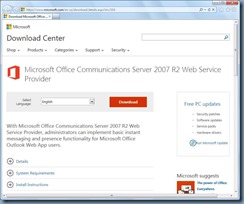
Step #1 – Download Microsoft Office Communications Server 2007 R2 Web Service Provider onto CAS Server or Servers

Begin by downloading the following bundle:

Microsoft Office Communications Server 2007 R2 Web Service Provider
https://www.microsoft.com/en-us/download/details.aspx?id=2310

clip_image002

The downloaded file should be named CWAOWASSPMain.msi with a size of 10,642KB:

clip_image002[5]

Step #2 – Download Patches (UcmaRedist.msp and CWAOWASSP.msp)

Next, download the following patch:

Unified Communications Managed API 2.0 Redist (64 Bit) Hotfix KB 2647091
http://www.microsoft.com/en-us/download/details.aspx?id=7557

clip_image002[7]

The downloaded file should be named UcmaRedist.msp with a size of 4,132KB:

clip_image002[9]

Download the following patch:

OCS 2007 R2 Web Service Provider Hotfix KB 981256
http://www.microsoft.com/en-us/download/details.aspx?id=797

clip_image002[11]

The downloaded file should be named CWAOWASSP.msp with a size of 136KB:

clip_image002[13]

Step #3 – Run CWAOWASSPMain.msi

Proceed by running the CWAOWASSPMain.msi file:

clip_image002[15]

clip_image002[17]

clip_image002[19]

clip_image002[21]

clip_image002[23]

Once completed, you will notice the following line item in the Programs and Features:

clip_image002[25]

Step #4 – Run CWAOWASSP.msi, dotnetfx35setup.exe, UcmaRedist.msi, and vcredist_x64x.exe installed by CWAOWASSPMain.msi

What the CWAOWASSPMain.msi file does is actually place 4 files into the folder specified during the wizard so continue by browsing to that folder:

clip_image002[27]

… then install the following:

vcredist_x64.exe

clip_image002[29]

clip_image002[33]clip_image002[35]

clip_image002[37]clip_image002[39]

Note the following item in the Programs and Features:

Microsoft Visual C++ 2008 Redistributable – x64 9.0.21022

clip_image002[41]

Depending on whether .NET 3.5 is already installed on the server, you may not need to install the following:

donetfx35setup.exe

clip_image002[43]

Next, install the following:

UcmaRedist.msi

clip_image002[45]

clip_image002[47]

Note that this is a silent install so you won’t see any prompts.

clip_image002[49]

Once completed, you should see the following line item in the Programs and Features:

Microsoft Office Communications Server 2007 R2, Microsoft Unified Communications Managed API 2.0 Core Redist 64-bit

clip_image002[51]

Finally, install the last msi:

CWAOWASSP.msi

Note that this is also a silent install:

clip_image002[53]

clip_image002[55]

If you forgot to run UCMARedist.msi first then you would receive the following message:

Microsoft Office Communicaions Server 2007 R2. Web Service Provider installation requires that Microsoft Unified Communications Managed API 2.0 Core Redist 64-bit is already installed. Either use Setup.exe for installation or run UCMARedist.msi included with the product to install the redistributable.

clip_image002[59]

The following line item will be displayed in the Programs and Features once the install has completed:

Microsoft Office Communications Server 2007 R2, Web Service Provider

clip_image002[57]

Step #5 – Patch the components install in Step #4

Proceed by navigating back to the packages downloaded in Step #2 and patch UcmaRedist.msi from 3.5.6907.0 to Microsoft Office Communciations Server 2007 R2, Microsoft Unified Communications Managed API 2.0 Core Redist 64-bit from 3.5.6907.0 to 3.5.6907.244:

clip_image002[61]

clip_image002[63]

clip_image002[65]

clip_image002[67]

Note the version change to 3.5.6907.244:

clip_image002[69]

Continue by patching CWAOWASSP.msp from 3.5.6907.57 to Microsoft Office Communications Server 2007 R2, Web Service Provider 3.5.6907.202:

clip_image002[71]

clip_image002[73]

clip_image002[75]

clip_image002[77]

Note the version change to 3.5.6907.202:

clip_image002[79]

Step #6 – Configuring the Exchange 2010 CAS Server

With the components installed onto your CAS server or servers, proceed by launching the Exchange Management Shell and identify the certificate that is currently assigned to the IIS server.  Run the following cmdlet to get the list of certificates currently used by the Exchange CAS server:

Get-ExchangeCertificate|fl Services,Thumbprint

image

Note that the Exchange CAS server used in this example actually has multiple certificates for different services but the one we are interested in is the one used for the IIS service:

image

Copy the Thumprint of the certificate to Notepad.

There will be environments when multiple OWA Virtual Directories are configured on the the Exchange Server so to check simply execute the Get-OWaVirtualDirectory cmdlet and verify that the only returned result is owa (Default Web site):

Get-OWAVirtualDirectory

image

Another cmdlet we can execute to display the virtual directory mapped to OWA is the following:

Get-OwaVirtualDirectory | Where-Object {$_.ExternalUrl -eq https://webmail.domain.com/owa}

image

Note that we only have one single OWA Virtual Directory in the example above so we won’t have to specifically target the virtual directory with the -identity switch but I like to be safe so I use the Where-Object {$_.ExternalUrl -eq https://webmail.domain.com/owa} anyways. Continue by executing the following to configure the InstantMessaging parameters of the virtual directory:

Get-OwaVirtualDirectory | Where-Object {$_.ExternalUrl -eq "https://webmail.domain.com/owa"} | Set-OwaVirtualDirectory -InstantMessagingType OCS -InstantMessagingEnabled:$true -InstantMessagingCertificateThumbprint A5202F5ED7E8DC2B294FE41EAF9FECC2DCFBB2E3 -InstantMessagingServerName <FQDNofLyncSTDserverOrPool>

Note that when you execute the following cmdlet, you will see the parameters assigned:

Get-OwaVirtualDirectory | Where-Object {$_.ExternalUrl -eq "https://webmail.domain.com/owa"} | FL Server,Instant*

image

Step #7 – Configure the Trusted Application Pool

Launch the Lync Server 2013 Topology Builder tool, navigate to Lync Server > Datacenter > Lync Server 2013 > Trusted application servers then right click on the node and create a New Trusted Application Pool…:

clip_image002[1]

The Exchange topology in this example contains 2 CAS servers so I’ll be using the Multiple computer pool option with the webmail URL as the pool FQDN matching the certificate name:

clip_image002[3]

Add the individual CAS server names into the Define the computers in this pool step:

clip_image002[5]clip_image002[7]

Associate the next hop server as the front end server:

image

image

Publish the topology:

image

clip_image002[9]

Next, verify that the changes are in place by launching the Lync Server Management Shell and executing the following cmdlet:

Get-CsTrustedApplicationPool

image

Execute the follow cmdlet to verify the computers defined in the pool:

Get-CsTrustedApplicationComputer

image

With the configuration settings verified, proceed by using the cmdlet New-CsTrustedApplication cmdlet to define a trusted application and associate it to the new trusted application pool.

A free port will need to be identified and then used to assign as the listening port on the Lync server.  Jeff Schertz’s Lync 2010 with Exchange 2010 integration (http://blog.schertz.name/2010/11/lync-and-exchange-im-integration/) provides an easy way to determine whether a port is free and that is to use the command:

netstat -a | findstr <port #>

We can use either 5059 as Jeff demonstrates or another one that is free.  For the purpose of this example, we’ll use 5059:

clip_image002[11]

With the port identified, execute the following cmdlet to create the new trusted application and associate the CAS array to it:

New-CsTrustedApplication -ApplicationId ExchangeOWA -TrustedApplicationPoolFqdn <casArrayFQDN> -Port 5059

image

Enable the topology with the following cmdlet:

Enable-CsTopology -v

clip_image002[13]

Once the publishing completes, you can review the logs to ensure there are no unexpected warnings or errors:

clip_image002[15]

That’s it.  You should be able to log into Outlook Web App and see your Lync presence at the top right hand corner and your contact list on the left hand pane.

Exchange Server 2013 PowerShell cmdlets for reviewing mailbox storage quotas

$
0
0

I was recently asked by a client to generate a report of all the mailboxes on their Exchange 2013 infrastructure highlighting the current:

  • Storage usage
  • Issue a warning at (GB)
  • Prohibit send at (GB)
  • Prohibit send and receive at (GB)

As most administrators would know, attempting to use the ECP and manually review these settings for each user’s mailbox properties:

image

… is not a practical method when there are many mailboxes in the organization. The ideal way would be to use PowerShell cmdlets to display the configuration.  I did a bit of research for this exercise and since I don’t live an breath in Exchange PowerShell on a regular basis, I thought it would be a good idea to write this blog post so I can have something to reference to in the future.

To display all mailboxes and the following configuration:

  • Storage usage
  • Issue a warning at (GB)
  • Prohibit send at (GB)
  • Prohibit send and receive at (GB)

… execute the following cmdlet:

Get-MailboxStatistics -Server <mailboxServerName> | FL DisplayName,TotalItemSize,DatabaseIssueWarningQuota,DatabaseProhibitSendQuota,DatabaseProhibitSendReceiveQuota

An output similar to the following would be generated:

image

------------------------------------------------------------------------------------------------------------------------------------------------------------

Execute the following cmdlet to determine what the quota settings configured on the mailbox database is:

Get-Mailboxdatabase -Server <serverName>| FL Identity,IssueWarningQuota,ProhibitSendQuota,ProhibitSendReceiveQuota

An output similar to the following would be generated:

image

------------------------------------------------------------------------------------------------------------------------------------------------------------

Execute the following cmdlet to determine which mailboxes have the default quota settings replaced with customized settings:

Get-mailbox -Server <serverName> -ResultSize unlimited | Where {$_.UseDatabaseQuotaDefaults -eq $false} |ft DisplayName,IssueWarningQuota,ProhibitSendQuota,@{label="TotalItemSize(MB)";expression={(get-mailboxstatistics $_).TotalItemSize.Value.ToMB()}}

An output similar to the following would be generated:

image

Recovering Cisco UCS Fabric Interconnect from the loader prompt

$
0
0

Problem

I recently had an issue with a Cisco UCS 6120 fabric interconnect we received from RMA that would no longer boot properly and simply presents the loader prompt no matter how many times you restart it:

image

Hitting the question mark ? would display the following available commands:

  • dir
  • reboot
  • serial
  • show
  • boot
  • help
  • resetcmos
  • set

image

Executing the dir command would display the following files:

image

A bit of researching on Google has blogs and forum posts recommending to simply execute the boot command along with the kickstart file as such:

boot ucs-6100-k9-kickstart.4.1.3.N2.1.1l.bin

imageimage

The boot process eventually brings you to the switch(boot)# prompt:

image

From here, some blog posts indicates that you can use the erase configuration command to erase the configuration on the fabric interconnect and start fresh but the command does not work as suggested:

erase configuration

% invalid command detected at ‘^’ marker.

image

It’s no surprise because executing the question mark ? command brings up the following available commands in this context:

  • clear
  • config
  • copy
  • delete
  • dir
  • exit
  • find
  • format
  • init
  • load
  • mkdir
  • move
  • no
  • pwd
  • rmdir
  • show
  • sleep
  • tail
  • terminal

image

It is possible to assign an IP address under this switch(boot) prompt as such:

config t

interface mgmt 0

ip address <ipAddress> <subnetMask>

no shut

exit

ip default <defaultGateway>

exit

image

While you can ping the interface by assigning an IP, you won’t be able to browse to it via http or https:

image

Solution

The way to properly boot the fabric interconnect from the loader prompt is to restart the fabric interconnect:

image

Boot the fabric interconnect with the kickstart and system bin files as such:

boot ucs-6100-k9-kickstart.4.1.3.N2.1.11.bin ucs-7100-k9-system.4.1.3.N2.1.1l.bin

imageimage

imageimage

imageimage

image

Once the boot process has completed, the IP address assigned earlier should now respond to pings:

image

… and you should be able to browse to the web page:

image

From here, you can use the prompt to use the console prompt to execute connect local-mgmt:

image

… and then execute a erase configuration to remove the config:

image

Removing the: “A website is trying to run a RemoteApp program. Make sure that you trust the publisher before you connect to run the program.” message prompt when launching RD Web Access RemoteApp

$
0
0

Problem

You’ve configured your RemoteApp resources on your Remote Desktop Services and attempt to launch an application but receive the following warning message:

A website is trying to run a RemoteApp program. Make sure that you trust the publisher before you connect to run the program.

This RemoteApp program could harm your local or remote computer. Make sure that you trust the publisher before you connect to run this program.

Don’t ask me again for remote connections from this publisher

image

imageimage

As shown in the screenshots above, you have the option of checking the checkbox that reads:

Don’t ask me again for remote connections from this publisher

… to remove this prompt but you do not want everyone in the organization to receive this prompt.

Solution

One of the ways to remove this warning prompt is to implement a GPO and apply it to the user or computer account to trust the SHA1 thumbprint of the certificate presented.  Begin by opening the properties of the certificate and navigating to the Details tab that is used for your Remote Desktop Services portal:

image

Scroll down to the bottom where the Thumbprint is listed:

image

Select the Thumbprint field:

image

Select the thumbprint and copy the text:

image

Now before we proceed to copy this into the setting of the GPO we’ll be using, it is important to paste the thumbprint you have just copied into a command prompt as such:

image

Notice how there is a question mark: ? in front of the thumbprint? Note that paste this into Notepad does not reveal this unwanted question mark:

image

Proceed and copy the thumbprint from the command prompt without the question mark.

Next, create a new GPO or open an existing GPO that you would like to use and navigate to:

Policies\Administrative Templates\Windows Components\Remote Desktop Services\Remote Desktop Connection Client

Note that this policy can be applied to either a computer object or a user account so use whichever fits better for your environment.

image

Proceed and open the Specify SHA1 thumbprints of certificates representing trusted .rdp publishers:

image

Paste the copied thumbprint into the Comma-separated list of SHA1 trusted certificate thumbprints field:

image

Apply the configuration:

image

The user should no longer see the warning prompt once the policy is applied to a computer object or user account.

Adding an account from an external domain with a forest trust configured throws the error: “The security identifer could not be resolved…”

$
0
0

Problem

You’ve successfully deployed a new Windows Server 2012 R2 Remote Desktop Services farm in your environment and have begun assigning permissions to users located in another forest that you are forest trust with:

image

While you are able to browse the domain in the separate forest and select a user or group, you quickly notice you receive the following error message when you attempt to apply the settings:

The security identifier could not be resolved. Ensure that a two-way trust exists for the domain of the selected users.

Exception: The network path was not found.

image

Solution

I’ve come across the same problem with a Windows Server 2008 R2 Remote Desktop Services deployment and it looks like this problem still persists in the newer Windows Server 2012 R2 version. To get around this issue, we would need to create a Domain local group in the domain where the RDS server is installed:

image

… then proceed and add the user or group from the federated forest domain into the Domain local group:

image

… and because we can’t add a Domain local group into any other type of group such as Global or Universal in the domain, we would have to assign it directly to the RDS Collection and RemoteApp:

image

Not exactly the most elegant solution but good enough for a workaround.

Inbound mail submission disabled with event ID: 15004 warning logged on Exchange Server 2013

$
0
0

I recently had to troubleshoot an issue for a client who only had about 30 people in the organization with a mix of Macs and PCs notebooks/desktops accessing a single Exchange Server 2013 server with all roles installed via a mix of MAPI, IMAP4, and EWS protocols. The volume of email exchange within the organization isn’t particularly large but users do tend to send attachments as large as 40MB and Exchange is configured to journal to a 3rd party provider and therefore doubling every attachment email that is sent.

What one of the users noticed was that he would receive the following message on his Mac mail intermittently at various times of the week:

Cannot send message using the server

The sender address some@emailaddress.com was rejected by the server webmail.url.com

The server response was: Insufficient system resources

Select a different outgoing mail server from the list below or click Try Later to leave the message in your Outbox until it can be sent.

image

Reviewing the event logs show that when the user receives the error message above, Exchange also logs the following:

Log Name: Application

Source: MSExchangeTransport

Event ID: 15004 warning:

The resource pressure increased from Medium to High.

The following resources are under pressure:

Version buckets = 278 [High] [Normal=80 Medium=120 High=200]

The following components are disabled due to back pressure:

Inbound mail submission from Hub Transport servers

Inbound mail submission from the Internet

Mail submission from Pickup directory

Mail submission from Replay directory

Mail submission from Mailbox server

Mail delivery to remote domains

Content aggregation

Mail resubmission from the Message Resubmission component.

Mail resubmission from the Shadow Redundancy Component

The following resources are in normal state:

Queue database and disk space ("C:\Program Files\Microsoft\Exchange Server\V15\TransportRoles\data\Queue\mail.que") = 77% [Normal] [Normal=95% Medium=97% High=99%]

Queue database logging disk space ("C:\Program Files\Microsoft\Exchange Server\V15\TransportRoles\data\Queue\") = 80% [Normal] [Normal=94% Medium=96% High=98%]

Private bytes = 6% [Normal] [Normal=71% Medium=73% High=75%]

Physical memory load = 67% [limit is 94% to start dehydrating messages.]

Submission Queue = 0 [Normal] [Normal=2000 Medium=4000 High=10000]

Temporary Storage disk space ("C:\Program Files\Microsoft\Exchange Server\V15\TransportRoles\data\Temp") = 80% [Normal] [Normal=95% Medium=97% High=99%]

image

Aside from seeing the pressure go from Medium to High, I’ve also seen pressure go from Normal to High:

The resource pressure increased from Normal to High.

The following resources are under pressure:

Version buckets = 155 [High] [Normal=80 Medium=120 High=200]

The following components are disabled due to back pressure:

Inbound mail submission from Hub Transport servers

Inbound mail submission from the Internet

Mail submission from Pickup directory

Mail submission from Replay directory

Mail submission from Mailbox server

Mail delivery to remote domains

Content aggregation

Mail resubmission from the Message Resubmission component.

Mail resubmission from the Shadow Redundancy Component

The following resources are in normal state:

Queue database and disk space ("C:\Program Files\Microsoft\Exchange Server\V15\TransportRoles\data\Queue\mail.que") = 77% [Normal] [Normal=95% Medium=97% High=99%]

Queue database logging disk space ("C:\Program Files\Microsoft\Exchange Server\V15\TransportRoles\data\Queue\") = 80% [Normal] [Normal=94% Medium=96% High=98%]

Private bytes = 5% [Normal] [Normal=71% Medium=73% High=75%]

Physical memory load = 67% [limit is 94% to start dehydrating messages.]

Submission Queue = 0 [Normal] [Normal=2000 Medium=4000 High=10000]

Temporary Storage disk space ("C:\Program Files\Microsoft\Exchange Server\V15\TransportRoles\data\Temp") = 80% [Normal] [Normal=95% Medium=97% High=99%]

image

A bit of researching on the internet pointed me to various reasons why this would happen but one that appeared to the cause of this error in the environment was that users were sending attachments that are too large and therefore filling up the version bucket too fast for Exchange to process. One of the cmdlets a forum users suggested to check was the following:

get-messagetrackinglog -resultsize unlimited -start "04/03/2014 00:00:00" | select sender, subject, recipients,totalbytes | where {$_.totalbytes -gt "20240000"}

Executing the cmdlet above displayed the following:

image

Further digging into the logs revealed that there were quite a few emails with large attachments sent around the time when the warning was logged and after consulting with our Partner Forum support engineer, I decided to go ahead and increase the thresholds that deem the pressure as being Normal, Medium or High.  The keys of interest are found on the Exchange server in the following folder:

C:\Program Files\Microsoft\Exchange Server\V15\Bin

… in the following file:

EdgeTransport.exe.config

image

From within this file, look for the following keys:

<add key=”VersionBucketsHighThreshold” value=”200″ />

<add key=”VersionBucketsMediumThreshold” value=”120″ />

<add key=”VersionBucketsNormalThreshold” value=”80″ />

image

Proceed and change the values to a higher number (I simply doubled the number):

<add key=”VersionBucketsHighThreshold” value=”400″ />

<add key=”VersionBucketsMediumThreshold” value=”240″ />

<add key=”VersionBucketsNormalThreshold” value=”160″ />

image

Another suggested key to change was the:

<add key=”DatabaseMaxCacheSize” value=”134217728” />

… but the value on Exchange 2013 already defaults to the 512MB value so there was no need to modify it.

With these new values in pace, I went ahead and restarted the Microsoft Exchange Transport service to make the new variables take effect.

A month goes by without any complaints and logs reveal that while the version buckets have risen to the Medium threshold, it does not reach the new 400 high threshold. 

image

Another month passes and I get another call from the same user indicating the problem has reappeared.  A quick look at the logs shows that the threshold did reach the new high of 400. With no ideas left, I went ahead and opened a support call with Microsoft and the engineer basically told me the same cause and that was there is most likely a lot of large attachments being sent and thus Exchange is unable to flush the messages held in memory which results in this.  I explained to the engineer that there’s only 30 people and the attachments aren’t that big so the engineer went ahead to export the tracking logs so she could review them.  After about 30 minutes she said that I was right in the sense that while there are attachments but none of them exceed 40MB.  At this point, she said the configuration changes we can try are the following:

  1. Modify the Normal, Medium, High version buckets keys
  2. Modify the DatabaseMaxCacheSize
  3. Modify the QueueDatabaseLoggingFileSize
  4. Modify the DatabaseCheckPointDepthMax
  5. Set limits on send message sizes
  6. Increase the memory on the server

After reviewing the version bucket thresholds I’ve set when I doubled the default values, she said we don’t need to increase them further.  The questions I immediately asked was whether I could if I wanted to and she said yes but we could run the risk of causing the server to crash if it’s set to high that the server runs out of memory.

The DatabaseMaxCacheSize key was unchanged at 512MB so she asked me to change it to:

<add key=”DatabaseMaxCacheSize” value=”1073741824” />

image

The<add key="QueueDatabaseLoggingFileSize" value="5MB" />:

image

… was changed to <add key="QueueDatabaseLoggingFileSize" value="31457280" />:

image

The <add key="DatabaseCheckPointDepthMax" = value="384MB" />:

image

… was changed to <add key="DatabaseCheckPointDepthMax" = value="512MB" />:

image

Next, she used the following cmdlets to review the message size limits currently set:

Get-ExchangeServer | fl name, admindisplayversion, serverrole, site, edition

Get-Transportconfig | fl *size*

Get-sendconnector | fl Name, *size*

Get-receiveconnector | fl Name, *size*

Get-Mailbox -ResultSize Unlimited | fl Name, MaxSendSize, MaxReceiveSize >C:\mbx.txt

Get-MailboxDatabase | FL

Get-Mailboxdatabase -Server <serverName> | FL Identity,IssueWarningQuota,ProhibitSendQuota,ProhibitSendReceiveQuota

Get-Mailbox -server <ServerName> -ResultSize unlimited | Where {$_.UseDatabaseQuotaDefaults -eq $false} |ft DisplayName,IssueWarningQuota,ProhibitSendQuota,@{label="TotalItemSize(MB)";expression={(get-mailboxstatistics $_).TotalItemSize.Value.ToMB()}}

She noticed that I’ve already set limits on the mailbox database but wanted me to sent all of the other connectors and some other configurations to have 100MB limits by executing the following cmdlet:

Get-Transportconfig | Set-Transportconfig -maxreceivesize 100MB Get-Transportconfig | Set-Transportconfig -maxsendsize 100MB Get-sendconnector | Set-sendconnector -MaxMessageSize 100MB Get-receiveconnector | set-receiveconnector -MaxMessageSize 100MB Get-TransportConfig | Set-TransportConfig -ExternalDSNmaxmessageattachsize 100MB -InternalDSNmaxmessageattachsize 100MB Get-Mailbox -ResultSize Unlimited | Set-Mailbox -MaxSendSize 100MB -MaxReceiveSize 100MB

The last item that we could modify was the memory of the server but as there was already 16GB assigned, she said we could leave it as is for now and monitor the event logs over the next while.  It has been 3 weeks and while the version bucket has reached medium, it has been consistently 282 or less than the 400 High threshold set.

Troubleshooting this issue was quite frustrating for me as there wasn’t really a KB article with clear instructions for all these checks so I hope this post will help anyone out there who may experience this issue in their environment.

Searching through OWA (Outlook Web App) on Exchange 2013 returns only 1 month of results

$
0
0

Problem

You’ve received complaints that users searching their inbox with OWA or Outlook in Online mode only returns 1 month of results.  Using the following Get-MailboxDatabaseCopyStatus cmdlet:

Get-MailboxDatabaseCopyStatus –server <mailboxServerName> | FL *index*,*ma*ser*,databasename

image

… shows that the ContentIndexState is listed as Healthy for the mailbox databases.

You proceed to stop the following services:

  • Microsoft Exchange Search Host Controller
  • Microsoft Exchange Search

Then rename or delete the content index folder named with the GUID of the database and restart the services again forcing Exchange to rebuild the content indexes.  However, you notice that searching still continues to return the same incomplete results.

Solution

This issue took me a bit of time to troubleshoot because attempting to search for anything related to searching points to the solution above but the environment I was working on did not have the ContentIndexState listed as FailedAndSuspended.  I tried searching for the ContentIndexRetryQueueSize variable because the value was high and all of the results pointed me to install CU7 when I already had CU8 installed.

What I found that eventually led me to the underlying issue was the following warning that got repeatedly written to the application log:

Log Name: Application

Source: MSExchangeFastSearch

Event ID: 1009

Level: Warning

image

The indexing of mailbox database Admin encountered an unexpected exception. Error details: Microsoft.Exchange.Search.Core.Abstraction.OperationFailedException: The component operation has failed. ---> Microsoft.Exchange.Search.Core.Abstraction.ComponentFailedPermanentException: Failed to read notifications, MDB: 8f76b2d9-77dd-44e6-a8ef-73d2a2539ae1. ---> Microsoft.Mapi.MapiExceptionMdbOffline: MapiExceptionMdbOffline: Unable to read events. (hr=0x80004005, ec=1142)

Diagnostic context:

Lid: 49384

Lid: 51176 StoreEc: 0x476

Lid: 40680 StoreEc: 0x476

Lid: 43980

Lid: 16354 StoreEc: 0x476

Lid: 38985 StoreEc: 0x476

Lid: 20098

Lid: 20585 StoreEc: 0x476

at Microsoft.Mapi.MapiExceptionHelper.InternalThrowIfErrorOrWarning(String message, Int32 hresult, Boolean allowWarnings, Int32 ec, DiagnosticContext diagCtx, Exception innerException)

at Microsoft.Mapi.MapiExceptionHelper.ThrowIfError(String message, Int32 hresult, IExInterface iUnknown, Exception innerException)

at Microsoft.Mapi.MapiEventManager.ReadEvents(Int64 startCounter, Int32 eventCountWanted, Int32 eventCountToCheck, Restriction filter, ReadEventsFlags flags, Boolean includeSid, Int64& endCounter)

at Microsoft.Exchange.Search.Mdb.NotificationsEventSource.<>c__DisplayClass3.<ReadEvents>b__1()

at Microsoft.Exchange.Search.Mdb.MapiUtil.<>c__DisplayClass1`1.<TranslateMapiExceptionsWithReturnValue>b__0()

at Microsoft.Exchange.Search.Mdb.MapiUtil.TranslateMapiExceptions(IDiagnosticsSession tracer, LocalizedString errorString, Action mapiCall)

--- End of inner exception stack trace ---

at Microsoft.Exchange.Search.Mdb.MapiUtil.TranslateMapiExceptions(IDiagnosticsSession tracer, LocalizedString errorString, Action mapiCall)

at Microsoft.Exchange.Search.Mdb.MapiUtil.TranslateMapiExceptionsWithReturnValue[TReturnValue](IDiagnosticsSession tracer, LocalizedString errorString, Func`1 mapiCall)

at Microsoft.Exchange.Search.Mdb.NotificationsEventSource.ReadEvents(Int64 startCounter, Int32 eventCountWanted, ReadEventsFlags flags, Int64& endCounter)

at Microsoft.Exchange.Search.Mdb.NotificationsEventSource.ReadFirstEventCounter()

at Microsoft.Exchange.Search.Engine.NotificationsEventSourceInfo..ctor(IWatermarkStorage watermarkStorage, INotificationsEventSource eventSource, IDiagnosticsSession diagnosticsSession, MdbInfo mdbInfo)

at Microsoft.Exchange.Search.Engine.SearchFeedingController.DetermineFeederStateAndStartFeeders()

at Microsoft.Exchange.Search.Engine.SearchFeedingController.InternalExecutionStart()

at Microsoft.Exchange.Search.Core.Common.Executable.InternalExecutionStart(Object state)

--- End of inner exception stack trace ---

at Microsoft.Exchange.Search.Core.Common.Executable.EndExecute(IAsyncResult asyncResult)

at Microsoft.Exchange.Search.Engine.SearchRootController.ExecuteComplete(IAsyncResult asyncResult)

From here, I went ahead to compare the content index catalog sizes between the 3 mailbox databases in the environment and quickly noticed that the problematic mailbox database had a catalog that was 1.5GB while the others were 9.5GBs or more.

My hunch was that the Veeam backups which take place at 11:00p.m. every evening was conflicting with the index building engine so I proceeded to stop the backups for the evening, forced Exchange to rebuild the index catalog over the evening.  After leaving the environment for a day, I went back to test searching on both and Outlook client in Online mode and through OWA and was able to retrieve results older than 1 month.

Using remote PowerShell to log into Office 365 and review archive mailboxes

$
0
0

I’m not much of an Office 365 expert but have recently had the opportunity to work with a client to migrate their on prem Exchange 2010 archive over to O365.  The process of deploying ADFS and DirSync was fairly painless but there seemed to be some confusion when I called into Microsoft Office 365 support where the support engineer did not understand why the migrated archived mailbox did not show up in the EAC (Exchange Admin Center).  To make a long story short, it was not until I worked with the third engineer when I was finally told it’s not to supposed to show up if the user’s mailbox is hosted on prem while the archive is hosted on Office 365.  The purpose of this post is for me to list the steps for reviewing the migrated archive mailboxes in case I need it again in the future.

The first step is to connect to Office 365 by launching PowerShell and execute the following:

$LiveCred = Get-Credential

$Session = New-PSSession -ConfigurationName Microsoft.Exchange -ConnectionUri https://ps.outlook.com/powershell/ -Credential $LiveCred -Authentication Basic -AllowRedirection

Set-ExecutionPolicy Unrestricted -Force

Import-PSSession $Session

clip_image002

Log in with your administrative O365 credentials:

image

You should see the following output once successfully authenticated:

clip_image002[4]

Proceed an execute the following cmdlet to list a specific user’s archive mailbox:

Get-MailUser -Identity <userName@domain.com> |fl *archive*

image

Do not attempt to use the cmdlet:

Get-Mailbox -archive

… to list a user a user’s archive because it will not work when the user has an on prem mailbox with an O365 hosted archive:

image

To verify that the archive mailbox located on O365 is belongs to the on prem mailbox, compare the ArchiveGuid listed for the archive on O365 and the ArchiveGuid for the mailbox on the on prem mailbox by executing the following cmdlet:

Get-Mailbox -Identity <userName@domain.com> |fl *archive*

image

If you ever wanted to check whether a user’s archive is located on prem or Office 365, you can launch the Test E-mail AutoConfiguration option for Outlook, run the test, navigate to the XML tab and look for the <Type>Archive</T> tag that specifies the SmtpAddress as Office 365 rather than the internal on prem Exchange server:

imageimage


VMware Horizon View virtual desktops experience temporary drive space issues with SanDisk Fusion-io ioVDI integration

$
0
0

Before I begin, it’s important to note that I am not an expert with the SanDisk Fusion-io ioVDI product and the only exposure I’ve had was with a client who had another consulting company implement it in their VMware Horizon View 6 environment. With that out of the way, I’ve been troubleshooting issues with the VDIs ever since the the ioVDI product was upgraded from 1.0 to 2.0.  The virtual desktops would exhibit sporadic issues with various applications such as BGInfo not being able to load the customized desktop background or Silverlight web pages not loading at all.  The Silverlight web page issue isn’t as obvious so I’ll use the BGInfo as an example.  The screenshot below displays an error message when we try to manually apply the customized background:

Error during WriteFile():

There is not enough space on the disk.

image

This behavior lead us to believe that it had to do with the ioVDI cache / disposable disk so we opened up a ticket to work with a support engineer and we noticed that the Non-Persistent / DisposableDisk was indeed low on space with 1.52MB free:

imageimage

This would sort of explain why the BGInfo couldn’t load the background because the wallpaper would have consumed around 2MB of space which the disposable disk did not have.

Next, we browsed to the folder that ioVDI redirect files to:

\\VirtualDesktopName\c$\Windows\Temp\iotdx-disposable

image

Lassoing the folders and reviewing the properties shows that only 6.30MB of space is actually consumed:

image

Having a feeling that perhaps there were hidden files, we went ahead and configured the folder to list all files and folders:

image

Which immediately revealed a redirected 5GB pagefile.sys file that was just as big as the 5GB disposable disk:

image

image

The page file size was expected because the virtual machine was configured with 6GB of memory.

image

I’m currently still waiting for the ioVDI support engineer to call me back with a recommendation whether to increase the drive space or perhaps do not redirect the page file and will update this post when I get a firm answer.

Update Aug 9, 2015

I received confirmation from the support engineer that the pagefile.sys should be redirected to the disposable disk as it is by design.  The case is currently being escalated to the engineering group because there have been several customers with the same issue.  One of the another engineer I worked with is was able to locate a command to disable the redirection of this file:

iottool redirectpagefile { enable | disable } : Enable or Disable redirection of pagefile.sys. The command

takes effect after reboot.

I haven’t tried this yet because I wanted to wait for engineering to get back to us on a better resolution.

Update Aug 10, 2015

We didn’t get an update from the other support engineer who’s trying to escalate the case so I went ahead and made the change to disable the redirect of the pagefile via the command above, rebooted the VDI and immediately noticed that all the sporadic out of memory, out of disk space error messages and other problems we had went away.  The VDI also feels a lot faster.  Here is a screenshot what the command prompt output looks like when executed directly on the VDI:

image

Attempting to update a VMware Horizon View linked-clone pool’s snapshot throws the error: “Active Directory Host Unreachable”

$
0
0

Problem

You’ve updated your linked-clone pool’s master image and attempt to reassign the Default Image Snapshot but while you are able to assign the new snapshot, you receive the following error when you try to apply the setting:

Server Error

Active Directory Host Unreachable

image

Solution

While there can be several reasons why this error would be thrown, this is usually caused by connectivity issues between the server with the View Composer role installed and your Active Directory controllers.  In the example above, I noticed that the vCenter server which had the View Composer role installed was assigned a primary and secondary DNS server that would not be able to look up the internal Active Directory domain zone which would prevent the View Composer role to locate and communicate with the Active Directory Domain Controllers.  The error above went away as soon as I removed those DNS servers and configured the primary and secondary servers to point to the Active Directory Domain Controllers which had DNS installed on them.

Removing duplicate disposable disks assigned to SanDisk Fusion-io ioVDI enabled virtual desktop

$
0
0

Problem

While reviewing the Hard disk configuration of VMware Horizon View ioVDI enabled virtual desktops, you notice that there are several disposable disks assigned to the VDI:

image

Note the Disk File path: 18/disp0/18disp0.vmdk

image

Note the Disk File path: 18/disp1/18disp0.vmdk

image

Note the Disk File path: 18/disp2/18disp0.vmdk

image

image

image

The following are the paths of each Hard disk with the disposable disks highlighted in red:

[datastore01b:view_lun11] 18/18-checkpoint.vmdk

[datastore01b:view_lun11] 18/disp0/18disp0.vmdk

[datastore01b:view_lun11] 18/disp1/18disp0.vmdk

[datastore01b:view_lun11] 18/disp2/18disp0.vmdk

[datastore01a:view_lun11] 4-vdm-user-disk-D-e7fd3c19-ca5e-4c7e-9531-ac6a22830c49.vmdk

[datastore01b:view_lun11] 18/181-internal.vmdk

Solution

As shown in the desktop properties above, we have 3 disposable disks assigned to the VDI but only one is really being used.  To identify which disk is in use, SSH into the ioVDI management appliance and connect to the vCenter via the following commands:

fio3prd:~ # iovdi vcenter -ln -vu sladmin -va vc01.contoso.com

Enter the vCenter password:

Re-Enter the vCenter password:

Logged in to VMP : vc01.contoso.com

Once successfully logged into vCenter, proceed to execute the following command to list the VDI’s Cache Mode properties for each disk:

iovdi guest -dr -np 18 -gu a-tluk -v

An output similar to the follow will be displayed:

fio3prd:~ # iovdi guest -dr -np 18 -gu a-tluk -v
Enter Guest Password :
Re-Enter Guest Password :
Checking vSCSI filter
VM name: 18
scsi0:1.Cache Mode = write_vector
scsi0:2.Cache Mode = hyper_cache  (Write Vector Candidate)
scsi0:3.Cache Mode = hyper_cache  (Write Vector Candidate)
scsi1:0.Cache Mode = hyper_cache
scsi1:1.Cache Mode = hyper_cache
scsi0:0.Cache Mode = hyper_cache
Duplicate write-vector disks found

vSCSI filter status: Not OK

Checking Write Vector status
VM name: 18
Pagefile and temp folder are redirected

Write Vectoring status: OK

1 tests failed
Add failed guests to an ioVDI config to fix the issues. If already present, reapply the config.

fio3prd:~ #

image

From the output above, the disposable disks that are actually being used are the ones that are labeled as with:

(Write Vector Candidate)

This means that SCSI (0:2):

image

… and SCSI (0:3):

image

… are the ones we can delete so proceed to remove them from within the Virtual Machine Properties then re-execute the command again. Output similar to the following will be displayed:

fio3prd:~ # iovdi guest -dr -np 18 -gu a-tluk -v
Enter Guest Password :
Re-Enter Guest Password :
Checking vSCSI filter
VM name: 18
scsi0:1.Cache Mode = write_vector
scsi1:0.Cache Mode = hyper_cache
scsi1:1.Cache Mode = hyper_cache
scsi0:0.Cache Mode = hyper_cache

vSCSI filter status: OK

Checking Write Vector status
VM name: 18
Pagefile and temp folder are redirected

Write Vectoring status: OK

All OK
fio3prd:~ #

image

If you would like to traverse through all of the desktops rather than doing them independently, the command also accepts wildcards as demonstrated in the following command:

fio3prd:~ # iovdi guest -dr -np VDInamingConvention-* -gu a-tluk -v

AD FS and DirSync services fail to start after server restart

$
0
0

Problem

You’ve successfully installed AD FS and DirSync on their respective Windows Server 2012 R2 servers and have confirmed that both are working as expected. However, you also realize that the services on the AD FS and DirSync servers no fail to start as soon as you restart the server:

DirSync

Service Name: FIMSynchronizationService
Display Name: Forefront Identity Manager Synchronization Service
Service Account: .\AAD_d5b89680b957

Service Name: MSOnlineSyncScheduler
Display Name: Windows Azure Active Directory Sync Service
Service Account: .\AAD_d5b89680b957

image

AD FS

Service Name: Adfssrv
Display Name: Active Directory Federation Services
Service Account: <nonGeneric>

image

Windows could not start the Active Directory Federation Services service on the Local Computer.

Error 1069: The service did not start due to a logon failure.

image

Solution

While there could be various reasons why this issue may occur, one of them is if you have a GPO configured in your domain that specifies what accounts are allowed to have Log on as service rights.  In the environment I worked in, there was such a policy so when I launched the Local Computer Policy editor with gpedit.msc:

image

… I can see that the options to edit the Log on as a service configuration greyed out:

image

The reason why the AD FS and DirSync worked initially is because the install manually granted these service accounts the rights but a restart of the server removed them.

Troubleshooting this issue didn’t actually take me too much time but I can see that it could have if I missed this so I hope this will safe some time for anyone who may encounter the same issue.

Moving O365 (Office 365) archive mailbox to on-prem Exchange server

$
0
0

I’ve recently been involved with an Office 365 archiving pilot project to demonstrate the user experience and performance for a client to see if it met their requirements and noticed that while it was quite easy to move the archive mailbox from the on-prem Exchange database to O365, there did not seem to be a way to move the mailbox back to the on-prem Exchange. After failing to find instructions through search, I ended up calling Microsoft O365 support for assistance and what ended up being the solution was to use PowerShell. As I’m sure there will be others who find themselves in the same situation as I did, I thought it would be good to write this blog post to demonstrate the steps.

To move the mailbox from O365 to your on-prem Exchange, execute the following New-MoveRequest cmdlet replacing the unique parameters:

$cred = get-credential // Enter your On Premise Admin credential

New-MoverRquest -identity user@domain.com -remotehostname mail.domain.com -archiveonly -archivedomain “domain.com” -Outbound -remotearchivetargetdatabase “db1” -remotecredential $cred

Note the following parameters that need to be changed for your environment:

user@domain.com– replace with the user’s email address
mail.domain.com– your migration endpoint configured in Office 365
domain.com– your SMTP domain
db1– the name of the on-prem archive database that this user’s archive will be moved to

image

Note that the above immediately begins the move and as with all move requests done on an on-prem Exchange, this move would fail if it encounters any corrupted items. Skipping corrupted items is the same as a regular on-prem Exchange move and to specify a threshold for corrupted items, use the parameter -BadItemLimit # where # is the amount of corrupted item threshold you would like to set.

Get-MoveRequest on its own or with the | FL parameter can be used to review the status of the mailbox move:

image

The Exchange Management Console and navigating to Office 365 > Recipient Configuration > Move Request can also be used for reviewing the status of the archive mailbox migration as such:

image

image

Continue to wait until the move is completed and you should be able to see that the on-prem Exchange archive database is specified as the user’s Archive database:

image

image

The on-prem Exchange Management Shell can also be used to confirm that the user’s archive mailbox database is now on-prem by executing:

Get-Mailbox -identity user@domain.com –archive | FL

image

Note that the ArchiveDatabase is listed as blank when the user’s archive mailbox is still on O365:

image

After the move, you should see that the field is now populated with the on-prem Exchange archive database:

image

Hope this will help anyone looking for off boarding an Office 365 Online Archive mailbox back onto their on-prem Exchange.

------------------------------------------------------------------------------------------------------------------------------------------------------------------

An additional note I’d like to make is if you would like to list all the archive mailboxes active on Office 365, execute the following cmdlet:

Get-MailUser | Where-Object {$_.ArchiveStatus -match "Active"} | fl DisplayName,*archive*

image

Installing KB 3080353 on Lync Server 2013 causes users to not be able to log in with Lync Mobility clients

$
0
0

Problem

You’ve recently installed Lync Server 2013 updates, and more specifically the Lync Server 2013, Web Components Server (KB3080353) onto your Lync Server then immediately noticed that users with iPhones or Androids are no longer able to log in with their Lync clients via the Lync Mobility service.

You’ve confirmed that login traffic from Lync Mobility clients are indeed hitting the IIS server when you review the IIS logs:

image

2015-10-22 12:23:44 10.21.1.106 GET / sipuri=sip:a-tluk@contoso.com 4443 - 216.249.42.188 ACOMO - 200 0 0 78

2015-10-22 12:23:44 10.21.1.106 GET /Autodiscover/AutodiscoverService.svc/root/user originalDomain=contoso.com 4443 - 216.249.42.188 ACOMO - 401 0 0 0

2015-10-22 12:23:44 10.21.1.106 GET /Autodiscover/AutodiscoverService.svc/root/user originalDomain=contoso.com 4443 - 216.249.42.188 ACOMO - 401 0 0 15

2015-10-22 12:23:44 10.21.1.106 GET /Autodiscover/AutodiscoverService.svc/root/user originalDomain=contoso.com 4443 - 216.249.42.188 ACOMO - 401 0 0 15

2015-10-22 12:23:44 10.21.1.106 POST /WebTicket/WebTicketService.svc/mex - 4443 - 216.249.42.188 ACOMO - 500 0 0 93

2015-10-22 12:23:44 10.21.1.106 GET / sipuri=sip:a-tluk@contoso.com 4443 - 216.249.42.188 ACOMO - 200 0 0 15

2015-10-22 12:23:44 10.21.1.106 POST /WebTicket/WebTicketService.svc/mex - 4443 - 216.249.42.188 ACOMO - 500 0 0 15

image

Reviewing the Application logs show the following event consistently logged:

Log Name: Application

Source: System.ServiceModel 4.0.0.0

Event ID: 3

Level: Error

User: NETWORK SERVICE

image

WebHost failed to process a request.

Sender Information: System.ServiceModel.ServiceHostingEnvironment+HostingManager/35236192

Exception: System.ServiceModel.ServiceActivationException: The service '/WebTicket/WebTicketService.svc' cannot be activated due to an exception during compilation. The exception message is: Method not found: 'Microsoft.Rtc.Management.Config.Settings.Web.MobilePreferredAuthType Microsoft.Rtc.Management.Config.Settings.Web.WebServiceSettings.get_MobilePreferredAuthType()'.. ---> System.MissingMethodException: Method not found: 'Microsoft.Rtc.Management.Config.Settings.Web.MobilePreferredAuthType Microsoft.Rtc.Management.Config.Settings.Web.WebServiceSettings.get_MobilePreferredAuthType()'.

at Microsoft.Rtc.Internal.WebTicketService.WebTicketServiceHostFactory.CreateServiceHost(Type serviceType, Uri[] baseAddresses)

at System.ServiceModel.Activation.ServiceHostFactory.CreateServiceHost(String constructorString, Uri[] baseAddresses)

at System.ServiceModel.ServiceHostingEnvironment.HostingManager.CreateService(String normalizedVirtualPath, EventTraceActivity eventTraceActivity)

at System.ServiceModel.ServiceHostingEnvironment.HostingManager.ActivateService(ServiceActivationInfo serviceActivationInfo, EventTraceActivity eventTraceActivity)

at System.ServiceModel.ServiceHostingEnvironment.HostingManager.EnsureServiceAvailable(String normalizedVirtualPath, EventTraceActivity eventTraceActivity)

--- End of inner exception stack trace ---

at System.ServiceModel.ServiceHostingEnvironment.HostingManager.EnsureServiceAvailable(String normalizedVirtualPath, EventTraceActivity eventTraceActivity)

at System.ServiceModel.ServiceHostingEnvironment.EnsureServiceAvailableFast(String relativeVirtualPath, EventTraceActivity eventTraceActivity)

Process Name: w3wp

Process ID: 2768

image

Solution

I’ve noticed that this known issue from installing KB 3080353 is commonly overlooked as described in the following Microsoft article:

https://support.microsoft.com/en-us/kb/3080353#/en-us/kb/3080353

image

Clicking on the link to KB 3098577:

https://support.microsoft.com/en-us/kb/3098577#/en-us/kb/3098577

… will bring you to a KB that suggests either to uninstall KB 3080353 to bring the service up or uninstall KB 3080353, reinstall the July 2015 Lync Server 2013 cumulative updates, then reinstall KB 3080353.  The latter would be the better route to take as it ensures all the security patches are installed.

image

Before I uninstall KB 3080353, I’d like to paste the version of the Lync components on the server experiencing this problem just as a reference:

imageimage

imageimage

Proceed with locating KB 3080353 and uninstall the update:

imageimage

You’ll notice that Lync Mobility works again after executing iisreset immediately after the uninstall of the patch:

image

Proceed to download the July 2013 Cumulative updates (KB 2809243) here:

http://www.microsoft.com/en-us/download/details.aspx?id=36820

Then download KB 3080353 here:

http://www.microsoft.com/en-us/download/details.aspx?id=48875

Reinstall the patch:

image

Lync Mobility should now work properly.  The following is a screenshot of the Lync Server 2013 component versions after performing the operations above:

image

Unable to power on virtual machines on ESXi host with the error: "Invalid or unsupported virtual machine configuration."

$
0
0

Problem

You’ve noticed that the Recent Tasks in your vCenter’s task list is displaying the following error when attempting to perform a Power On virtual machine task:

Invalid or unsupported virtual machine configuration.

image

Reviewing the detail of the task displays the following Task Details:

Name: Power On virtual machine

Status: Invalid or unsupported virtual machine configuration.

Error Stack:

An error was received from the ESX host while powering on VM <vmName>.

Transport (VMDB) error -45: Failed to connect to peer process.

Failed to power on’/vmfs/volumes/<GUID>/<vmName>/<vmName>.vmx’.

image

image

The problem appears to be host specific because you are able to power on the virtual machine if you move it to a different host.

Establishing an SSH session to the host and reviewing the logs show the following message constantly logged:

Cannot create file /tmp/.SwapInfoSysSwap.lock.LOCK for process hostd-worker because the inode table of its ramdisk (tmp) is full.

image

Solution

The environment where I encountered this issue was running HP ProLiant BL660c Gen8 blades which the VMware support engineer told me apparently had a bug that constantly wrote logs to the /tmp/vmware-root folder that eventually filled up the partition. To verify this, navigate to the /tmp/vmware-root folder and use the ls command to list the contents:

image

Note the amount of vmware-vmx-xxxxxxx.log files in the directory in the screenshot above. To correct the issue, either move the files out of the directory to an external storage device or simply delete them. In this example, I will use the rm vmware-vmx-xxx* command to delete the files. The reason why I am required to narrow down the file to a 3 digit + wildcard is because there are simply too many files in the directory to use vmware-vmx-* (if you try using that, you will get a Argument list too long message).

The problem should go away once the files are removed.


Performing an in-place upgrade of Lync Server 2013 to Skype for Business 2015

$
0
0

This blog post is probably a bit late to write as I haven’t really had the time to blog a much this year due to my work schedule but I’ve vowed to slowly work my way through the queue I have of all the blog posts I never got to over the past two years.

The steps performed for this in-place upgrade can be found at the following TechNet article:

Upgrade to Skype for Business Server 2015
https://technet.microsoft.com/en-us/library/dn951371.aspx

Prerequisites

Before you begin, ensure that you have the prepared the following:

  1. Update your Lync Server 2013 servers with the latest Cumulative Updates found here: https://support.microsoft.com/en-us/kb/2809243 (CU5 or later)
  2. Ensure that PowerShell version 6.2.9200.0 or later is installed onto the Lync Server 2013 server
  3. Update your SQL Server 2012 instance locally on the Lync Server 2013 server front-end and Edge servers to SP1 or SP2 (SP2 for SQL 2012 Express version can be found here: https://www.microsoft.com/en-gb/download/details.aspx?id=43351)  Note that a patched SQL Server 2012 with SP2 should have the following version numbers:              image
  4. Update your back-end SQL Server 2012 instance to SP1 or SP2 if you are running the Enterprise edition (SP2 for SQL 2012 full edition can be found here: https://www.microsoft.com/en-us/download/details.aspx?id=43340)
  5. Patch your Lync server with the latest updates
  6. Ensure that KB2533623 is installed if your Lync server is on a Windows Server 2008 R2 server
  7. Ensure that Kb2858668 is installed if your Lync server is on a Windows Server 2012 server
  8. Ensure that KB2982006 is installed if your Lync server is on a Windows Server 2012 R2 server
  9. Ensure that there is at least 32GB of free space on you Lync Server 2013 front-end and Edge servers
  10. Ensure that there is at least 18GB free on your SQL 2012 back-end server if you are running Enterprise edition of Lync Server 2013
  11. Allocate a server that does not have the Lync core components installed so you can install the new Skype for Business 2015 components
  12. If you have allocated a Windows Server 2008 R2 server for step #4, ensure that you download and install PowerShell 3.0 and .NET 4.5

Step #1 –  Update legacy Lync Server 2013 topology to Skype for Business 2015

Log onto the server you’ve allocated to install the Skype for Business Server 2015 components on and run the setup.exe executable from the Skype for Business Server 2015 installation binaries:

image

image

Proceed through the wizard to install the core components:

image

image

image

image

image

Once the Deployment Wizard is presented, click on Install Administrative Tools to install the tools onto the server:

image

Proceed through the wizard:

image

image

image

image

With the Administrative Tools installed, launch the Topology Builder and download the current Lync Server 2013 topology:

image

Once the topology has downloaded and saved, navigate to your pool:

image

Right click on the pool and select Upgrade to Skype for Business Server 2015…:

image

Answer yes to the Are you sure you want to upgrade the selected pool to Skype for Business Server 2015 prompt:

image

Note that answering Yes to the prompt will cause the existing pool to no longer exist under the Lync Server 2013 tree:

image

Proceed by navigating down to the Skype for Business Server 2015 folder and then the appropriate Standard or Enterprise pool to verify that the legacy pool has been moved:

image

Continue by publishing the topology:

image

image

image

image

image

image

image

With the topology published, give the topology time to replicate or force AD replication via the domain controllers.

Step #2 – Upgrade Lync Server 2013 front-end servers

Log onto your legacy Lync Server 2013 server and execute the following cmdlets inLync Server Management Shell to disable and stop the Lync Server 2013 services:

Disable-CsComputer -Scorch

Stop-CsWindowsService

image

With the services disabled, proceed and launch setup.exe from the Skype for Business Server 2015 installation binaries:

image

Proceed through the wizard and start the install:

image

image

image

Note the following 2 items:

  1. This process takes quite a bit of time as my Enterprise pool single server took over an hour
  2. You may be prompted to run extra installations that would be hidden behind the Skype for Business Server 2015 window so don’t just walk away from the install:

imageimage

imageimage

imageimage

imageimage

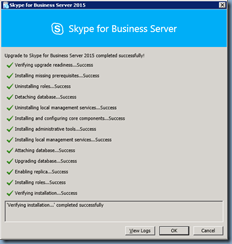
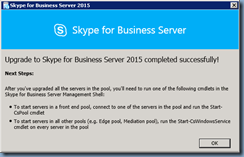
Clicking OK to the wizard once the upgrade has completed will present the following prompt:

image

Close any Lync Server Management Shell, open Skype for Business Server Management Shell and execute Start-CsPool:

image

Note how the services may throw a Failed to get status data error message and this is normal if the front-end service is taking a bit of time to start as shown in the screenshot above.

Allowing the cmdlet to continue will eventually completed successfully:

image

Launching the Control Panel and navigating to the Topology will show that your front-end server has been upgraded:

image

Step #3 – Upgrade Lync Server 2013 Edge servers

Once all of the front-end servers have been upgraded, proceed and log launch the Topology Builder, navigate to the Edge pool or single server, right click and selection Upgrade to Skype for Business Server 2015…:

image

Confirm when prompted:

image

As with the front-end server, the Edge server or pool node will be moved to the Skype for Business Server 2015 folder:

image

Proceed and publish the topology:

image

image

With the topology successfully published, log onto the Edge server and execute the cmdlet:

Stop-CsWindowsService

image

Launch setup.exe from the Skype for Business Server 2015 installation binaries to start the installation wizard:

image

Proceed through the wizard to start the upgrade:

image

image

image

image

  imageimage

Clicking OK to the wizard once the upgrade has completed will present the following prompt:

  image

Close any Lync Server Management Shell, open Skype for Business Server Management Shell and execute Start-CsWindowsService to start the Edge services then use the Services Console to verify that the services have been started:

image

The Edge services should now be operational.

Launching the Control Panel and navigating to the Topology will show that your Edge server has been upgraded:

image

Installing and performing initial configuration of VMware App Volumes Manager

$
0
0

I’ve been fortunate enough to have a few clients interested in adopting VMware’s new App Volumes earlier this year and while I’ve had numerous issues with Microsoft Office or related applications, I’ve found it extremely for most other applications that have no dependency on Microsoft Office.  I know I’m a bit late in writing this post as the screenshots have been sitting in my Outlook for almost a year but better late than never, right?

Prerequisites

  1. Begin by allocating a server to deploy VMware App Volumes Manager on.  The server I’ll be using in this example will be Windows Server 2012 R2.
  2. Launch Server Manager and install .NET Framework 3.5 Features:image
  3. If a remote SQL database server is going to be used, create an empty database named svmanager_production (or a different name if desired) and a SQL authentication account granting it dbcreator and db_owner rights to the svmanager_production database.
  4. Create a service account in Active Directory with read-only access (regular domain user is fine).
  5. Assign the service account created in step #4 to vCenter and assign the following permissions:
  • Datastore
    • Allocate space
    • Browse datastore
    • Low level file operations
    • Remove file
    • Update virtual machine files
  • Folder
    • Create folder
    • Delete folder
  • Global
    • Cancel task
  • Host
    • Local operations
      • Create virtual machine
      • Delete virtual machine
      • Reconfigure virtual machine
  • Resource
    • Assign virtual machine to resource pool
  • Sessions
    • View and stop sessions
  • Tasks
    • Create task
  • Virtual machine
    • Configuration
      • Add existing disk
      • Add new disk
      • Add or remove device
      • Change resource
      • Remove disk
      • Settings
    • Interaction
      • Power Off
      • Power On
      • Suspend
    • Inventory
      • Create from exising
      • Create new
      • Move
      • Register
      • Remove
      • Unregister
    • Provisioning
      • Clone template
      • Clone virtual machine
      • Create template from virtual machine
      • Customize
      • Deploy template
      • Mark as template
      • Mark as virtual machine
      • Modify customization specification
      • Promote disks
      • Read customization specifications

App Volumes Manager Installation

Download the VMware App Volume ISO, extract it to a directory then run setup.exe:

clip_image002

Proceed through the installation wizard:

clip_image002[4]

clip_image002[6]

Select Install App Volume Manager:

clip_image002[8]

clip_image002[10]

clip_image002[12]

Select either Install local SQL Server Express Database or Connect to an existing SQL Server Database:

clip_image002[14]

For the purpose of this example, I will be using a remote database server:

clip_image002[16]

Type in the remote SQL server’s name and database instance, the account that was created and svmanager_production as the Name of database catalog to use or create then check the option to Overwrite existing database (if any) checkbox:

image

clip_image002[18]

clip_image002[20]

clip_image002[22]

clip_image002[24]

clip_image002[26]clip_image002[28]

clip_image002[30]clip_image002[32]

Once the installation has completed, proceed and launch the App Volumes Manager portal to begin the initial configuration:

clip_image002[34]

clip_image002[36]

In the Active Directory window fill in the following:

Active Directory Domain Name: Enter the FQDN of your AD domain
Domain Controller Host Name: <leave blank>
LDAP Base: <leave blank if you would like the whole domain to be used or fill in the DN of a specific OU>
Username: Enter the service account created
Password: Enter the password for the service account
Use LDAPS: <enable if LDAPS is enabled on the DCs>
Allow non-domain entities: <enable if non-domain users and computers are going to be used>

image

Select a group that you would like to assign administrative privileges to the App Volumes Manager:

image

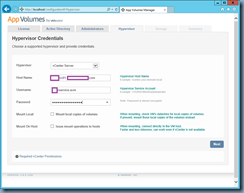
Fill in the required details for the vCenter in your environment:

image

Select a storage location to store the App Volumes:

image

Confirm the Storage Settings:

image

Select a host in your cluster and enter root credentials to upload prepackaged volumes:

imageimage

Confirm the upload:

imageimage

Confirm the summary settings:

image

The initial configuration is now setup and you can proceed installing the App Volumes agent onto a desktop or server to provision new AppStacks:

clip_image002[1]

Creating an AppStack with VMware App Volumes

$
0
0

This post serves as a continuation of my previous post:

Installing and performing initial configuration of VMware App Volumes Manager http://terenceluk.blogspot.com/2015/11/installing-and-performing-initial.html

… to demonstrate how to create an AppStack once you have VMware App Volumes deployed in your environment.

Prerequisites

  1. In order to create an AppStack, you’ll need a virtual machine to mount an empty AppStack to capture the application that is being installed.  With this in mind, you can either use a plain vanilla Windows install with no applications installed on it to avoid conflicts or, which I have found to be the better option, use the master image that you’ll be mounting the AppStacks on.  The reason why the latter appears to work better is because if you had Microsoft Office installed on your master image, it’s better to the master image to deploy an AppStack with Visio.  Not doing so caused all sorts of problems for me when attempting to mount a Visio AppStack to the master image. 
  2. You will need to deploy the App Volumes agent on the virtual machine that you will be using to create an AppStack.  If you are using your master image then this would not be a problem because it would need the agent to have AppStacks mounted onto it.

Step #1 – Install the App Volumes agent onto the virtual machine used to create the AppStack

Begin by logging onto the virtual machine that you will be using to create a new AppStack and launch the VMware App Volumes installer:

clip_image002

Proceed through the wizard:

clip_image002[4]

Select Install App Volumes Agent:

clip_image002[6]

clip_image002[8]

Type in either the IP address or FQDN of the App Volumes Manager server:

clip_image002[10]

Complete the installation:

clip_image002[12]

clip_image002[14]

clip_image002[16]

clip_image002[18]

clip_image002[22]

Restart the virtual machine:

clip_image002[20]

Step #2 – Create the new AppStack

Log onto the VMware App Volumes Manager administration console, click on Volumes and then AppStacks, then click on Create AppStack:

clip_image002[24]

Fill in the appropriate fields as such:

image

Selecting Perform in the background will allow you to continue through the creation immediately while selecting Wait for completion would keep you on the screen until the empty AppStack is created:

image

image

A summary of the empty AppStack that is ready to be provisioned will be displayed:

image

Proceeding to click on the Provision option will bring you to the following screen that allows you to search for the virtual machine to mount the AppStack and deploy the new application:

image

Hitting the search button with nothing filled out in the Find Provision Computer text box will list all the virtual machines with the agent installed that the App Volumes Manager can detect:

image

Select the virtual machine prepared in step 1 and click on Provision:

image

Confirm the provisioning:

image

image

Note the new AppStack created:

image

Reviewing the settings of the virtual machine selected will show that a new hard disk has been mounted to it and this is the hard disk where the new application files will be redirected:

image

Step #3 – Install the application

Proceed and log onto the virtual machine with the empty AppStack mounted and you will see the following message displayed:

App Volumes

You are now in provisioning mode.

Click OK only after you have completely installed all applications you wish to provision to this AppStack.

clip_image002[30]

Proceed to install the application and once completed, click on the OK button in the prompt:

clip_image002[32]

The following message will be displayed:

Installation complete? System will reboot

Click YES to finish and reboot computer.

Or Click No to continue provisioning.

clip_image002[34]

Proceed by clicking on the Yes button then OK:

clip_image002[36]

The following message will be displayed once you have logged in after the restart:

Provisioning successful (exit code 0)

Click OK, then return to the App Volumes Manager to assign the AppStack.

clip_image002[38]

Note that the settings of the virtual machine should show that the hard disk 2 has been removed:

image

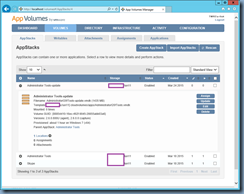
Navigating back to the App Volumes Manager will show that the AppStack is now ready to be assigned:

image

Proceed with clicking on the Assign button then searching for the user or group you want to assign the AppStack to:

clip_image002[40]

image

image

What’s also worth noting is that you can also limit which computer this AppStack can get attached to regardless of whether it is assigned to the user or group specified:

image

Select the desired option:

image

The AppStack is now assigned:

image

If the AppStack is assigned immediately, you should be able to see a new hard disk attached to the virtual machine that the assigned user is logged on:

image

Logging onto the virtual machine should also show that the application is available:

clip_image002[42]

Updating an AppStack in VMware App Volumes

$
0
0

This post serves as a continuation of my previous post:

Creating and AppStack with VMware App Volumes
http://terenceluk.blogspot.com/2015/11/creating-and-appstack-with-vmware-app.html

… mainly to demonstrate the process of updating an AppStack that has already been created.

Step #1 – Select the AppStack that needs to be updated

Begin by logging into the App Volumes Manager, navigate to Volumes, AppStacks, expand the AppStack that you would like to update and click on the Update button:

image

Provide a new name for the AppStack and select (or use the default) storage configuration:

image

Confirm the prompt for updating the AppStack:

imageclip_image002[4]

Upon completion, you would now notice a new AppStack created in addition to the one that you are trying to update.  What the wizard basically did was duplicate the existing AppStack to create one for you to modify hence why you had to use a new and unique name.  Proceed by clicking on the Provision button:

image

Select the virtual machine that you’ll be using to mount this AppStack on and then update the associated application:

clip_image002[6]

image

Confirm the provisioning:

imageimage

You will now be brought back to AppStack summary basically displaying the same information that would be presented if you were creating a new one:

image

Step #2 – Update the application

Proceed to logging onto the virtual machine that you are using for the provisioning process and install the update to the application:

clip_image002[8]clip_image002[10]

The following message will be displayed:

Installation complete? System will reboot

Click YES to finish and reboot computer.

Or Click No to continue provisioning.

clip_image002[12]

Proceed by clicking on the Yes button then OK:

clip_image002[14]clip_image002[16]

The following message will be displayed once you have logged in after the restart:

Provisioning successful (exit code 0)
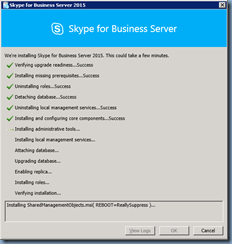
Click OK, then return to the App Volumes Manager to assign the AppStack.

clip_image002[18]

Navigating back to the App Volumes Manager will show that the AppStack is now ready to be assigned:

image

Unable to connect to SQL server instance with SQL Server Management Studio with administrator account even though domain admins group is assigned with sysadmin permissions

$
0
0

Problem

You’re logged directly into a SQL Server 2012 server with an account that belongs to the domain admins group, launch SQL Server Management Studio and attempt to use Windows Authentication to connect to a database instance but notice that you receive the following error:

image

Cannot connect to <SQLserverName>\<DatabaseInstance>.

Additional information:

Login failed for user ‘<domainName>\<userName>’. (Microsoft SQL Server, Error: 18456)

image

You’ve confirmed that the Domain Admins group is assigned to the Security > Logins folder and assigned sysadmin permissions:

image

You noticed that you do not have this problem if you directly add the account you’re logged in as to the logins folder.

Solution

One of the reasons why this issue occurs is if the SQL server exhibiting this behavior has UAC turned on.  If this is the case, the problem will go away if SQL Server Management Studio as ran as an administrator.

Viewing all 836 articles
Browse latest View live


<script src="https://jsc.adskeeper.com/r/s/rssing.com.1596347.js" async> </script>